CAUTION / NOTICE / HINT
-
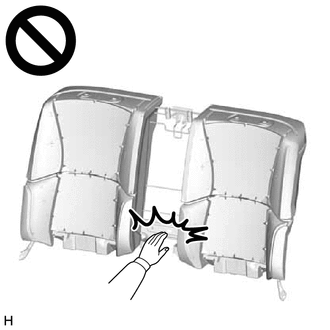
Wear protective gloves. Sharp areas on the parts may injure your hands.
-
There is risk of injury.
PROCEDURE
- Click here
INSTALL SEAT COVER WIRE
- Click here
INSTALL SEPARATE TYPE REAR SEATBACK COVER LH
Tip:When installing a separate type rear seatback cover LH, refer to Precaution in order to prevent wrinkles from forming.
-
Set the separate type rear seatback cover LH.
-
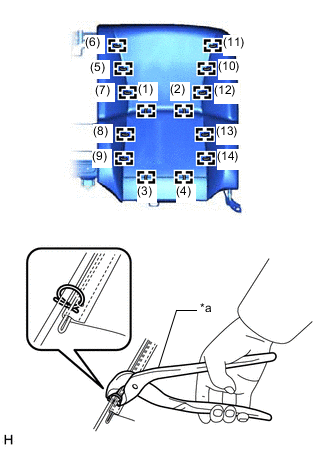
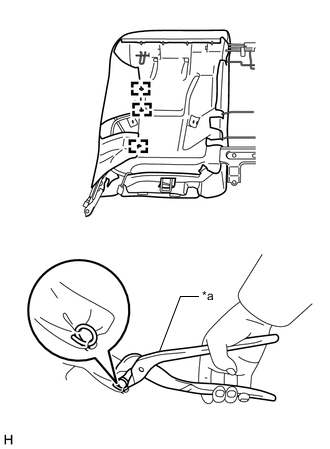
*a Hog Ring Pliers Using hog ring pliers, install the separate type rear seatback cover LH to the bench type rear seatback pad with 14 new hog rings in the order indicated in the illustration.
Note:
-
Be careful not to damage the separate type rear seatback cover LH.
-
Be sure to securely install the hog rings as shown in the illustration while preventing wrinkles from forming on the separate type rear seatback cover LH.
-
-
Through the hole of the separate type rear seatback pad to the back side.
-
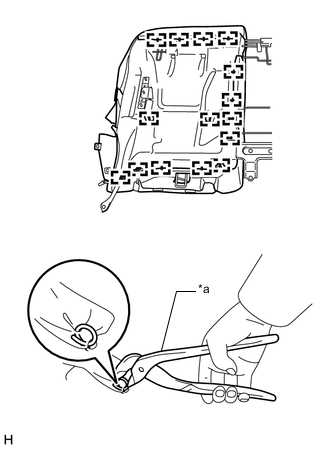
*a Hog Ring Pliers Using hog ring pliers, install the separate type rear seatback cover LH to the bench type rear seatback pad with 15 new hog rings.
Note:
-
Be careful not to damage the separate type rear seatback cover LH.
-
Be sure to tighten the hog rings securely as shown in the illustration.
-
-
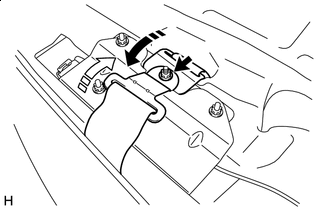

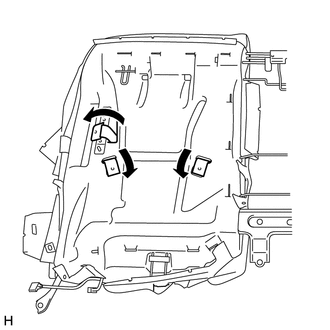
Install in this Direction (1) 
Install in this Direction (2) Install the strap in the installation direction (1) shown in the illustration.
-
Install the strap in the installation direction (2) shown in the illustration.
-
Install a new nut.
5.5 N*m 56 kgf*cm 49 in.*lbf -
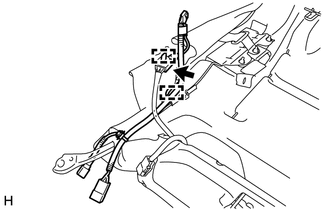
Attach the wire harness clamp.
-
Connect the connector and install the rear seat wire LH.
-
Attach the clamp and install the seat heater control sub-assembly LH.
-
Connect the connector.
-
Attach the wire harness clamp.
-
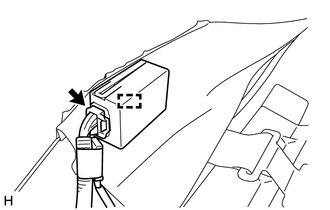
*a Hog Ring Pliers Using hog ring pliers, install 3 new hog rings.
-
- Click here
INSTALL SEPARATE TYPE REAR SEATBACK COVER RH
Tip:Use the same procedure described for the LH side.
- Click here
INSTALL REAR CENTER SEAT ARMREST ASSEMBLY
- Click here
INSTALL REAR SEAT HEADREST SUPPORT
- Click here
INSTALL REAR CENTER SEAT HEADREST ASSEMBLY
- Click here
INSTALL REAR SEAT HEADREST ASSEMBLY
- Click here
INSTALL REAR SEATBACK HOLDER
- Click here
INSTALL REAR SEAT CUSHION LOCK HOOK
- Click here
INSTALL REAR SEATBACK ASSEMBLY
- Click here
INSTALL NO. 1 SEAT ARMREST CAP
- Click here
INSTALL REAR SEAT CUSHION ASSEMBLY
- Click here
CONNECT CABLE TO NEGATIVE AUXILIARY BATTERY TERMINAL
Note:When disconnecting the cable, some systems need to be initialized after the cable is reconnected.
- Click here
INSTALL LUGGAGE COMPARTMENT MAT SUB-ASSEMBLY
- Click here
PERFORM DIAGNOSTIC SYSTEM CHECK
- Click here
CHECK SRS WARNING LIGHT
- Click here
INSPECT SEAT HEATER SYSTEM