OUTER REAR VIEW MIRROR REMOVAL
CAUTION / NOTICE / HINT
The necessary procedures (adjustment, calibration, initialization or registration) that must be performed after parts are removed, installed or replaced during the outer rear view mirror assembly with cover removal/installation are shown below.
| Replacement Part or Procedure | Necessary Procedures | Effects / Inoperative when not Performed | Link |
|---|---|---|---|
|
Side television camera view adjustment | Panoramic view monitor system |
Tech Tips
-
Use the same procedure for RHD and LHD vehicles.
-
The procedure listed below is for LHD vehicles.
-
Use the same procedure for the RH and LH sides.
-
The procedure listed below is for the LH side.
-
Fully open the front door glass sub-assembly.
PROCEDURE
-
REMOVE FRONT DOOR TRIM UPPER COVER LH
-
REMOVE FRONT DOOR ARMREST COVER LH
-
REMOVE FRONT DOOR NO. 2 ARMREST COVER LH
-
REMOVE FRONT DOOR TRIM BOARD SUB-ASSEMBLY LH
-
REMOVE OUTER MIRROR INSTALL HOLE COVER LH
-
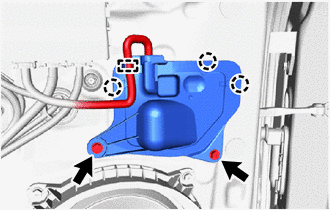
Detach the clamp.
-
Remove the 2 screws.
-
Detach the claw and remove the outer mirror install hole cover LH.
-
-
REMOVE FRONT MULTIPLEX NETWORK DOOR ECU LH
-
REMOVE OUTER REAR VIEW MIRROR ASSEMBLY LH
-
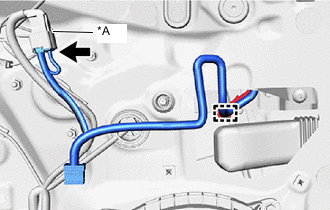
*A w/ Panoramic View Monitor System Detach the clamp.
-
w/ Panoramic View Monitor System:
-
Disconnect the connector.
-
-
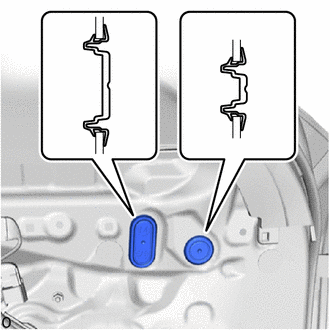
Remove the 2 hole plugs.
-
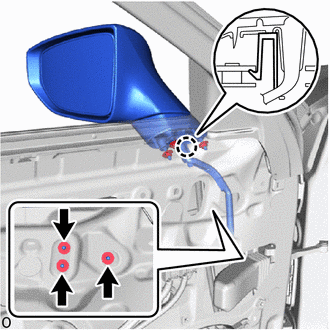
Remove the 3 nuts.
Note
Hold the outer rear view mirror assembly LH with one hand so that it does not drop.
-
Detach the claw and remove the outer rear view mirror assembly LH.
-