CAUTION / NOTICE / HINT
The necessary procedures (adjustment, calibration, initialization, or registration) that must be performed after parts are removed, installed, or replaced during the luggage compartment door weatherstrip removal/installation are shown below.
| Replacement Part | Necessary Procedure | Effect/Inoperative Function When Necessary Procedures are not Performed | Link |
|---|---|---|---|
| Rear bumper assembly (Including removal and installation) |
|
Parking support brake system | |
| When the luggage compartment door is opened using a mechanical key | Initialize luggage closer motor assembly | The power trunk lid does not operate |
PROCEDURE
- Click here
REMOVE REAR BUMPER COVER
- Click here
REMOVE BACK WINDOW LOWER OUTSIDE MOULDING
-

Protective Tape Apply protective tape around the back window lower outside moulding as shown in the illustration.
-
Using a moulding remover B, detach the clip.
-


Remove in this Direction Using a thin-bladed screwdriver, detach the claw as shown in the illustration.
-
With the claw detached, lift the back window lower outside moulding toward the top of the vehicle, and then remove the back window lower outside moulding.
Note:If the claw is damaged, replace the No. 1 windshield outside moulding clip with a new one.
Tip:Detach the claws individually and do not use excessive force.
-
- Click here
REMOVE NO. 1 WINDSHIELD OUTSIDE MOULDING CLIP
Tip:Perform the following procedure when replacing the No. 1 windshield outside moulding clip.
-
Remove in this Direction - - Detach the claw and remove the 5 No. 1 windshield outside moulding clips as shown in the illustration.
-
- Click here
REMOVE NO. 3 WINDSHIELD OUTSIDE MOULDING CLIP
Tip:Perform the following procedure when replacing the No. 3 windshield outside moulding clip.
-
Set a 4.0 mm diameter drill bit into an air drill.
-
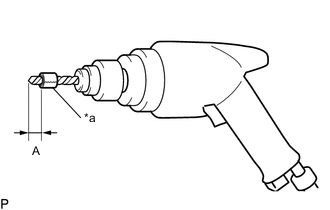
*a Wind Vinyl Tape Wind vinyl tape around the 4.0 mm diameter drill bit 5.0 mm from the tip of the drill.
Standard Value Area Standard Value A 5.0 mm (0.197 in.) Tip:Wind vinyl tape around the drill bit to prevent drilling too deep.
-
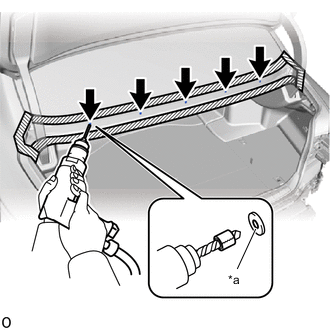
*a Flanges Lightly press the air drill against the No. 3 windshield outside moulding clip, drill off the flanges of the No. 3 windshield outside moulding clip and remove the 5 No. 3 windshield outside moulding clips.
CAUTION:Be careful of the drilled No. 3 windshield outside moulding clip, as it is hot.
Note:
-
Protect the vehicle and be careful, as shards of the drilled No. 3 windshield outside moulding clip may scatter.
-
Pressing the air drill excessively will cause the No. 3 windshield outside moulding clip to turn and result in the No. 3 windshield outside moulding clip not being drilled.
-
Do not pry the No. 3 windshield outside moulding clip with the air drill. This may cause damage to the installation holes of the No. 3 windshield outside moulding clip or the drill bit.
-
-
- Click here
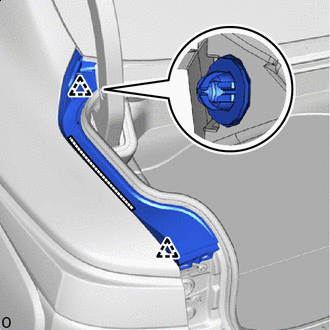
REMOVE LUGGAGE COMPARTMENT DOOR COVER LH
Tip:When removing the luggage compartment door cover LH, heat the vehicle body and luggage compartment door cover LH using a heat light.
Standard Item Temperature Vehicle Body 40 to 60°C (104 to 140°F) Luggage Compartment Door Cover LH 20 to 30°C (68 to 86°F) CAUTION: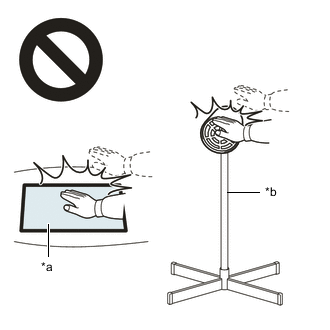
*a Heated Part *b Heat Light
-
Do not touch the heat light and heated parts.
-
Touching the heat light may result in burns.
-
Touching heated parts for a long time may result in burns.
-
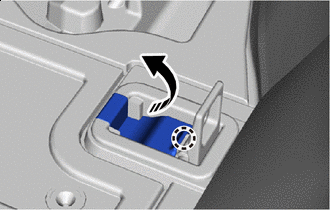
Double-sided Tape Using a clip remover, detach the clip.
-
Remove the double-sided tape and luggage compartment door cover LH.
-
- Click here
REMOVE LUGGAGE COMPARTMENT DOOR COVER RH
Tip:Use the same procedure for the RH and LH sides.
- Click here
REMOVE LUGGAGE COMPARTMENT FLOOR MAT
- Click here
REMOVE LUGGAGE COMPARTMENT TRIM COVER LH
- Click here
REMOVE LUGGAGE COMPARTMENT TRIM COVER RH
- Click here
REMOVE ROPE HOOK ASSEMBLY
-
Open Detach the claw and open the cap.
-
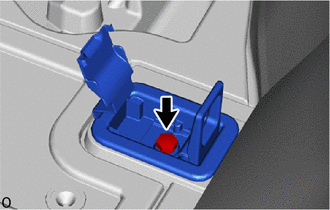
Remove the bolt and rope hook assembly.
Tip:Use the same procedure for the RH and LH sides.
-
- Click here
REMOVE REAR FLOOR FINISH PLATE
-
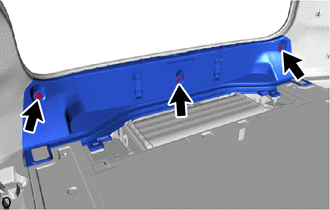
Using a clip remover, remove the 3 clips.
-
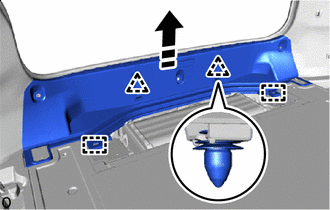
Remove in this Direction Detach the clip and guide and remove the rear floor finish plate.
-
- Click here
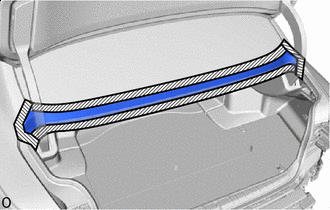
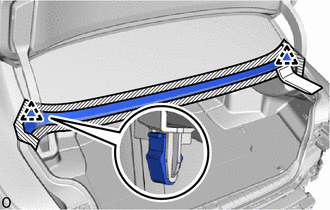
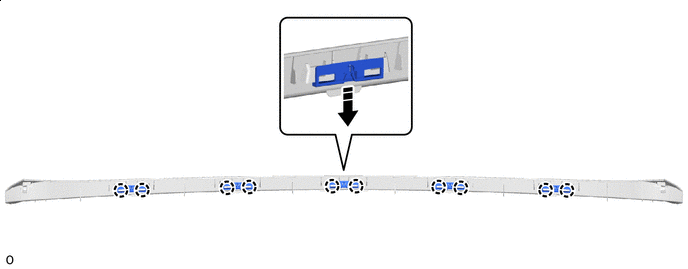
REMOVE LUGGAGE COMPARTMENT DOOR WEATHERSTRIP
-
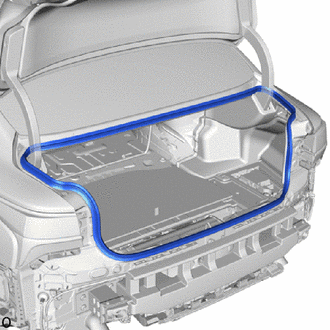
While avoiding the luggage compartment door, remove the luggage compartment door weatherstrip.
Note:When removing, make sure that non-drying sealer does not adhere to the body and luggage compartment door.
-