LUGGAGE DOOR HINGE TORSION BAR REMOVAL

CAUTION / NOTICE / HINT
The necessary procedures (adjustment, calibration, initialization, or registration) that must be performed after parts are removed and installed, or replaced during luggage door hinge torsion bar removal/installation are shown below.
| Replacement Part | Necessary Procedure | Effect/Inoperative Function When Necessary Procedures are not Performed | Link |
|---|---|---|---|
| When the luggage compartment door is opened using a mechanical key | Initialize luggage closer motor assembly | The power trunk lid does not operate |
Note
-
When the torsion bar is removed, the tension in the torsion bar disappears and the luggage compartment door closes with strong force. Therefore, hold the luggage compartment door when opening or closing the luggage compartment door.
-
Because the torsion bar at the RH side is on the top and the torsion bar at the LH side is on the bottom, install from RH → LH and remove from LH → RH.
PROCEDURE
-
REMOVE LUGGAGE COMPARTMENT DOOR ASSIST GRIP
-
REMOVE SWITCH BEZEL
-
REMOVE NO. 2 LUGGAGE COMPARTMENT LIGHT ASSEMBLY
-
REMOVE LUGGAGE COMPARTMENT DOOR COVER
-
REMOVE LUGGAGE COMPARTMENT FLOOR MAT
-
REMOVE LUGGAGE COMPARTMENT MAT SUB-ASSEMBLY
-
REMOVE LUGGAGE COMPARTMENT TRIM COVER LH
-
REMOVE LUGGAGE COMPARTMENT TRIM COVER RH
-
REMOVE TOOL BOX
-
REMOVE INNER LOWER LUGGAGE COMPARTMENT TRIM COVER
-
REMOVE FRONT LUGGAGE COMPARTMENT TRIM COVER (w/o Rear Air Conditioning System)
-
REMOVE FRONT LUGGAGE COMPARTMENT TRIM COVER (w/ Rear Air Conditioning System)
Tech Tips
Use the same procedure described for the front luggage compartment trim cover (w/o Rear Air Conditioning System).
-
REMOVE NO. 1 LUGGAGE COMPARTMENT LIGHT ASSEMBLY
-
REMOVE REAR LUGGAGE COMPARTMENT TRIM COVER
-
REMOVE LUGGAGE COMPARTMENT DOOR HINGE COVER LH
-
REMOVE LUGGAGE COMPARTMENT DOOR HINGE COVER RH
Tech Tips
Use the same procedure for the RH and LH sides.
-
REMOVE LUGGAGE DOOR HINGE TORSION BAR LH
-
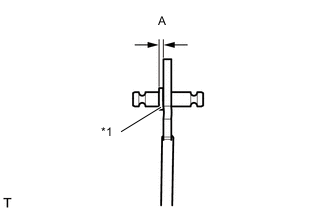
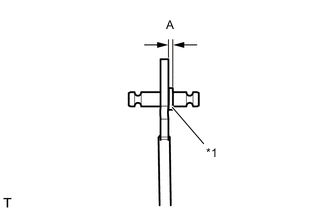
*1 Washer (90201-10008) Install the washer (90201-10008) to SST (luggage compartment door torsion bar tool) as shown in the illustration.
- SST
- 09804-24010
OK Area Specified Condition A 4.5 mm (0.177 in.) -
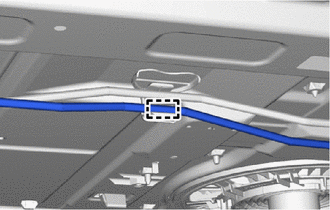
Detach the clamp and remove the luggage door hinge torsion bar LH from the luggage compartment door torsion bar support.
-
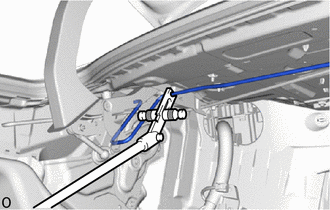
Using SST (luggage compartment door torsion bar tool), remove the luggage door hinge torsion bar LH from the luggage compartment door hinge assembly LH as shown in the illustration.
-
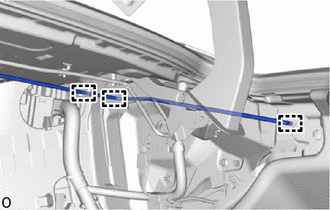
Detach each connection and remove the luggage door hinge torsion bar LH.
-
-
REMOVE LUGGAGE DOOR HINGE TORSION BAR RH
-
*1 Washer (90201-10008) Install the washer (90201-10008) to SST (luggage compartment door torsion bar tool) as shown in the illustration.
- SST
- 09804-24010
OK Area Specified Condition A 4.5 mm (0.177 in.) -
Detach the clamp and remove the luggage door hinge torsion bar RH from the luggage compartment door torsion bar support.
-
Using SST (luggage compartment door torsion bar tool), remove the luggage door hinge torsion bar RH from the luggage compartment door hinge assembly RH as shown in the illustration.
-
Detach each connection and remove the luggage door hinge torsion bar RH.
-