PROCEDURE
- Click here
INSTALL LUGGAGE COMPARTMENT DOOR WEATHERSTRIP
-
Using non-residue solvent, remove any non-drying sealer on the body.
-
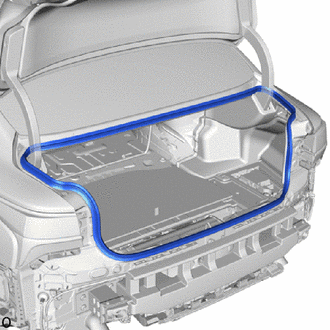
While avoiding the luggage compartment door, temporarily install a new luggage compartment door weatherstrip.
Note:When installing, make sure that non-drying sealer does not adhere to the body and luggage compartment door.
-
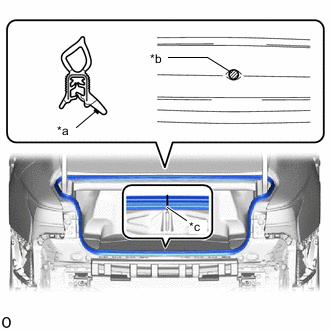
*a Paint Mark *b Mark Position *c Center Mark Align the paint mark on the luggage compartment door weatherstrip with the center identification mark on the body and install the luggage compartment door weatherstrip.
Note:
-
Always align the paint mark when installing the part. If the paint mark position is out of place, water leaks may occur.
-
After installing, check that the corners are properly installed.
Tip:To easily install the weatherstrip, first install the area with the paint mark and then push toward the corners.
-
-
- Click here
INSTALL REAR FLOOR FINISH PLATE
-
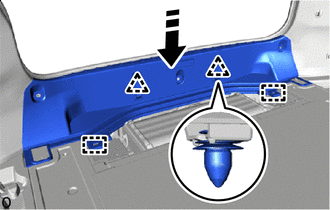

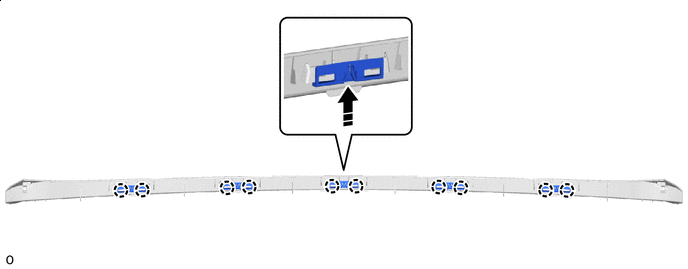
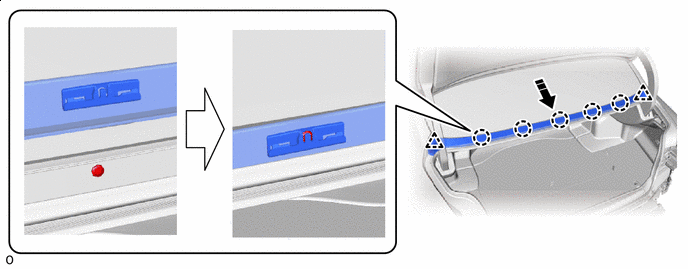
Install in this Direction Insert the guide and attach the clip in the direction indicated by the arrow shown in the illustration.
-
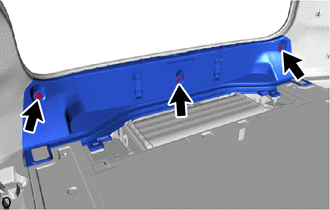
Install the rear floor finish plate with the 3 clips.
-
- Click here
INSTALL ROPE HOOK ASSEMBLY
-
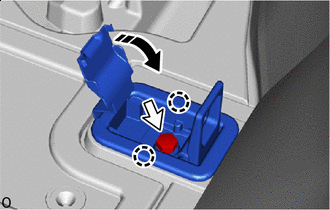
Close Install the rope hook assembly with the bolt.
6.5 N*m 66 kgf*cm 58 in.*lbf -
Attach the claw and close the cap.
-
- Click here
INSTALL LUGGAGE COMPARTMENT TRIM COVER LH
- Click here
INSTALL LUGGAGE COMPARTMENT TRIM COVER RH
- Click here
INSTALL LUGGAGE COMPARTMENT FLOOR MAT
- Click here
INSTALL LUGGAGE COMPARTMENT DOOR COVER LH
Tip:When installing the luggage compartment door cover LH, heat the vehicle body and luggage compartment door cover LH using a heat light.
Item Temperature Vehicle Body 40 to 60°C (104 to 140°F) Luggage Compartment Door Cover LH 20 to 30°C (68 to 86°F) CAUTION: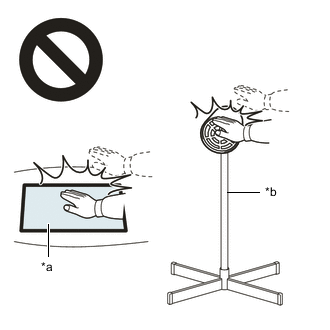
*a Heated Part *b Heat Light
-
Do not touch the heat light and heated parts.
-
Touching the heat light may result in burns.
-
Touching heated parts for a long time may result in burns.
-
Install a new luggage compartment door cover LH.
-
Using a heat light, heat a new luggage compartment door cover LH and the vehicle body surface.
-
Remove the peeling paper from the face of the luggage compartment door cover LH.
Tip:After removing the peeling paper, keep the exposed adhesive free from foreign matter.
-
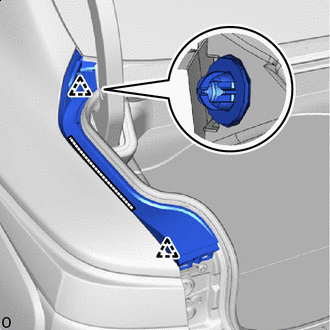

Double-sided Tape Attach the clip and install the luggage compartment door cover LH as shown in the illustration.
Note:Press the double-sided tape on the luggage compartment door cover LH firmly to apply it.
-
-
- Click here
INSTALL LUGGAGE COMPARTMENT DOOR COVER RH
Tip:Use the same procedure for the RH and LH sides.
- Click here
INSTALL NO. 3 WINDSHIELD OUTSIDE MOULDING CLIP
Tip:Perform the following procedure when replacing the No. 3 windshield outside moulding clip.
-
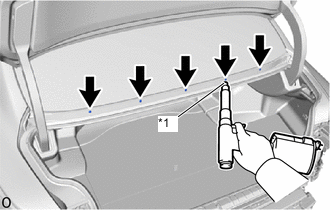
*1 nose piece Using a riveter with a nose piece, install 5 new No. 3 windshield outside moulding clips.
Tip:Pull the trigger again to cut off the No. 3 windshield outside moulding clip if the No. 3 windshield outside moulding clip does not cut off.
Note:
-
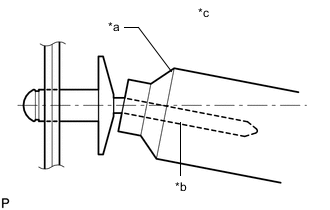
*a Riveter *b Mandrel *c Incorrect Do not pry the rivet with the riveter, as this will cause damage to the riveter and mandrel.
-
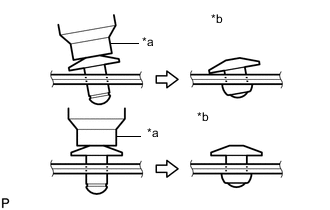
*a Riveter *b Incorrect Confirm that the rivets are seated properly against the moulding.
-
Do not tilt the riveter when installing the rivet to the moulding.
-
Do not leave any space between the rivet head and moulding.
-

*a Riveter *b Incorrect Do not leave any space between the moulding and door frame. Firmly hold the 2 items together while installing the rivet.
-
-
- Click here
INSTALL NO. 1 WINDSHIELD OUTSIDE MOULDING CLIP
Tip:Perform the following procedure when replacing the No. 1 windshield outside moulding clip.
-
Install in this Direction - - Attach the claw and install the 5 No. 1 windshield outside moulding clips as shown in the illustration.
-
- Click here
INSTALL BACK WINDOW LOWER OUTSIDE MOULDING
-
Install in this Direction - - Attach the claw and install the back window lower outside moulding.
-
- Click here
INSTALL REAR BUMPER COVER
- Click here
INITIALIZE POWER TRUNK LID CONTROL SYSTEM
- Click here
PERFORM CALIBRATION