PROCEDURE
- Click here
INSTALL SERVICE PLUG GRIP
CAUTION:Wear insulated gloves.
Note:Before installing the service plug grip, check that no parts or tools remain and that the high voltage terminals and connectors are connected securely.
-
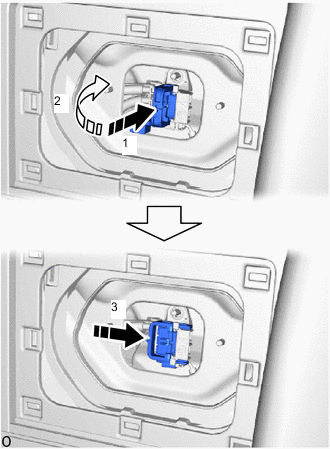
While wearing insulated gloves, and temporarily install the service plug grip as indicated by the arrow (1) shown in the illustration.
-
Rotate the handle of the service plug grip 90° toward the HV battery and slide it in the direction indicated by the arrow (3) shown in the illustration until a click sound is heard to install the service plug grip.
-
- Click here
INSTALL NO. 8 HV BATTERY SHIELD PANEL
-
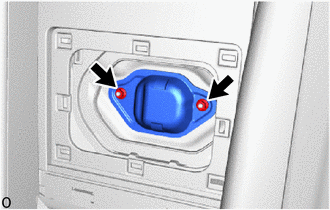
Install the No. 8 HV battery shield panel with the 2 nuts.
7.5 N*m 76 kgf*cm 66 in.*lbf
-
- Click here
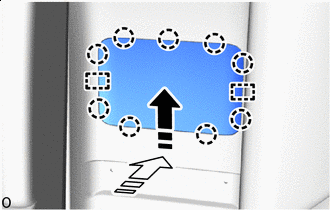
INSTALL NO. 1 ROOM PARTITION COVER (for Power Seat)
-
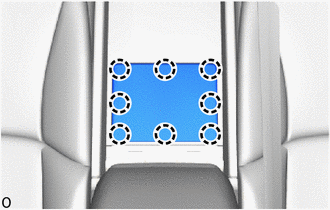
Attach the 8 claws to install the No. 1 room partition cover.
-
- Click here
CONNECT DOOR ARMREST CAP (for Fixed Seat Type)
-
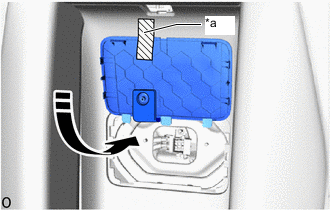
*a Adhesive Tape 
Install in this Direction Remove the adhesive tape and move the door armrest cap in the direction indicated by the arrow shown in the illustration.
-
Install in this Direction (1) 
Install in this Direction (2) Press in the direction indicated by the arrow shown in the illustration to attach the 9 claws and 2 guides and connect the door armrest cap.
-
- Click here
CONNECT CABLE TO NEGATIVE AUXILIARY BATTERY TERMINAL
Note:When disconnecting the cable, some systems need to be initialized after the cable is reconnected.
- Click here
INSTALL LUGGAGE COMPARTMENT MAT SUB-ASSEMBLY