CONTROL VALVE ASSEMBLY(for Rear Side) INSTALLATION

CAUTION / NOTICE / HINT
Tech Tips
Before installing, check the identification marks made when removing the parts to prevent improper installation during reinstallation.
PROCEDURE
-
INSTALL NO. 2 HEIGHT CONTROL VALVE SUB-ASSEMBLY
-
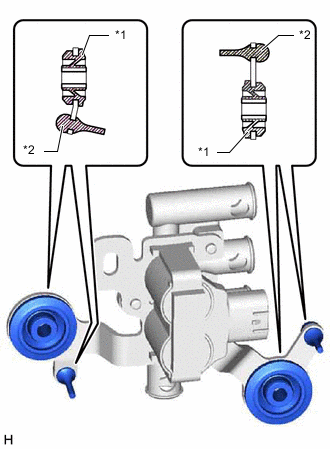
*1 No. 1 Height Control Valve Bush *2 No. 2 Height Control Valve Cushion Install the 2 No. 1 height control valve bushes and No. 2 height control valve cushions to the No. 2 height control valve sub-assembly.
-
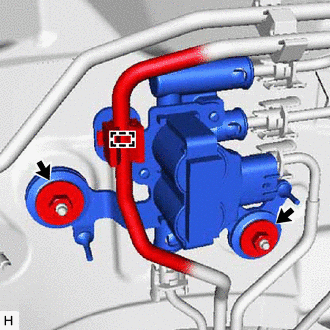
Install the No. 2 height control valve sub-assembly with the 2 nuts.
- Torque:
- 5.4 N*m { 55 kgf*cm, 48 in.*lbf }
-
Attach the clamp.
-
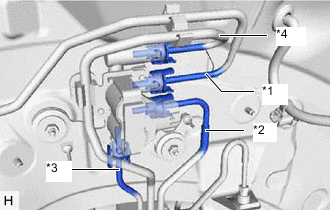
*1 No. 6 Height Control Tube *2 No. 7 Height Control Tube *3 No. 8 Height Control Tube *4 No. 9 Height Control Tube Connect the No. 6 height control tube.
Note
Replace the O-ring, plate and No. 2 connector with new ones.
-
Connect the No. 7 height control tube.
Note
Replace the O-ring, plate and No. 2 connector with new ones.
-
Connect the No. 8 height control tube.
Note
Replace the O-ring, plate and No. 2 connector with new ones.
-
Connect the No. 9 height control tube.
Note
Replace the O-ring, plate and No. 2 connector with new ones.
-
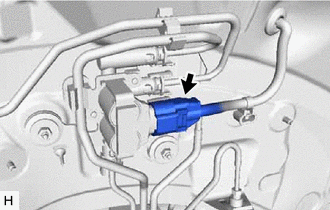
Connect the connector.
-
-
AIR MOVEMENT
-
CHECK CONNECTIONS OF TUBES FOR AIR LEAKAGE
-
Install the rear wheel RH.
-
Check the connections of the tubes for air leakage.
-
Remove the rear wheel RH.
-
-
INSTALL REAR WHEEL HOUSE LINER RH
-
Install the rear wheel house liner RH with the 4 screws, 2 clips, 11 nuts and grommet.
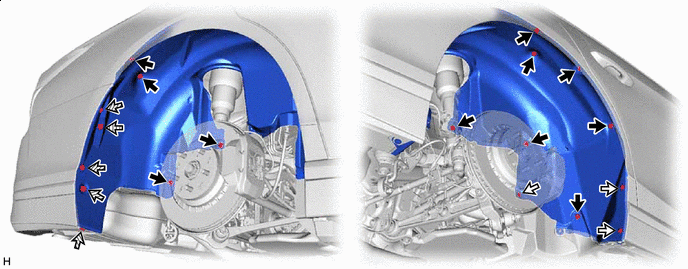

Nut 
Screw 
clip 
Grommet
-
-
INSTALL ROCKER PANEL MOULDING PROTECTOR RH
-
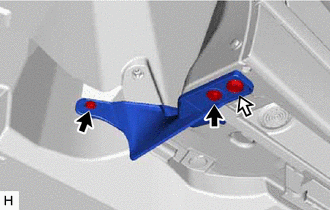
Install the rocker panel moulding protector RH with the 2 screws and clip.
-
-
INSTALL REAR WHEEL RH
-
CHECK VEHICLE HEIGHT
Note
If the height control sensor link is removed, check the vehicle height.
-
Change the height control switch from the "NORM" position to the "HIGH" position and back to the "NORM" position again.
-
Measure the vehicle height.
-
-
ADJUST VEHICLE HEIGHT
Note
If the height control sensor has been replaced, be sure to adjust the vehicle height.
-
CHECK HEIGHT CHANGE OPERATION