PROCEDURE
- Click here
INSTALL TRANSFER ASSEMBLY
-
Clean and degrease the transfer assembly and hybrid vehicle transmission installation bolt holes.
-
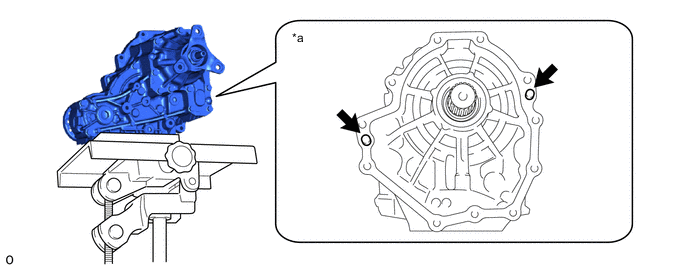
*a for Hybrid Vehicle Transmission Side - - Set the lift attachment and transmission jack to the transfer assembly and align and install the knock pins on the hybrid vehicle transmission and transfer assembly to the knock pin holes.
Note:
-
Be careful not to damage the transfer front case oil seal.
-
Be careful not to drop the transfer assembly.
-
Be sure to perform this procedure with several people as the transfer assembly is very heavy.
-
Make sure there are no oil leaks.
-
-
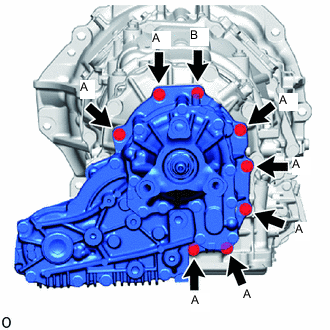
Temporarily install the transfer assembly to the hybrid vehicle transmission assembly with 8 new bolts.
-
Tighten the 7 bolts marked A.
22.5 N*m 229 kgf*cm 17 ft.*lbf -
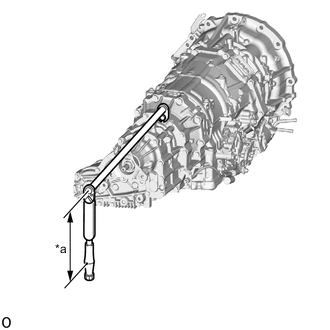
*a Torque Wrench Fulcrum Length Using a union nut wrench, tighten the bolt marked B.
Torque Specified tightening torque 22.5 N*m (229 kgf*cm, 17 ft.*lbf) Tip:
-
Calculate the torque wrench reading when changing the fulcrum length of the torque wrench.
-
When using a union nut wrench (fulcrum length of 20 mm (0.787 in.)) + torque wrench (fulcrum length of 180 mm (7.087 in.)): 25.3 N*m (258 kgf*cm, 19 ft.*lbf)
-
-
Remove the transmission jack from the rear of the hybrid vehicle transmission assembly.
CAUTION:Check that the transfer is securely supported by the transmission jack.
-

Install the transfer assembly with 3 new bolts.
22.5 N*m 229 kgf*cm 17 ft.*lbf
-
- Click here
INSTALL REAR ENGINE MOUNTING INSULATOR
- Click here
INSTALL FRONT PROPELLER SHAFT ASSEMBLY
- Click here
INSTALL PROPELLER WITH CENTER BEARING SHAFT ASSEMBLY
- Click here
INSTALL NO. 2 ENGINE UNDER COVER ASSEMBLY
- Click here
INSTALL TRANSMISSION UNDER COVER
- Click here
ADD TRANSFER OIL
- Click here
INSPECT TRANSFER OIL LEAK