OUTER REAR VIEW MIRROR REMOVAL
CAUTION / NOTICE / HINT
Tech Tips
-
Use the same procedure for the RH and LH sides.
-
The procedure listed below is for the LH side.
-
Fully close the front door glass sub-assembly.
PROCEDURE
-
REMOVE FRONT DOOR TRIM COVER SUB-ASSEMBLY LH (for Driver Side)
-
REMOVE FRONT DOOR TRIM BOARD SUB-ASSEMBLY LH (for Driver Side)
-
REMOVE FRONT DOOR ASSIST GRIP ASSEMBLY RH (for Front Passenger Side)
-
REMOVE FRONT DOOR TRIM BOARD SUB-ASSEMBLY RH (for Front Passenger Side)
-
REMOVE NO. 1 SPEAKER ASSEMBLY WITH BOX
-
REMOVE OUTER REAR VIEW MIRROR ASSEMBLY LH
-
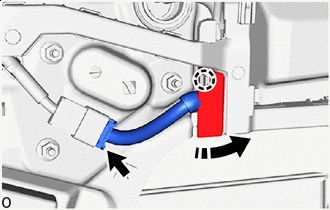

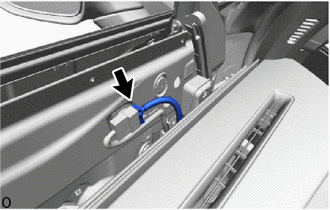
Open Detach the claw and open the wire harness protector.
-
Disconnect the connector.
-
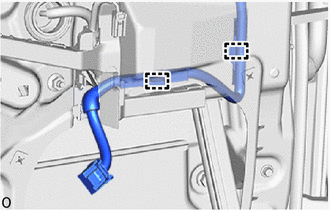
Detach the clamp.
-
Open the front door glass sub-assembly LH fully open position.
-
Connect the No. 2 front door wire LH connector.
-

Temporarily Set in this Direction Insert the upper portion of the front door trim board sub-assembly LH into the front door panel to temporarily set it.
-
Turn the power switch on (IG).
-
Operate the multiplex network master switch assembly and set the front door glass sub-assembly LH to the fully open position.
-
Turn the power switch off.
-
Disconnect the No. 2 front door wire LH connector.
-

Remove in this Direction Remove the front door trim board sub-assembly LH.
-
-
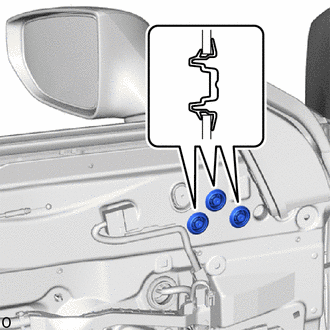
Remove the 3 hole plugs.
-

Remove the 3 nuts.
Note
Hold the outer rear view mirror assembly with one hand so that it does not drop.
-
Detach the claw and remove the outer rear view mirror assembly LH.
-