ABSORBER CONTROL ACTUATOR(for Rear Side) REMOVAL
PROCEDURE
-
PRECAUTION
Note
After turning the power switch off, waiting time may be required before disconnecting the cable from the negative (-) auxiliary battery terminal. Therefore, make sure to read the disconnecting the cable from the negative (-) auxiliary battery terminal notices before proceeding with work.
-
REMOVE BATTERY SERVICE HOLE COVER LH
-
DISCONNECT CABLE FROM NEGATIVE AUXILIARY BATTERY TERMINAL
Note
When disconnecting the cable from the negative (-) auxiliary battery terminal, some systems need to be initialized after the cable is reconnected.
-
REMOVE NO. 1 LUGGAGE COMPARTMENT TRIM COVER
-
REMOVE LUGGAGE COMPARTMENT TRIM BOX
-
REMOVE REAR LUGGAGE COMPARTMENT TRIM COVER
-
REMOVE FRONT LUGGAGE COMPARTMENT TRIM COVER
-
REMOVE NO. 1 LUGGAGE COMPARTMENT LIGHT ASSEMBLY
-
REMOVE FRONT UPPER LUGGAGE COMPARTMENT TRIM COVER
-
SEPARATE LUGGAGE COMPARTMENT TRIM COVER LH (for LH Side)
-
Disengage the 4 claws and open the 2 covers.
-
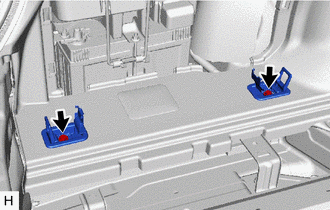
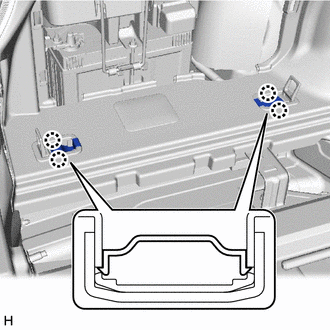
Remove the 2 bolts and 2 rope hook assemblies.
-

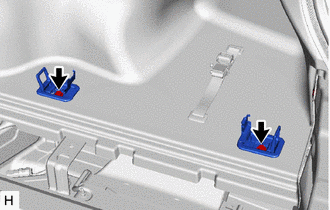
Remove the 4 clips.
-
Disengage the claw.
-
Separate the luggage compartment trim cover LH from the vehicle body.
-
-
SEPARATE LUGGAGE COMPARTMENT TRIM COVER RH (for RH Side)
-

Disengage the 4 claws and open the 2 covers.
-
Remove the 2 bolts and 2 rope hook assemblies.
-
Remove the 4 clips.
-
Disengage the claw.
-
Separate the luggage compartment trim cover RH from the vehicle body.
-
-
REMOVE ABSORBER CONTROL ACTUATOR
Tech Tips
-
Use the same procedure for the RH side and LH side.
-
The following procedure is for the LH side.
-
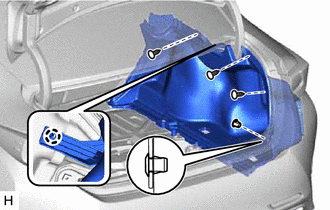
Turn back the luggage compartment trim cover until the absorber control actuator can be seen.
-
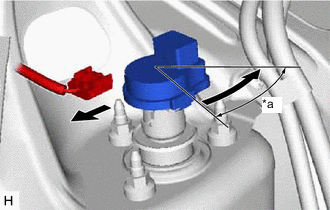
*a 40° Disconnect the connector.
-
Turn the absorber control actuator 40° counterclockwise to remove it from the rear actuator support bracket.
Note
-
Do not turn the absorber control actuator more than 40°.
-
Do not drop the absorber control actuator. If it is dropped, replace it with a new one.
-
-