NOISE FILTER(w/ Rear No. 2 Seat) INSTALLATION
PROCEDURE
-
INSTALL RADIO SETTING CONDENSER
-
Engage the claw to install a new terminal cover to the wire harness.
Note
-
Make sure to hold the crimping side of the terminal when installing the wire harness to the terminal cover.
-
Make sure not to bend the exposed wire when installing the wire harness to the terminal cover.
-
Do not use excessive force when inserting the wire harness into the terminal cover.
-
If the terminal cover has been deformed during installation, replace the terminal and terminal cover with new ones.
-
-
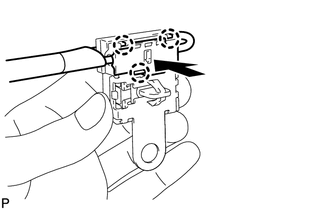
Engage the 3 claws to install the new terminal cover with wire harness to a new condenser.
Note
-
Do not use excessive force when inserting the terminal cover into the condenser.
-
If the terminal cover has been deformed during installation, replace the terminal, terminal cover and condenser with new ones.
-
-
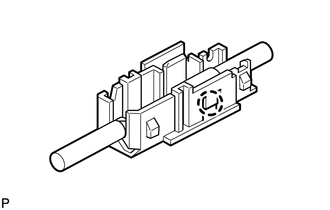
Engage the clamp to temporarily install a new radio setting condenser with wire harness.
-
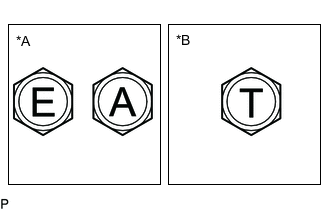
*A for Type A *B for Type B Install the new radio setting condenser with the bolt.
- Torque:
- for Type A
- 7.5 N*m { 76 kgf*cm, 66 in.*lbf }
- for Type B
- 10 N*m { 102 kgf*cm, 7 ft.*lbf }
Note
There are three types of bolts and the tightening torque depends on the type of bolt used as shown in the illustration. Therefore, confirm the tightening torque before installing the bolt.
-
-
INSTALL DECK TRIM SIDE PANEL ASSEMBLY LH
-
INSTALL COOLER (NO. 2 ROOM TEMP. SENSOR) THERMISTOR
-
INSTALL NO. 2 AIR CONDITIONING CONTROL ASSEMBLY
-
INSTALL NO. 1 LUGGAGE COMPARTMENT LIGHT ASSEMBLY
-
INSTALL ROPE HOOK ASSEMBLY
-
INSTALL NO. 1 LUGGAGE COMPARTMENT TRIM HOOK
-
INSTALL REAR SEAT SIDE GARNISH LH
-
INSTALL FRONT DECK SIDE TRIM COVER LH
-
INSTALL REAR SEAT OUTER TRACK BRACKET COVER LH
-
INSTALL REAR DOOR INSIDE SCUFF PLATE LH
-
INSTALL REAR DOOR SCUFF PLATE LH
-
INSTALL REAR NO. 2 SEAT ASSEMBLY