PARKING BRAKE CABLE REMOVAL
CAUTION / NOTICE / HINT
Tech Tips
-
The following procedure is for the No. 1 parking brake cable assembly and No. 3 parking brake cable assembly.
-
Use the same procedure for the No. 3 parking brake cable assembly and No. 2 parking brake cable assembly.
PROCEDURE
-
REMOVE PARKING BRAKE PEDAL SUB-ASSEMBLY (for LHD)
-
REMOVE PARKING BRAKE PEDAL SUB-ASSEMBLY (for RHD)
-
REMOVE NO. 1 PARKING BRAKE CABLE ASSEMBLY (for LHD)
-
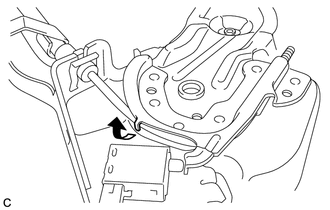
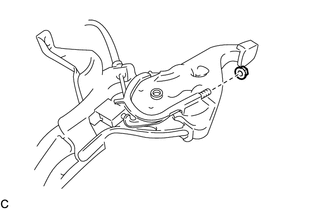
Pull up the parking brake pedal claw.
Note
Do not damage the No. 1 parking brake cable assembly.
-
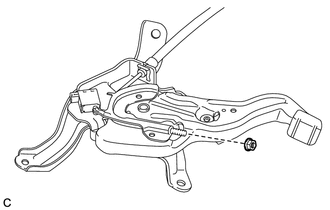
Remove the adjusting nut.
-
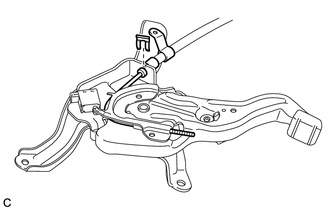
Remove the clip from the No. 1 parking brake cable assembly.
-
Remove the No. 1 parking brake cable assembly from the parking brake pedal assembly.
-
-
REMOVE NO. 1 PARKING BRAKE CABLE ASSEMBLY (for RHD)
-
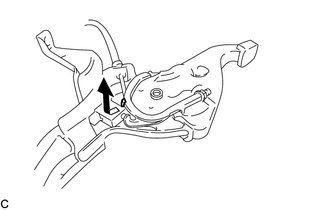
Pull up the parking brake pedal claw.
Note
Do not damage the No. 1 parking brake cable assembly.
-
Remove the adjusting nut.
-

Remove the clip from the No. 1 parking brake cable assembly.
-
Remove the No. 1 parking brake cable assembly from the parking brake pedal assembly.
-
-
REMOVE REAR DOOR SCUFF PLATE LH
-
REMOVE CENTER PILLAR LOWER GARNISH LH
-
REMOVE FRONT DOOR SCUFF PLATE RH
Tech Tips
Use the same procedure as for the LH side Click here.
-
REMOVE COWL SIDE TRIM BOARD RH
Tech Tips
Use the same procedure as for the LH side Click here.
-
REMOVE REAR DOOR SCUFF PLATE RH
-
REMOVE CENTER PILLAR LOWER GARNISH RH
-
REMOVE FRONT SEAT ASSEMBLY LH
-
REMOVE FRONT SEAT ASSEMBLY RH
Tech Tips
Use the same procedure as for the LH side.
-
REMOVE AUDIO AMPLIFIER COVER
-
REMOVE STEREO COMPONENT AMPLIFIER ASSEMBLY WITH BRACKET
-
REMOVE AUDIO AMPLIFIER COVER (w/ Telematics Transceiver)
-
INSTALL TELEMATICS TRANSCEIVER (w/ Telematics Transceiver except G-BOOK)
-
REMOVE TELEMATICS TRANSCEIVER WITH MAYDAY BATTERY (w/ Telematics Transceiver for G-BOOK)
-
REMOVE FLOOR CARPET HOOK
-
REMOVE FRONT FLOOR CAUTION PLATE COVER
-
REMOVE NO. 2 CONSOLE BOX MOUNTING BRACKET
-
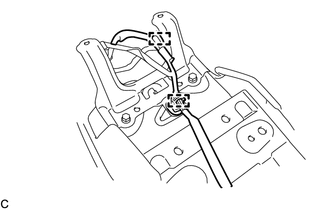
Disengage the 2 clamps and separate the wire harness from the No. 2 console box mounting bracket.
-

Remove the 2 bolts and No. 2 console box mounting bracket.
-
-
REMOVE NO. 4 CROSS MEMBER FLOOR REINFORCEMENT SUB-ASSEMBLY
-
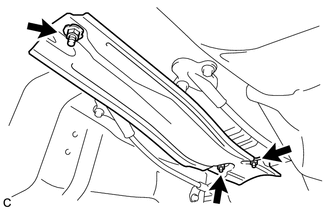
Turn back the floor carpet to a position where the No. 4 cross member floor reinforcement sub-assembly can be removed.
-
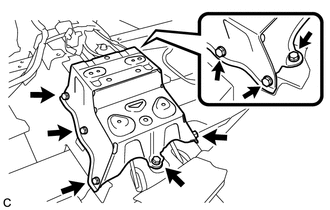
Remove the 8 bolts and No. 4 cross member floor reinforcement sub-assembly.
-
-
REMOVE NO. 4 PARKING BRAKE CABLE ASSEMBLY
-
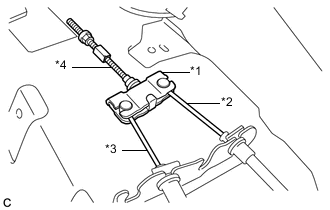
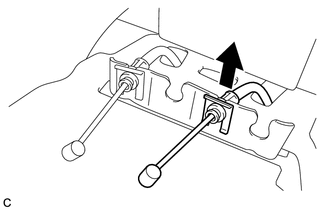
Text in Illustration *1 Parking Brake Equalizer *2 No. 2 Parking Brake Cable Assembly *3 No. 3 Parking Brake Cable Assembly *4 No. 4 Parking Brake Cable Assembly Separate the No. 3 parking brake cable assembly from the parking brake equalizer.
-
Separate the No. 2 parking brake cable assembly to remove the parking brake equalizer.
-
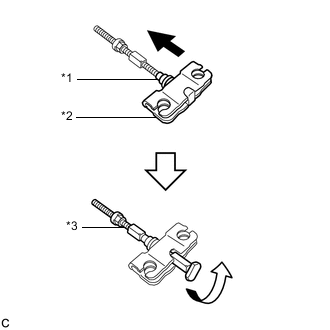
Text in Illustration *1 Rubber Boot *2 Parking Brake Equalizer *3 No. 4 Parking Brake Cable Assembly Slide the parking brake equalizer and rubber boot.
-
Remove the No. 4 parking brake cable assembly from the parking brake equalizer.
-
-
REMOVE FRONT EXHAUST PIPE ASSEMBLY (for 2AR-FE)
-
REMOVE FRONT EXHAUST PIPE ASSEMBLY (TWC: Rear Catalyst) (for 6AR-FSE)
-
REMOVE FRONT NO. 2 FLOOR HEAT INSULATOR (for 2AR-FE, 6AR-FSE)
-
Remove the 3 nuts and front No. 2 floor heat insulator.
-
-
REMOVE PARKING BRAKE SHOE LEVER
-
REMOVE NO. 2 FLOOR UNDER COVER (for LH Side)
-
REMOVE NO. 1 FLOOR UNDER COVER (for RH Side)
-
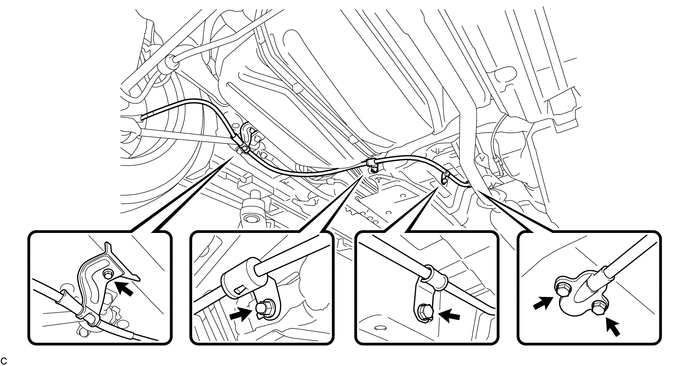
REMOVE NO. 3 PARKING BRAKE CABLE ASSEMBLY
-
Remove the clip from the No. 3 parking brake cable assembly.
-
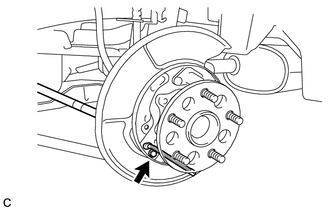
Remove the bolt and separate the No. 3 parking brake cable assembly.
-
Remove the 4 bolts, nut and No. 3 parking brake cable assembly.
-
-
REMOVE NO. 2 PARKING BRAKE CABLE CLAMP
-
Remove the No. 2 parking brake cable clamp.
-