MILLIMETER WAVE RADAR SENSOR INSTALLATION

CAUTION / NOTICE / HINT
Note
If the millimeter wave radar sensor assembly has been struck or dropped, replace the millimeter wave radar sensor assembly with a new one.
PROCEDURE
-
INSTALL MILLIMETER WAVE RADAR SENSOR ASSEMBLY
Note
If the front bumper assembly, radiator grill, millimeter wave radar sensor assembly or No. 1 millimeter wave radar sensor bracket has been replaced, check that the beam axis change mechanism is at the standard position (centered).
-
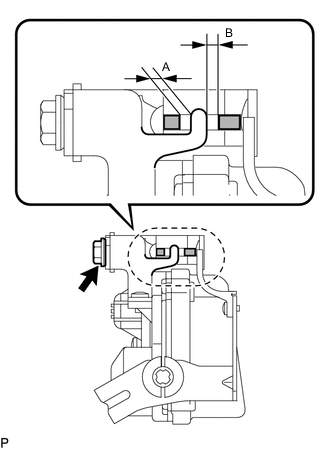
Set beam axis to the standard position.
-
Turn the bolt so that the beam axis change mechanism is positioned as shown in the illustration.
Specified Condition Difference between (A) and (B) 1 mm (0.0394 in.) or less - Torque:
- 1.5 N*m { 15 kgf*cm, 13 in.*lbf }
-
-

Bolt 
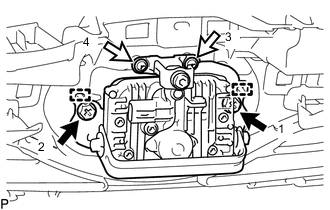
Screw Engage the 2 guides.
-
Tighten the 2 bolts and 2 screws on the millimeter wave radar sensor assembly.
- Torque:
- Bolt
- 2.5 N*m { 25 kgf*cm, 22 in.*lbf }
Tech Tips
Tighten the bolts and screws in the order shown in the illustration.
-
Connect the connector.
-
-
INSTALL RADIATOR SUPPORT OPENING COVER
-
ADJUST MILLIMETER WAVE RADAR SENSOR
-
When the millimeter wave radar sensor assembly or No. 1 millimeter wave radar sensor bracket is replaced with a new one, adjustment of the radar sensor beam axis must be performed.
-