STEREO JACK ADAPTER ASSEMBLY REMOVAL
PROCEDURE
REMOVE CENTER INSTRUMENT CLUSTER FINISH PANEL SUB-ASSEMBLY
REMOVE CIGARETTE LIGHTER HOLE COVER
REMOVE NO. 1 STEREO JACK ADAPTER ASSEMBLY
-

Disengage the 2 claws to remove the No. 1 stereo jack adapter assembly.
-
REMOVE RADIO RECEIVER ASSEMBLY (for Radio Receiver Type)
REMOVE RADIO AND DISPLAY RECEIVER ASSEMBLY (for Radio and Display Type)
REMOVE AIR CONDITIONING CONTROL ASSEMBLY (except Automatic Air Conditioning System)
REMOVE AIR CONDITIONING CONTROL ASSEMBLY (for Automatic Air Conditioning System)
REMOVE NO. 2 STEREO JACK ADAPTER ASSEMBLY
Note:Perform this procedure only when replacement of No. 2 stereo jack adapter assembly is necessary.
-
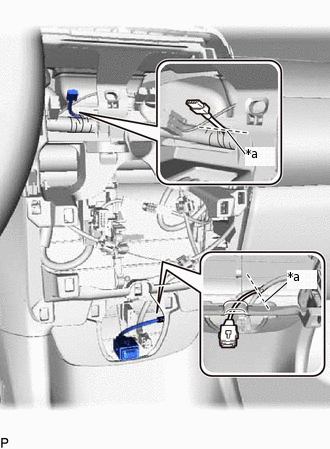
*a
Cut
Cut the No. 2 stereo jack adapter assembly at the positions shown in the illustration.
-
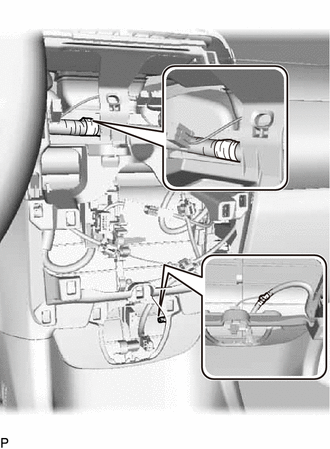
Using vinyl tape, secure the No. 2 stereo jack adapter assembly the wire harness as shown in the illustration.
-