RADIO ANTENNA CORD(for Wagon) INSTALLATION
PROCEDURE
INSTALL NO. 2 ANTENNA CORD SUB-ASSEMBLY (w/ Digital Audio Broadcasting Antenna)
Engage the 6 clamps.
Connect the connector to install the No. 2 antenna cord sub-assembly.
INSTALL NO. 3 ANTENNA CORD SUB-ASSEMBLY
Align the No. 3 antenna cord sub-assembly positioning tape with the markings on the roof headlining assembly.
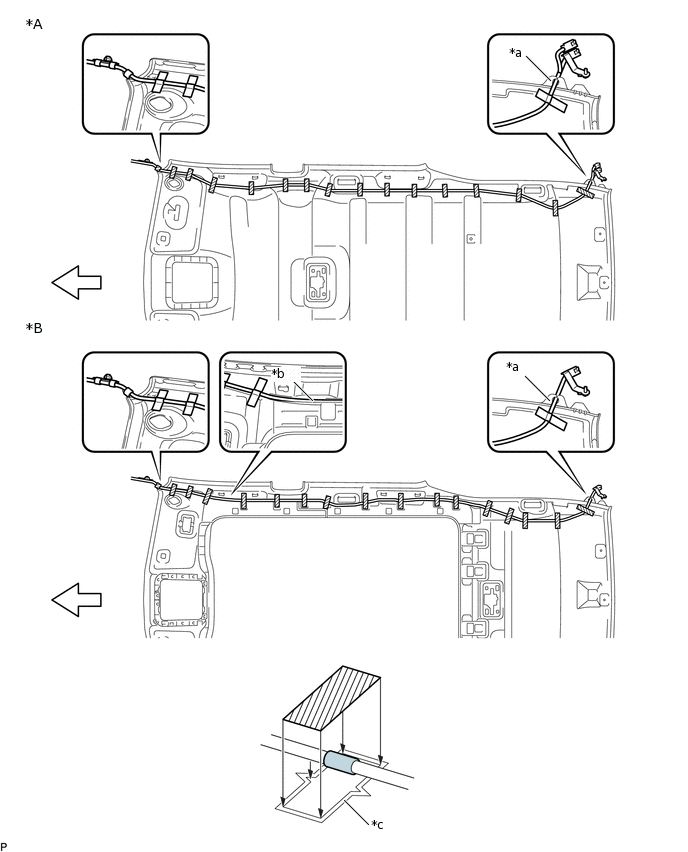
*A
for Standard Roof
*B
for Glass Roof
*a
Notch
*b
Hollow
*c
Marking
-
-

Positioning Tape

Adhesive Tape

Front
-
-
for Glass Roof:
Push the No. 3 antenna cord sub-assembly into the hollow of the roof headlining assembly.
Install the No. 3 antenna cord sub-assembly to the roof headlining assembly with new adhesive tape.
Note:Apply the tape securely in place.
Do not touch the adhesive surface when applying the tape to prevent adhesion failure.
Engage the No. 3 antenna cord sub-assembly to the notch of the roof headlining assembly.
INSTALL ROOF HEADLINING ASSEMBLY
INSTALL ANTENNA CORD SUB-ASSEMBLY (for Instrument Panel Side)
for LHD:
Engage the 6 clamps.
Install the antenna cord sub-assembly with the bolt.
7.0 N*m
71 kgf*cm
62 in.*lbf
Connect each connector.
for RHD:
Engage the 5 clamps.
Install the antenna cord sub-assembly with the bolt.
7.0 N*m
71 kgf*cm
62 in.*lbf
Connect each connector.
INSTALL RADIO RECEIVER ASSEMBLY WITH BRACKET (w/ Radio Receiver)
INSTALL UPPER INSTRUMENT PANEL ASSEMBLY