BLOWER UNIT(for VALEO Made) DISASSEMBLY
CAUTION / NOTICE / HINT
Tech Tips
-
Use the same procedure for RHD and LHD vehicles.
-
The procedure listed below is for LHD vehicles.
PROCEDURE
-
PRECAUTION
Note
Make sure to perform initialization after replacing the No. 1 blower damper servo sub-assembly. If initialization is not performed, the air conditioner unit assembly will not perform properly as the air conditioning amplifier assembly will not be able to recognize the position of the No. 1 blower damper servo sub-assembly.
-
REMOVE AIR FILTER COVER PLATE
-
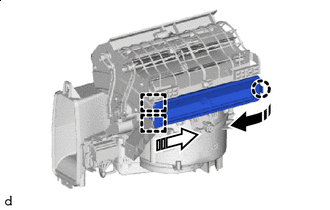

Remove in this Direction (1) 
Remove in this Direction (2) Disengage the claw and guides to remove the air filter cover plate as shown in the illustration.
-
-
REMOVE CLEAN AIR FILTER
-
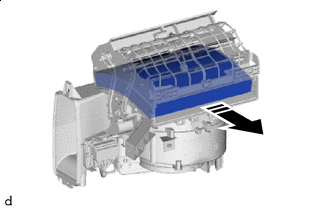
Remove in this Direction Remove the clean air filter as shown in the illustration.
-
-
REMOVE BLOWER MOTOR WITH FAN SUB-ASSEMBLY (for Single Type)
-
Disconnect the connector.
-
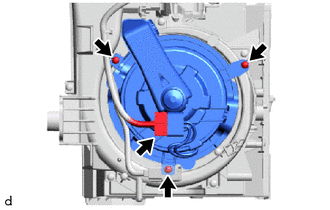
Remove the 3 screws and blower motor with fan sub-assembly.
-
-
REMOVE NO. 1 BLOWER DAMPER SERVO SUB-ASSEMBLY (for Dual Type)
-
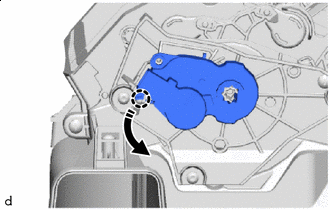
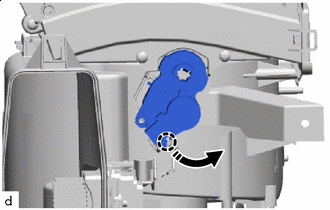
Remove in this Direction Turn the No. 1 blower damper servo sub-assembly to disengage the claw as shown in the illustration.
-
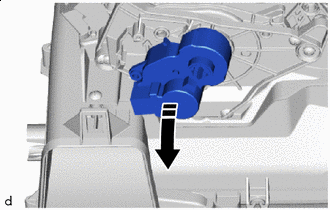
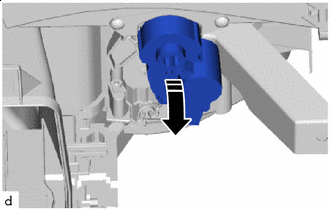
Remove in this Direction Remove the No. 1 blower damper servo sub-assembly as shown in the illustration.
-
-
REMOVE AIR FILTER SUB-ASSEMBLY (for Dual Type)
-
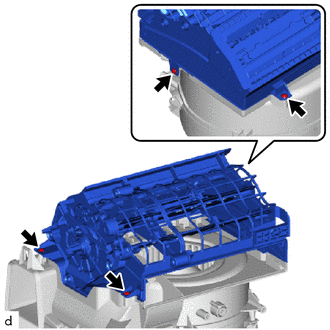
Remove the 4 screws and the air filter sub-assembly.
-
-
REMOVE BLOWER RESISTOR (for Dual Type)
-
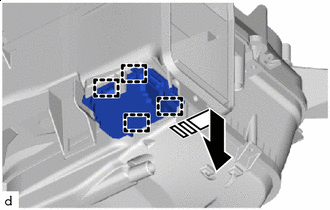
Remove in this Direction Disengage the guides and remove the blower resister as shown in the illustration.
-
-
REMOVE NO. 1 BLOWER DAMPER SERVO SUB-ASSEMBLY (for Single Type)
-
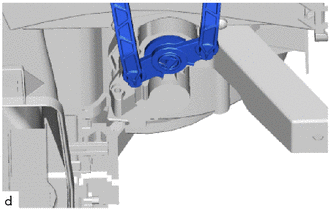
Disconnect the damper servo link.
-
Remove in this Direction Turn the No. 1 blower damper servo sub-assembly to disengage the claw as shown in the illustration.
-
Remove in this Direction Remove the No. 1 blower damper servo sub-assembly as shown in the illustration.
-
-
REMOVE AIR FILTER SUB-ASSEMBLY (for Single Type)
-
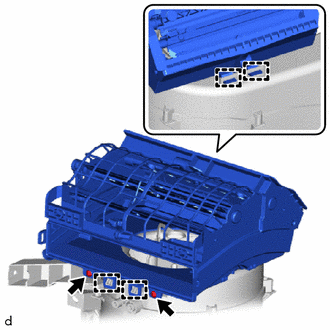
Remove the 2 screws.
-
Disengage the guides to remove the air filter sub-assembly.
-
-
REMOVE BLOWER RESISTOR
-
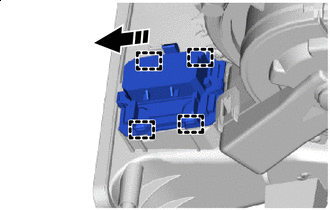
Remove in this Direction Disengage the guides and remove the blower resister as shown in the illustration.
-