BACK DOOR(for Wagon) DISASSEMBLY
PROCEDURE
REMOVE BACK DOOR UPPER TRIM PANEL ASSEMBLY
-
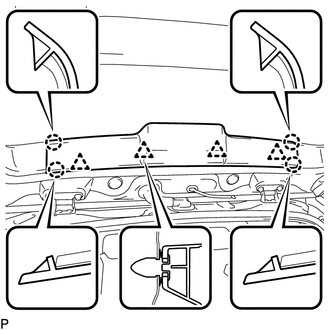
Disengage the 4 claws and 4 clips, and remove the back door upper trim panel assembly.
-
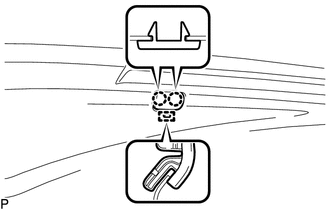
REMOVE CENTER STOP LIGHT ASSEMBLY
REMOVE CENTER STOP BRACKET
-
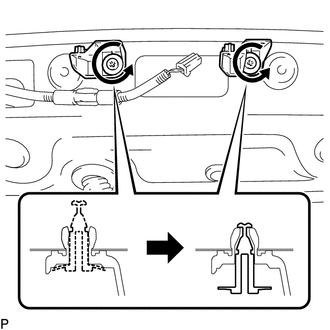
Disengage the 2 center stop light clips as shown in the illustration.
-
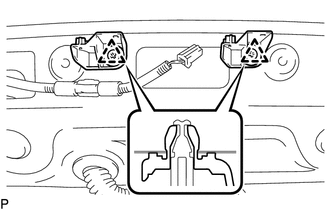
Disengage the 2 clips and remove the 2 center stop brackets.
-
REMOVE REAR WASHER NOZZLE
REMOVE BACK DOOR SIDE GARNISH LH
-
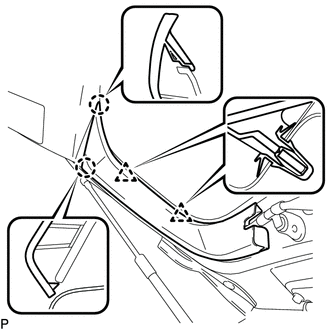
Disengage the 2 clips and 2 claws, and remove the back door side garnish LH.
-
REMOVE BACK DOOR SIDE GARNISH RH
Tip:Use the same procedure as for the LH side.
REMOVE DOOR PULL HANDLE
-
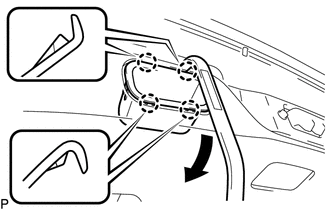
Using a moulding remover, disengage the 4 claws as shown in the illustration and remove the door pull handle.
Tip:Use the same procedure for the RH side and LH side.
-
REMOVE BACK DOOR TRIM PANEL ASSEMBLY
-
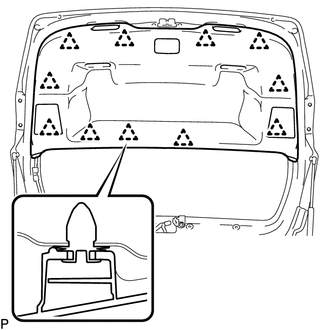
Disengage the 11 clips and back door trim panel assembly.
-
REMOVE BACK DOOR PANEL NO. 2 PROTECTOR
-
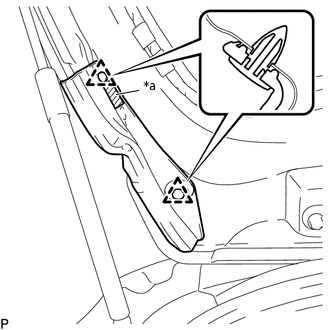
*a
Double-sided Tape
Disengage the 2 clips and remove the back door panel No. 2 protector.
-
REMOVE BACK DOOR PANEL NO. 1 PROTECTOR
Tip:Use the same procedure as for the back door panel No. 2 protector.
REMOVE BACK DOOR LOCK ASSEMBLY
REMOVE REAR LIGHT ASSEMBLY LH
REMOVE REAR LIGHT ASSEMBLY RH
Tip:Use the same procedure as for the LH side.
REMOVE BACK DOOR OPENER SWITCH ASSEMBLY
REMOVE BACK DOOR OUTSIDE GARNISH SUB-ASSEMBLY
REMOVE REAR TELEVISION CAMERA ASSEMBLY (w/ Rear View Monitor System)
REMOVE REAR WIPER ARM HEAD CAP
REMOVE REAR WIPER ARM AND BLADE ASSEMBLY
REMOVE REAR WIPER MOTOR ASSEMBLY
REMOVE REAR WIPER MOTOR GROMMET
REMOVE BACK DOOR PANEL CUSHION
-
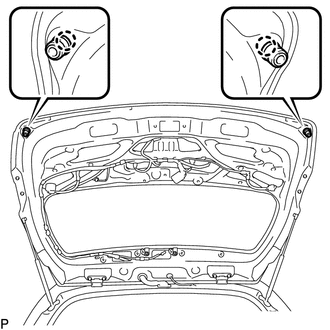
Disengage the 2 claws to remove the 2 back door panel cushions.
-
REMOVE BACK DOOR DAMPER ASSEMBLY
-
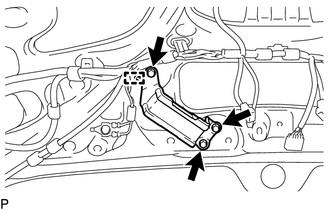
Remove the 3 bolts.
Disengage the guide to remove the back door damper assembly.
-
REMOVE DOOR DUST PROOF SEAL
-
Disengage the 2 claws and guide to remove the door dust proof seal.
Tip:Use the same procedure for the other 2 door dust proof seals.
-
REMOVE BACK DOOR STAY ASSEMBLY LH
REMOVE BACK DOOR STAY ASSEMBLY RH
Tip:Use the same procedure as for the LH side.
REMOVE BACK DOOR STAY BOLT