FRONT CRANKSHAFT OIL SEAL(w/o Glow Plug Controller) REMOVAL
PROCEDURE
REMOVE FRONT WHEEL RH
REMOVE NO. 1 ENGINE UNDER COVER (for Half Cover Type)
REMOVE NO. 1 ENGINE UNDER COVER (for Full Cover Type)
REMOVE REAR ENGINE UNDER COVER RH
REMOVE NO. 1 ENGINE COVER (w/ No. 1 Engine Cover)
REMOVE V-RIBBED BELT
REMOVE FRONT SUSPENSION MEMBER REINFORCEMENT RH
REMOVE FRONT ENGINE MOUNTING BRACKET LOWER REINFORCEMENT (w/ Reinforcement)
SEPARATE FRONT EXHAUST PIPE ASSEMBLY
-
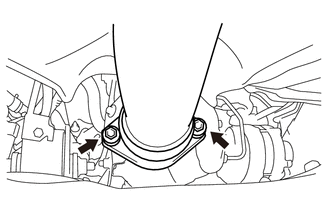
Remove the 2 bolts, 2 compression springs and separate the front exhaust pipe assembly from the No. 2 exhaust manifold converter sub-assembly.
Remove the gasket from the No. 2 exhaust manifold converter sub-assembly.
-
REMOVE RADIATOR RESERVE TANK ASSEMBLY
-

Remove the 2 bolts and separate the radiator reserve tank assembly.
-
REMOVE ENGINE MOUNTING INSULATOR SUB-ASSEMBLY RH
-
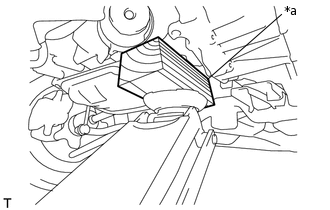
*a
Wooden Block
Support the engine with a jack and a wooden block.
Note:To prevent the No. 2 oil pan sub-assembly from deforming, do not place the wooden block under the No. 2 oil pan sub-assembly of the engine assembly.
-
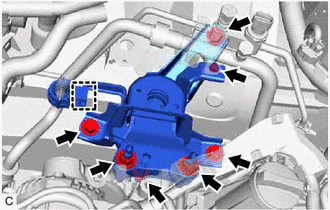
Remove the bolt and separate the cooler pipe clamp bracket from the engine mounting insulator sub-assembly RH.
Disconnect the cooler pipe clamp from the engine mounting insulator sub-assembly RH.
Remove the 3 bolts, 3 nuts and engine mounting insulator sub-assembly RH.
-
REMOVE CRANKSHAFT DAMPER SUB-ASSEMBLY
-
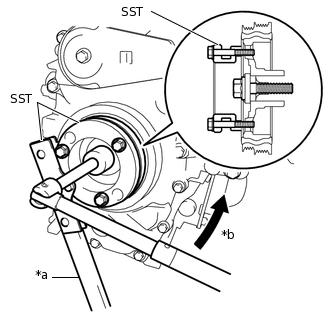
*a
Hold
*b
Turn
Using SST, hold the crankshaft damper and loosen the bolt.
09213-58014
09330-00021
-
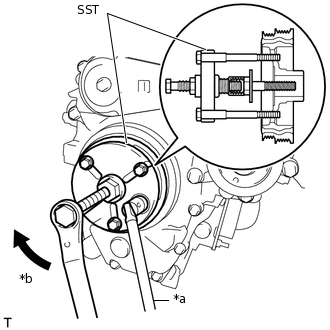
*a
Hold
*b
Turn
Using SST, remove the crankshaft pulley bolt and the crankshaft damper sub-assembly.
09950-30012
09951-03010
09953-03010
09956-03020
Note:Make sure that the engine does not contact the body or other components.
Tip:Operate the jack to lower the engine to the position where the crankshaft damper sub-assembly can be removed.
-
REMOVE TIMING CHAIN COVER OIL SEAL
Using a knife, cut off the timing chain cover oil seal lip.
-
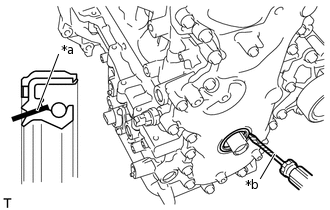
*a
Cut Position
*b
Protective Tape
Using a screwdriver with its tip wrapped with protective tape, remove the timing chain cover oil seal.
Note:After the removal, check the crankshaft for damage. If it is damaged, smooth the surface with 400-grit sandpaper.