FRONT CONSOLE BOX REMOVAL
CAUTION / NOTICE / HINT
Use the same procedure for RHD and LHD vehicles.
The procedure listed below is for LHD vehicles.
PROCEDURE
REMOVE SHIFT LEVER KNOB SUB-ASSEMBLY (for Manual Transaxle)
-
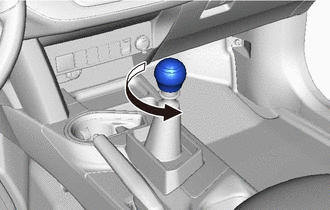
Twist the shift lever knob sub-assembly in the direction indicated by the arrow and remove it.
-
REMOVE SHIFT LEVER KNOB SUB-ASSEMBLY (except Manual Transaxle)
-
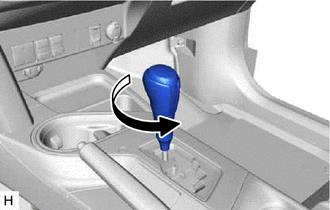
Twist the shift lever knob sub-assembly in the direction indicated by the arrow and remove it.
-
REMOVE PARKING BRAKE HOLE COVER SUB-ASSEMBLY
-
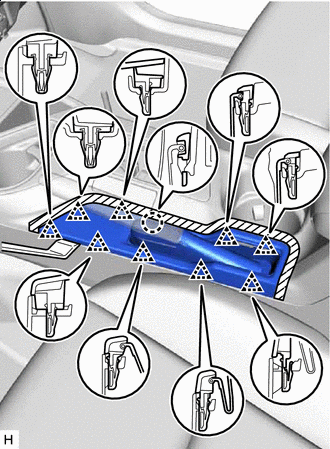

Protective Tape
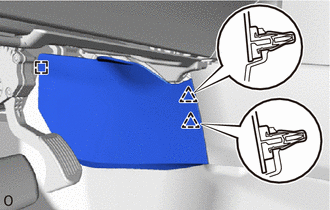
Apply protective tape as shown in the illustration.
Using moulding remover B, detach the 9 clips and claw and remove the parking brake hole cover sub-assembly.
-
REMOVE UPPER CONSOLE PANEL SUB-ASSEMBLY (for Manual Transaxle)
-
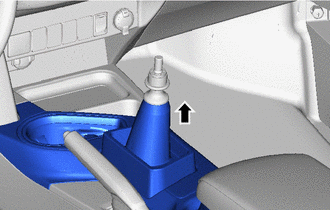
Pull up the shift lever boot and disconnect it from the shift lever assembly.
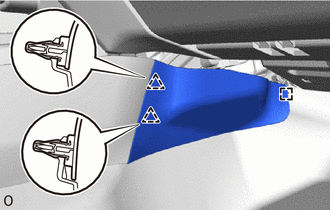
Apply protective tape as shown in the illustration.
Using moulding remover B, detach the 12 clips and remove the upper console panel sub-assembly.

Protective Tape
-
-
-
REMOVE UPPER CONSOLE PANEL SUB-ASSEMBLY (except Manual Transaxle)
Apply protective tape as shown in the illustration.
Using moulding remover B, detach the 12 clips and remove the upper console panel sub-assembly.
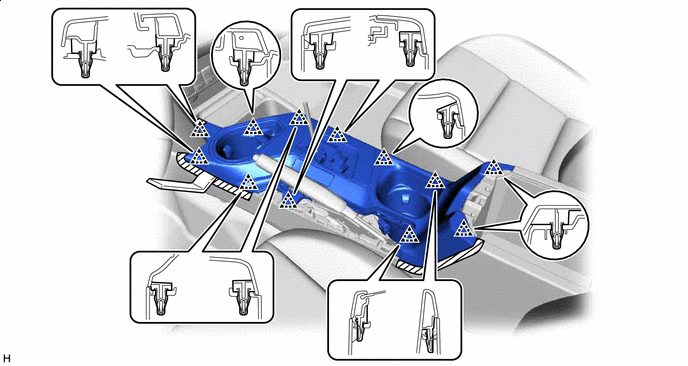
Protective Tape
-
-
-
Disconnect the connector.
REMOVE INNER NO. 1 INSTRUMENT PANEL BRACKET COVER LH
Detach the 2 clips and guide and remove the inner No. 1 instrument panel bracket cover LH.
REMOVE INNER NO. 1 INSTRUMENT PANEL BRACKET COVER RH
Detach the 2 clips and guide and remove the inner No. 1 instrument panel bracket cover RH.
REMOVE UPPER REAR CONSOLE PANEL SUB-ASSEMBLY
-
Detach the 4 claws and remove the upper rear console panel sub-assembly.
-
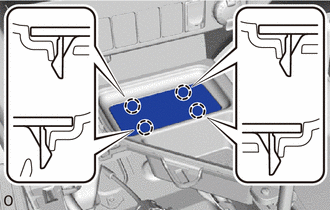
REMOVE CONSOLE BOX CARPET
-
Remove the console box carpet.
-
REMOVE LOWER CENTER INSTRUMENT PANEL FINISH PANEL
-
Protective Tape.
Apply protective tape as shown in the illustration.
Using moulding remover B, detach the 5 clips and remove the lower center instrument panel finish panel.
-
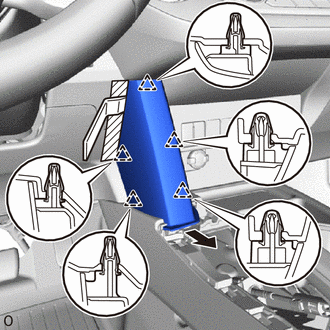
REMOVE CONSOLE REAR END PANEL SUB-ASSEMBLY
-
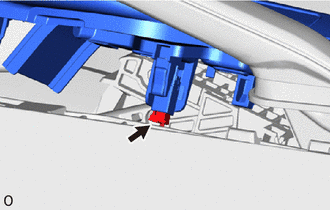
Detach the 4 clips and 2 claws.
Disconnect the connector and remove the console rear end panel sub-assembly.
-
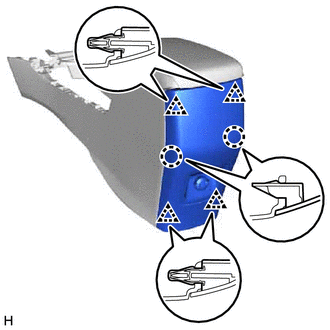
REMOVE REAR CONSOLE BOX SUB-ASSEMBLY
Remove the 2 screws and 4 bolts.
Detach the clamp and remove the rear console box sub-assembly.
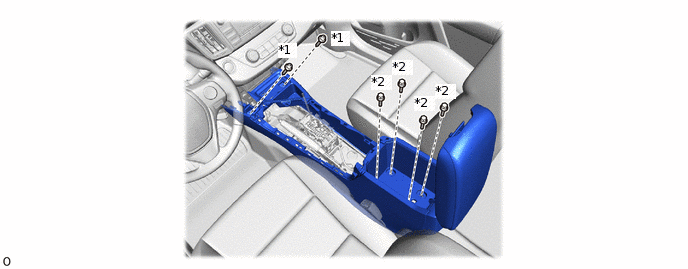
*1
Screw
*2
Bolt