ULTRASONIC SENSOR(for Hatchback Front Side, Wagon Front Side) INSTALLATION
PROCEDURE
INSTALL ULTRASONIC SENSOR BEZEL
Tip:Use the same procedure for all ultrasonic sensor bezels.
-
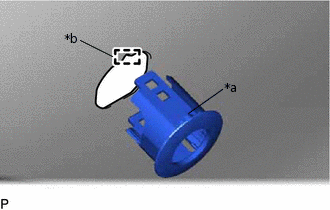
*a
Protrusion
*b
Cutout
Install the ultrasonic sensor bezel to the front bumper assembly.
Note:Do not damage the front bumper assembly with the protrusion when installing the ultrasonic sensor bezel.
Securely install the ultrasonic sensor bezel so that there are no gaps between the ultrasonic sensor bezel and surface of the front bumper assembly.
Tip:When installing the ultrasonic sensor bezel, align the cutout and protrusion as shown in the illustration.
-
INSTALL ULTRASONIC SENSOR BEZEL (for Simple Intelligent Parking Assist System)
-
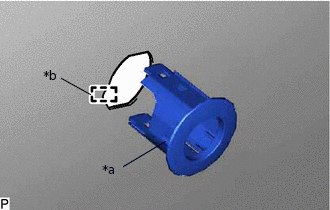
*a
Protrusion
*b
Cutout
Install the ultrasonic sensor bezel to the front bumper assembly.
Note:Do not damage the front bumper assembly with the protrusion when installing the ultrasonic sensor bezel.
Securely install the ultrasonic sensor bezel so that there are no gaps between the ultrasonic sensor bezel and surface of the front bumper assembly.
Tip:When installing the ultrasonic sensor bezel, align the cutout and protrusion as shown in the illustration.
This illustration is for the LH side. The orientation for the RH side is the opposite of the LH side.
-
INSTALL ULTRASONIC SENSOR CLIP
Tip:Use the same procedure for all ultrasonic sensor clips.
Engage the 2 claws to install the ultrasonic sensor clip.
INSTALL ULTRASONIC SENSOR CLIP (for Simple Intelligent Parking Assist System)
Tip:Use the same procedure for all ultrasonic sensor clips.
Engage the 2 claws to install the ultrasonic sensor clip.
INSTALL NO. 2 ULTRASONIC SENSOR
Tip:Use the same procedure for all No. 2 ultrasonic sensors.
Engage the 2 claws to install the No. 2 ultrasonic sensor.
Connect the connector.
Engage the clamp.
INSTALL NO. 1 ULTRASONIC SENSOR
Tip:Use the same procedure for all No. 1 ultrasonic sensors.
Engage the 2 claws to install the No. 1 ultrasonic sensor.
Connect the connector.
-
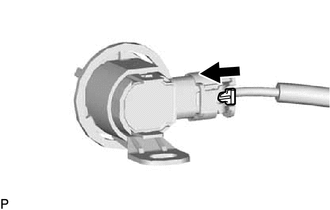
Slide the connector lock in the direction indicated by the arrow in the illustration.
Tip:This illustration is for the LH side. The orientation for the RH side is the opposite of the LH side.
INSTALL FRONT BUMPER ASSEMBLY