FRONT BUMPER(for Hatchback, Wagon) DISASSEMBLY
PROCEDURE
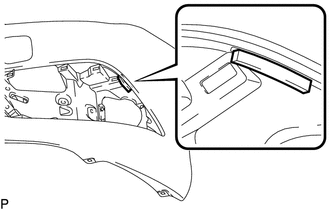
REMOVE HEADLIGHT WASHER COVER LH (w/ Headlight Cleaner System)
REMOVE HEADLIGHT WASHER COVER RH (w/ Headlight Cleaner System)
Tip:Use the same procedure as for the LH side.
REMOVE HEADLIGHT WASHER ACTUATOR SUB-ASSEMBLY LH (w/ Headlight Cleaner System)
REMOVE HEADLIGHT WASHER ACTUATOR SUB-ASSEMBLY RH (w/ Headlight Cleaner System)
Tip:Use the same procedure as for the LH side.
REMOVE NO. 2 HEADLIGHT CLEANER CLAMP (w/ Headlight Cleaner System)
REMOVE NO. 1 HEADLIGHT CLEANER CLAMP (w/ Headlight Cleaner System)
Tip:Use the same procedure for the No. 2 headlight cleaner clamp.
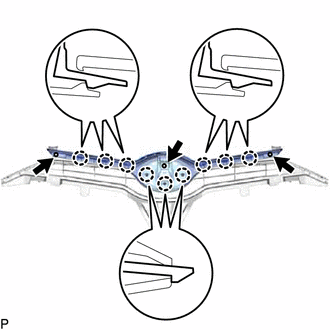
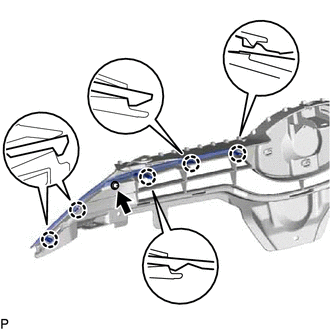
REMOVE HEADLIGHT CLEANER HOSE (w/ Headlight Cleaner System)
-
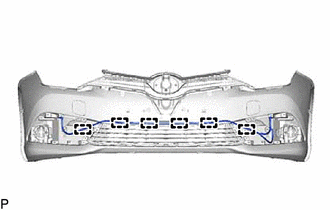
Disengage the 6 clamps and remove the headlight cleaner hose.
-
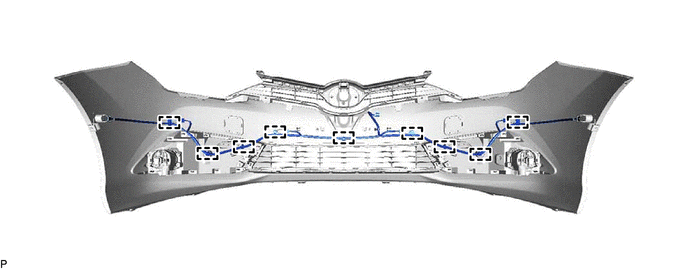
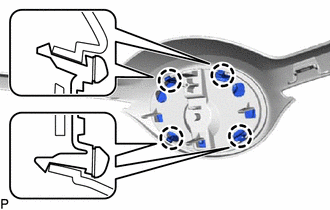
REMOVE NO. 5 ENGINE ROOM WIRE (w/ TOYOTA Parking Assist-sensor System)
Disconnect the 6 connectors.
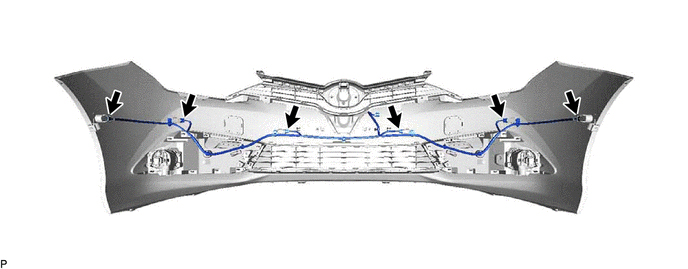
Disengage the 9 clamps and remove the No. 5 engine room wire.
REMOVE NO. 1 ULTRASONIC SENSOR (w/ TOYOTA Parking Assist-sensor System)
REMOVE NO. 2 ULTRASONIC SENSOR (w/ TOYOTA Parking Assist-sensor System)
REMOVE NO. 1 ULTRASONIC SENSOR RETAINER (w/ TOYOTA Parking Assist-sensor System)
REMOVE NO. 2 ULTRASONIC SENSOR RETAINER (w/ TOYOTA Parking Assist-sensor System)
REMOVE FOG LIGHT ASSEMBLY LH (w/ Fog Light)
REMOVE FOG LIGHT ASSEMBLY RH (w/ Fog Light)
Tip:Use the same procedure as for the LH side.
REMOVE FOG LIGHT MOUNTING BRACKET LH
Disengage the 11 claws and guide, and remove the fog light cover LH with fog light mounting bracket LH.
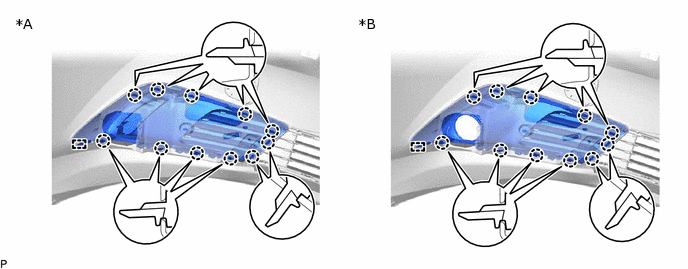
*A
w/o Fog Light
*B
w/ Fog Light
-
Remove the 3 screws.
Disengage the 6 claws and remove the fog light mounting bracket LH from the fog light cover LH.
w/ Fog Light:
-
Remove the protector.
-
REMOVE FOG LIGHT MOUNTING BRACKET RH
Tip:Use the same procedure as for the LH side.
REMOVE RADIATOR GRILLE SUB-ASSEMBLY
-
Remove the 3 screws.
Disengage the 9 claws and remove the radiator grille sub-assembly.
-
REMOVE NO. 1 RADIATOR GRILLE SEAL
-

Double-sided Tape
Disengage the 5 clips and separate the double-sided tape to remove the No. 1 radiator grille seal.
-
REMOVE RADIATOR GRILLE
-
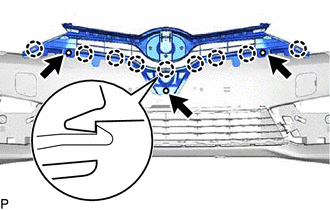
Remove the 3 screws.
Disengage the 9 claws and remove the radiator grille.
-
REMOVE RADIATOR GRILLE (OR FRONT PANEL) EMBLEM
-
Disengage the 4 claws and remove the radiator grille (or front panel) emblem.
-
REMOVE RADIATOR GRILLE MOULDING LH
-
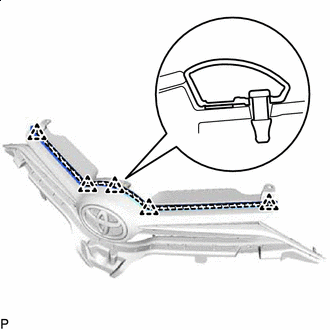
Remove the screw.
Disengage the 5 claws and remove the upper radiator grille moulding LH.
-
REMOVE RADIATOR GRILLE MOULDING RH
Tip:Use the same procedure as for the LH side.
REMOVE FRONT BUMPER EXTENSION MOUNTING BRACKET
-
Remove the 2 screws.
Disengage the 2 guides and remove the front bumper extension mounting bracket.
-
REMOVE FRONT FENDER LINER RETAINER
-
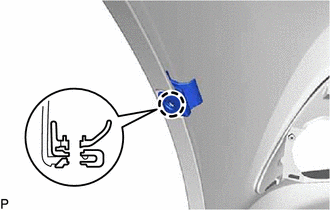
Disengage the claw and remove the front fender liner retainer.
Tip:Use the same procedure for the RH side and LH side.
-
REMOVE FRONT BUMPER HOLE COVER LH
-
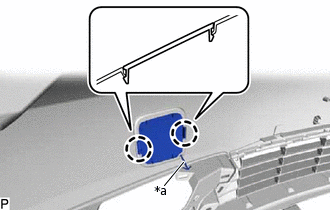
*a
Hook
Disengage the 2 claws.
Disengage the hook and remove the front bumper hole cover LH.
-
REMOVE FRONT BUMPER HOLE COVER RH
Tip:Use the same procedure as for the LH side.
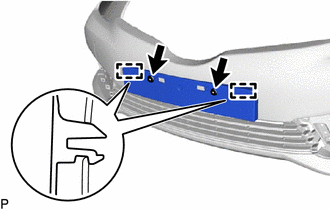
REMOVE FRONT BUMPER MOULDING
-
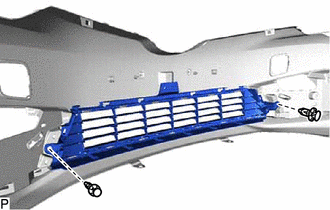
Remove the 2 clips.
-

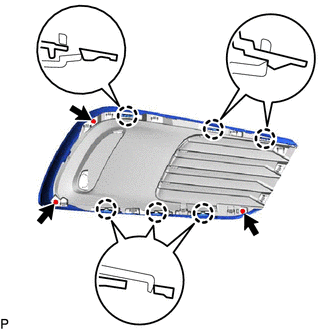
Disengage the 13 claws and remove the lower No. 1 radiator grille with front bumper moulding.
-

Disengage the 8 claws and remove the front bumper moulding from the lower No. 1 radiator grille.
-
REMOVE FRONT BUMPER PAD
-
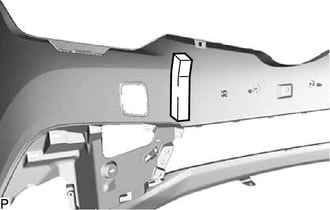
Remove the front bumper pad.
Tip:Use the same procedure for the RH side and LH side.
-
REMOVE FRONT BUMPER SIDE RETAINER LH
-
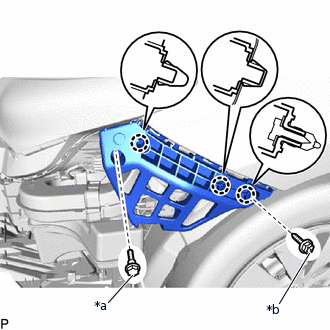
*a
Bolt
*b
Screw
Remove the bolt and screw.
Disengage the 3 claws and remove the front bumper side retainer LH.
-
REMOVE FRONT BUMPER SIDE RETAINER RH
Tip:Use the same procedure as for the LH side.
REMOVE FRONT BUMPER ENERGY ABSORBER
-
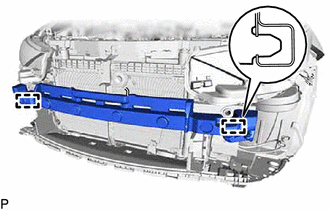
Disengage the 2 guides and remove the front bumper energy absorber.
-
REMOVE HEADLIGHT ASSEMBLY LH
REMOVE HEADLIGHT ASSEMBLY RH
Tip:Use the same procedure as for the LH side.
REMOVE FRONT BUMPER REINFORCEMENT SUB-ASSEMBLY
-
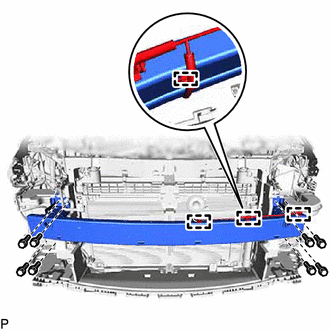
Disengage the 4 clamps.
Remove the 8 bolts and front bumper reinforcement sub-assembly.
-