HOOD LOCK CONTROL CABLE ASSEMBLY REMOVAL
CAUTION / NOTICE / HINT
Use the same procedure for LHD and RHD vehicles.
The procedure listed below is for LHD vehicles.
PROCEDURE
PRECAUTION
Note:After turning the ignition switch off, waiting time may be required before disconnecting the cable from the battery terminal. Therefore, make sure to read the disconnecting the cable from the battery terminal notice before proceeding with work (Click here).
DISCONNECT CABLE FROM NEGATIVE BATTERY TERMINAL
Note:When disconnecting the cable some systems need to be initialized after the cable is reconnected (Click here).
REMOVE RADIATOR SUPPORT OPENING COVER
REMOVE FRONT FENDER LINER LH
Remove the front fender liner (Click here).
REMOVE NO. 1 INSTRUMENT PANEL UNDER COVER SUB-ASSEMBLY
REMOVE NO. 1 WATER HOSE CLAMP BRACKET
REMOVE HOOD LOCK ASSEMBLY
for LHD:
-
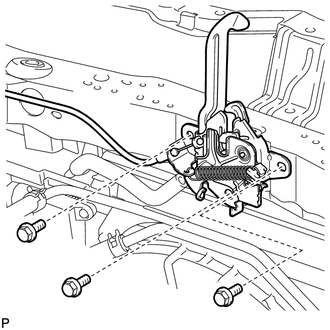
Remove the 3 bolts and hood lock.
-
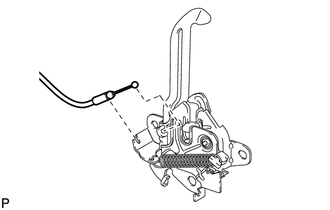
Disconnect the hood lock control cable.
-
for RHD:
-
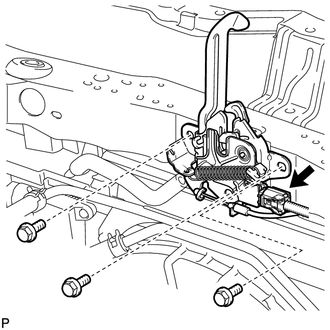
Remove the 3 bolts and hood lock.
Disconnect the connector.
-
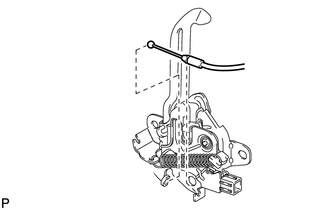
Disconnect the hood lock control cable.
-
REMOVE HOOD LOCK CONTROL LEVER SUB-ASSEMBLY
-
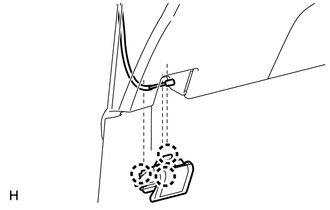
Detach the 3 claws.
Disconnect the hood lock control cable and remove the hood lock control lever.
-
REMOVE HOOD LOCK CONTROL CABLE ASSEMBLY (for LHD)
-
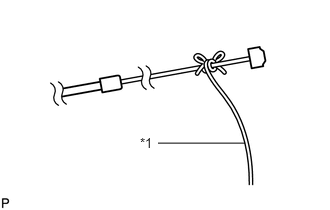
Tie a string to the end of the hood lock control cable assembly as shown in the illustration.
Note:Use a length of string long enough to pass through the engine compartment.
Table 1. Text in Illustration *1
String
Using a screwdriver, disconnect the clamps shown in the illustration.
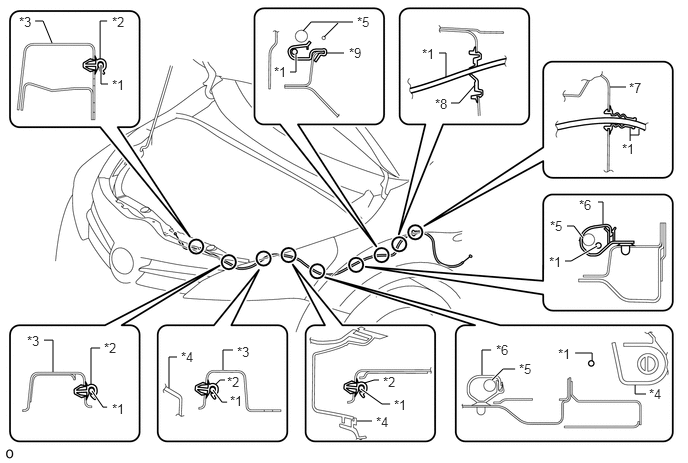
Table 2. Text in Illustration *1
Hood Lock Control Cable Assembly
*2
Clamp
*3
Radiator Support Side
*4
Headlight
*5
Wire Harness
*6
Wire Harness Clamp
*7
Dash Panel
*8
Grommet
*9
Hood Lock Control Cable Clamp
-
-
Tip:Tape the screwdriver tip before use.
Pull the cable out of the wheel housing from outside of the vehicle, and then untie the string and remove the cable.
-
REMOVE HOOD LOCK CONTROL CABLE ASSEMBLY (for RHD)
-
Tie a string to the end of the hood lock control cable assembly as shown in the illustration.
Table 3. Text in Illustration *1
String
Note:Use a length of string long enough to pass through the engine compartment.
Using a screwdriver, disconnect the clamps shown in the illustration.
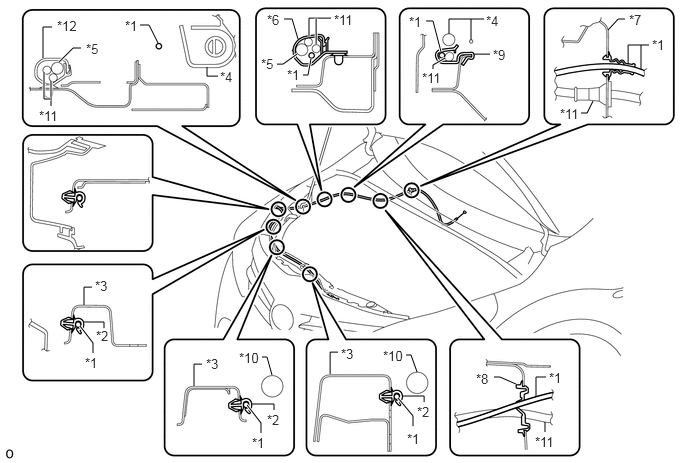
Table 4. Text in Illustration *1
Hood Lock Control Cable Assembly
*2
Clamp
*3
Radiator Support Side
*4
Headlight
*5
Wire Harness
*6
Wire Harness Clamp
*7
Dash Panel
*8
Grommet
*9
Hood Lock Control Cable Clamp
*10
Radiator Hose
*11
Washer Hose
*12
Washer Hose Clamp
Tip:Tape the screwdriver tip before use.
Pull the cable out of the wheel housing from outside of the vehicle, and then untie the string and remove the cable.
-