REAR DOOR WINDOW FRAME MOULDING REMOVAL
CAUTION / NOTICE / HINT
Use the same procedure for the RH and LH sides.
The procedure listed below is for the LH side.
PROCEDURE
DISCONNECT CABLE FROM NEGATIVE BATTERY TERMINAL
Note:After turning the engine switch off, waiting time may be required before disconnecting the cable from the battery terminal. Therefore, make sure to read the disconnecting the cable from the battery terminal notice before proceeding with work (Click hereClick hereClick here).
When disconnecting the cable, some systems need to be initialized after the cable is reconnected (Click hereClick hereClick hereClick here).
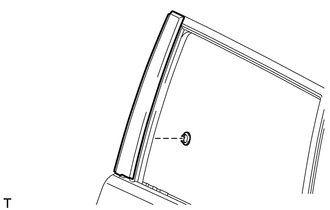
REMOVE REAR DOOR BELT MOULDING LH
Remove the rear door belt moulding (Click here).
REMOVE REAR DOOR WEATHERSTRIP LH
Detach the clip and remove the upper part of the rear door weatherstrip so that the moulding can be removed.
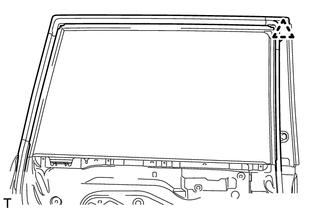
REMOVE REAR DOOR FRONT WINDOW FRAME MOULDING LH
Tip:When removing the window frame moulding, heat the vehicle body and window frame moulding using a heat light.
Standard
Item
Temperature
Vehicle Body
40 to 60°C (104 to 140°F)
Window Frame Moulding
20 to 30°C (68 to 86°F)
Note:Do not heat the vehicle body or window frame moulding excessively.
-
Remove the door window frame moulding clip.
-
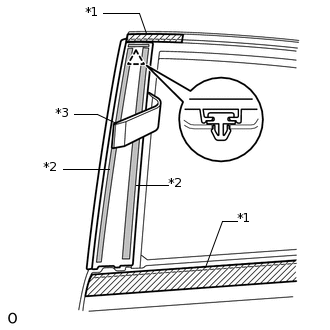
*1
Protective Tape
*2
Double-sided Tape
*3
Moulding Remover
Put protective tape around the rear door front window frame moulding.
Using a moulding remover, detach the clip and remove the double-sided tape to remove the rear door front window frame moulding.
-