MOTOR CABLE REMOVAL
PROCEDURE
-
PRECAUTION
Note
After turning the power switch off, waiting time may be required before disconnecting the cable from the negative (-) auxiliary battery terminal. Therefore, make sure to read the disconnecting the cable from the negative (-) auxiliary battery terminal notices before proceeding with work Click here.
-
REMOVE SERVICE PLUG GRIP
-
REMOVE NO. 1 ENGINE UNDER COVER
-
DRAIN COOLANT (for Inverter)
-
REMOVE RADIATOR SUPPORT OPENING COVER
-
REMOVE NO. 1 INVERTER BRACKET
-
DISCONNECT ENGINE ROOM MAIN WIRE
-
REMOVE INVERTER COVER
-
CHECK TERMINAL VOLTAGE
-
DISCONNECT FRAME WIRE
-
DISCONNECT GENERATOR CABLE
-
DISCONNECT MOTOR CABLE
-
DISCONNECT NO. 2 ENGINE WIRE
-
INSTALL INVERTER COVER
-
DISCONNECT NO. 2 ENGINE ROOM WIRE
-
DISCONNECT WATER HOSE
-
REMOVE INVERTER WITH CONVERTER ASSEMBLY
-
REMOVE INVERTER RESERVE TANK ASSEMBLY
-
REMOVE INVERTER TRAY BRACKET
-
REMOVE MOTOR CABLE
Note
Wear insulated gloves.
-
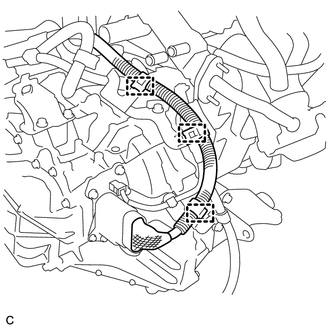
Disconnect the 3 clamps.
-
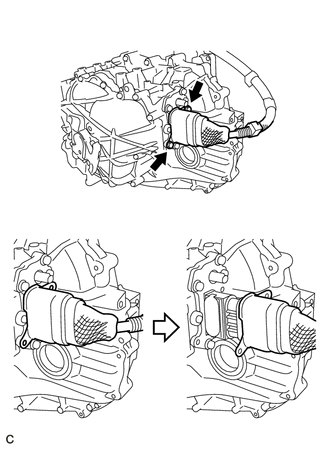
Remove the 2 bolts and slide the motor cable connector shell back.
-
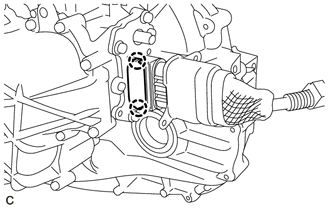
Disengage the 2 claws to remove the terminal cap.
-
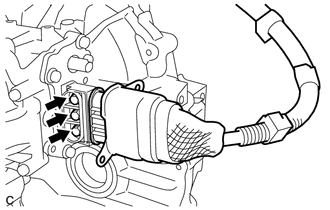
Remove the 3 bolts and motor cable from the hybrid vehicle transaxle assembly.
-