SLIDING ROOF HOUSING REMOVAL
PROCEDURE
-
REMOVE NO. 2 SLIDING ROOF SIDE GARNISH LH
-
Press and hold the UP switch until the sliding roof glass sub-assembly is fully tilted up.
-
Remove the No. 2 sliding roof side garnish LH.
-
-
REMOVE NO. 2 SLIDING ROOF SIDE GARNISH RH
Tech Tips
Use the same procedure as for the LH side.
-
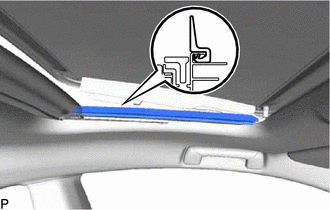
REMOVE NO. 1 SLIDING ROOF SIDE GARNISH LH
-
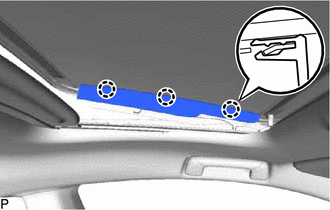
Disengage the 3 claws to remove the No. 1 sliding roof side garnish LH.
-
-
REMOVE NO. 1 SLIDING ROOF SIDE GARNISH RH
Tech Tips
Use the same procedure as for the LH side.
-
REMOVE SLIDING ROOF GLASS SUB-ASSEMBLY
-
Press and hold the DOWN switch until the sliding roof glass sub-assembly is fully tilted down.
-
Using a T25 "TORX" socket wrench, remove the 4 screws and sliding roof glass sub-assembly.
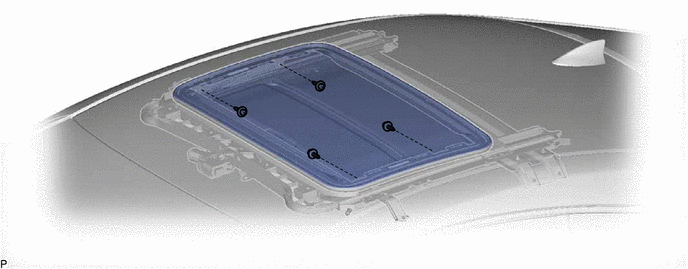
Note
To prevent the sliding roof glass sub-assembly and sliding roof drive gear sub-assembly from being displaced, fully close the sliding roof glass sub-assembly, and then remove the sliding roof glass sub-assembly.
-
-
REMOVE SLIDING ROOF WEATHERSTRIP
-
Remove the sliding roof weatherstrip from the sliding roof panel sub-assembly.
-
-
REMOVE CURTAIN SHIELD AIRBAG ASSEMBLY LH
-
REMOVE CURTAIN SHIELD AIRBAG ASSEMBLY RH
Tech Tips
Use the same procedure as for the LH side.
-
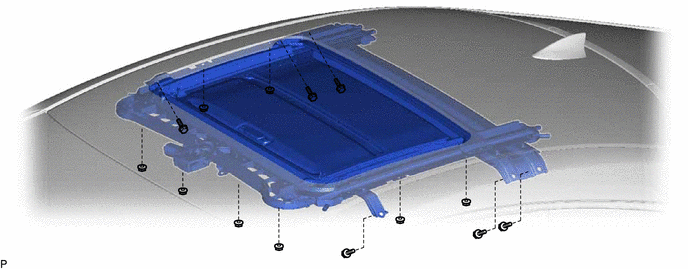
REMOVE SLIDING ROOF HOUSING ASSEMBLY
-
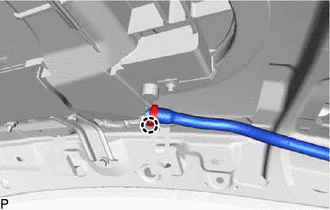
for Clamp Type:
-
Disengage the claw and disconnect the sliding roof drain hose.
Tech Tips
Use the same procedure for the other 3 sliding roof drain hoses.
-
-

for Clip Type:
-
Expand the clip and disconnect the sliding roof drain hose.
Tech Tips
Use the same procedure for the other 3 sliding roof drain hoses.
-
-
Remove the 6 bolts, 8 nuts and sliding roof housing assembly.
-