REAR STABILIZER BAR REMOVAL
PROCEDURE
REMOVE REAR WHEEL
REMOVE REAR HEIGHT CONTROL SENSOR SUB-ASSEMBLY LH (w/ Automatic Headlight Beam Level Control System)
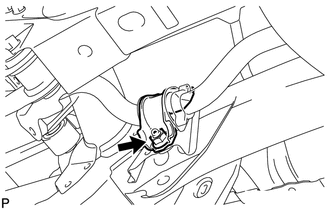
REMOVE REAR STABILIZER LINK ASSEMBLY LH
-
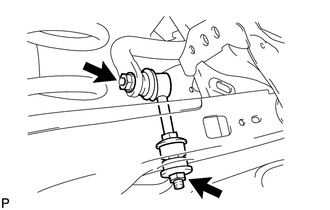
Remove the 2 nuts and 2 cushions and disconnect the link from the No. 2 suspension arm.
Tip:If the ball joint turns together with the nut, use a 6 mm hexagon wrench to hold the stud.
-
REMOVE REAR STABILIZER LINK ASSEMBLY RH
Tip:Use the same procedure described for the LH side.
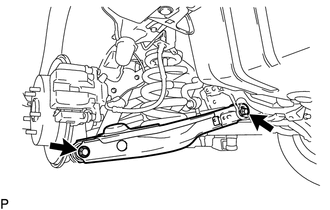
REMOVE REAR SUSPENSION MEMBER BRACE LH

Remove the 2 bolts and member brace from the suspension member.
LOOSEN REAR NO. 2 SUSPENSION ARM ASSEMBLY LH
Loosen the 2 bolts of the suspension arm.
Note:Do not remove the bolts and nuts, only loosen them.
Since a stopper nut is used, loosen the bolt.
REMOVE REAR COIL SPRING LH
-
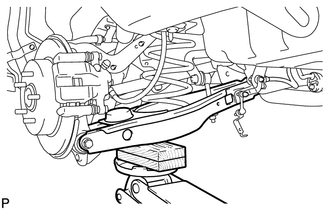
Support the No. 2 suspension arm LH with a jack.
Note:Place a wooden or rubber block between the jack and arm.
-
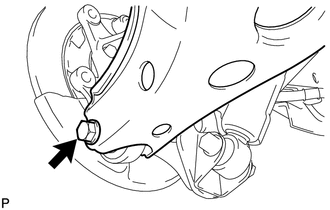
Remove the bolt located on the rear axle carrier of the rear No. 2 suspension arm.
Lower the jack gradually to remove the rear coil spring together with the rear upper coil spring insulator.
-
REMOVE REAR UPPER COIL SPRING INSULATOR LH
Remove the rear upper coil spring insulator from the rear coil spring.
REMOVE REAR LOWER COIL SPRING INSULATOR LH
Remove the rear lower coil spring insulator from the rear No. 2 suspension arm.
REMOVE REAR STABILIZER BAR
Remove the 4 bolts and 2 stabilizer brackets from the suspension member.
Remove the stabilizer bar from the suspension member.
REMOVE REAR STABILIZER BUSHING
Remove the 2 rear stabilizer bushes from the rear stabilizer bar.