AUTOMATIC LIGHT CONTROL SENSOR INSTALLATION
CAUTION / NOTICE / HINT
Use the same procedure for LHD and RHD vehicles.
The procedure listed below is for LHD vehicles.
PROCEDURE
INSTALL RAIN SENSOR (w/ Rain Sensor)
Note:If the tape is damaged, replace the rain sensor.
Clean the surface of the windshield glass that contacts the rain sensor.
When replacing the rain sensor with a new one:
Remove the protective cover on the rain sensor.
Note:Do not touch the silicon mixture directly with your finger.
-
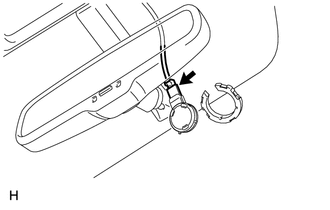
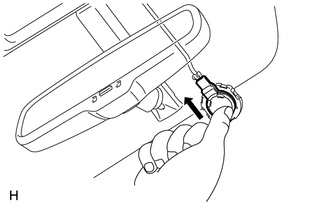
Connect the connector.
Note:Do not touch the silicon mixture directly with your finger.
-
Attach the 2 claws to install the rain sensor as shown in the illustration.
Note:Make sure that there are no air bubbles between the silicon mixture and windshield glass.
INSTALL NO. 2 RAIN SENSOR COVER (w/ Rain Sensor)
-
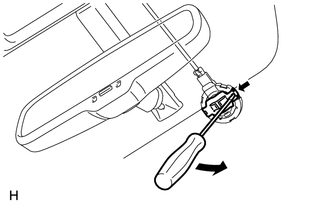
Using a screwdriver, attach the 2 claws to install the No. 2 rain sensor cover.
-
INSTALL NO. 1 RAIN SENSOR COVER (w/ Rain Sensor)
-
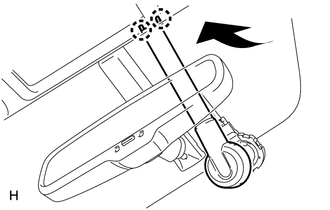
Attach the 2 claws to connect the No. 1 rain sensor cover.
Note:Be careful not to damage the No. 1 rain sensor cover.
-
Attach the 3 claws to install the No. 1 rain sensor cover.
-
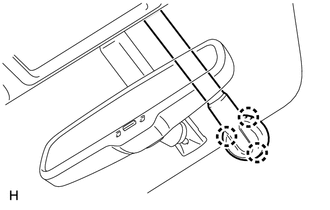
INSTALL AUTOMATIC LIGHT CONTROL SENSOR (w/o Rain Sensor)
Attach the 2 claws to install the automatic light control sensor.
Connect the connector.
INSTALL UPPER INSTRUMENT PANEL (w/o Rain Sensor)