FUEL PRESSURE REGULATOR INSTALLATION
-
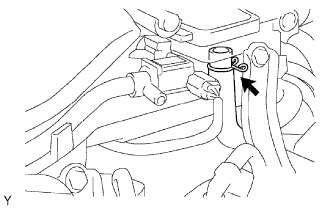
INSTALL FUEL PRESSURE REGULATOR ASSEMBLY
-
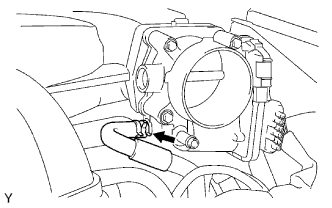
Install the vacuum hose.
-
Apply a light coat of spindle oil or gasoline to a new O-ring and install it to the fuel pressure regulator.
-
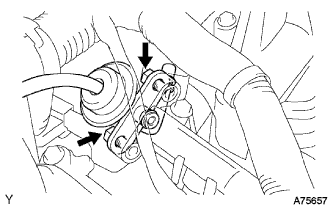
Install the fuel pressure regulator with the 2 bolts.
- Torque:
- 9.0 N*m { 92 kgf*cm, 80 in.*lbf }
-
-
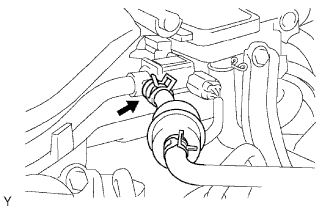
CONNECT NO. 2 FUEL PIPE SUB-ASSEMBLY
-
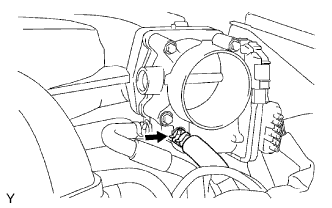
Connect the fuel pipe.
-
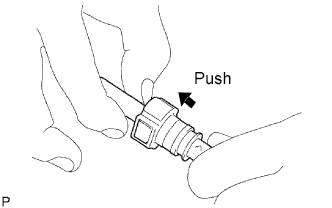
Check that there is no damage or contamination in the connected part of the pipe.
-
Align the axis of the connector with the axis of the pipe. Push the pipe into the connector until the connector makes a "click" sound. If the connection is tight, apply a little amount of fresh engine oil on the tip of the pipe.
-
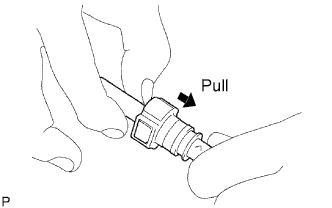
After having finished the connection, try to pull apart the pipe and the connector and confirm that they are securely connected.
-
-
Install the fuel pipe clamp.
-
-
INSTALL INTAKE AIR SURGE TANK
-
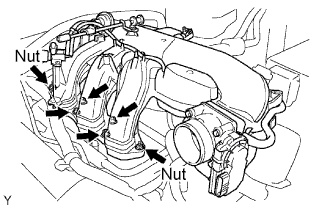
Install a new gasket and the surge tank with the 2 nuts.
- Torque:
- 28 N*m { 286 kgf*cm, 21 ft.*lbf }
-
Using an 8 hexagon wrench, install the 4 bolts.
- Torque:
- 28 N*m { 286 kgf*cm, 21 ft.*lbf }
-
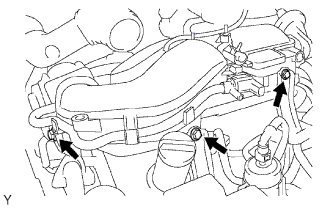
Install the 3 upper bolts which are used to secure the 2 surge tank stays and throttle body bracket.
- Torque:
- 21 N*m { 214 kgf*cm, 16 ft.*lbf }
-
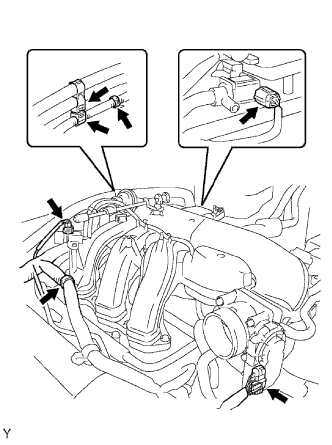
Install the 3 wire harness clamps and hose clamp.
-
Connect the throttle motor connector.
-
Connect the 2 VSV connectors.
-
Connect the ventilation hose.
-
Connect the vapor feed hose assembly.
-
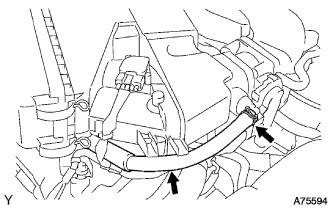
Connect the No. 4 water by-pass hose.
-
Connect the No. 5 water by-pass hose.
-
-
INSTALL AIR CLEANER ASSEMBLY
- Torque:
- 8.0 N*m { 82 kgf*cm, 71 in.*lbf }
-
CONNECT NO. 2 VENTILATION HOSE
-
INSTALL V-BANK COVER
-
Install the cover with the 2 nuts.
- Torque:
- 7.5 N*m { 76.5 kgf*cm, 66 in.*lbf }
-
-
CONNECT CABLE TO NEGATIVE BATTERY TERMINAL
-
PERFORM INITIALIZATION
-
Perform initialization Click here.
Note
Certain systems need to be initialized after disconnecting and reconnecting the cable from the negative (-) battery terminal.
-
-
CHECK FOR FUEL LEAKS
-
Connect the intelligent tester to the DLC3.
-
Turn the ignition switch ON.
Note
Do not start the engine.
-
Push the intelligent tester main switch ON.
-
Select Active Test and enter the following menus: Powertrain / Engine and ECT / Active Test / Control the Fuel Pump / Speed.
-
-
Check for fuel leaks.
-
Check that there are no fuel leaks after performing maintenance anywhere on the fuel system.
-
-