RADIO ANTENNA CORD(for Roof Side) INSTALLATION
PROCEDURE
INSTALL NO. 3 ANTENNA CORD SUB-ASSEMBLY
Attach the 3 clamps to install the No. 3 antenna cord sub-assembly.
Install the bolt.
4.5 N*m
46 kgf*cm
40 in.*lbf
Connect each connector.
INSTALL NO. 2 ANTENNA CORD SUB-ASSEMBLY
Apply new double-sided tape as shown in the illustration.
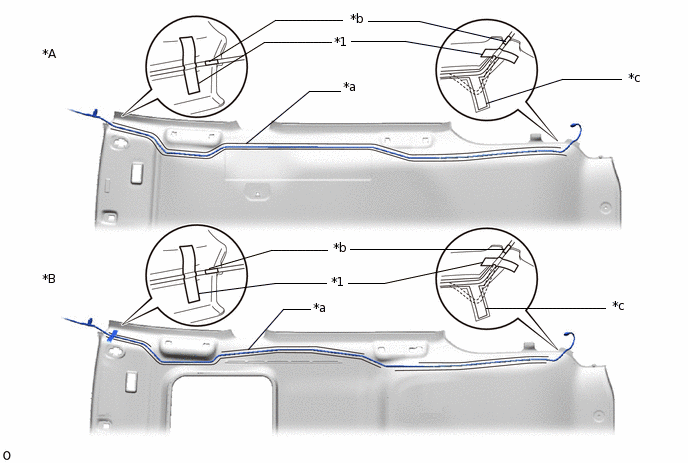
*A
w/o Sliding Roof
*B
w/ Sliding Roof
*1
One-sided Tape
-
-
*a
Double-sided Tape Application Marking
*b
Positioning Tape
*c
Surplus Cord Area
-
-
Align the positioning tape for the front side of the antenna cord with the edge of the double-sided tape application marking and attach it as shown in the illustration.
Align the positioning tape for the rear side of the antenna cord with the edge of the double-sided tape application marking and attach it as shown in the illustration.
Tip:Place any extra antenna cord length in the surplus cord area shown in the illustration.
Secure both ends of the antenna cord using one-sided tape as shown in the illustration.
INSTALL ROOF HEADLINING ASSEMBLY
CONNECT CABLE TO NEGATIVE BATTERY TERMINAL
Note:When disconnecting the cable, some systems need to be initialized after the cable is reconnected.
CHECK SRS WARNING LIGHT