FUEL TANK(w/o Canister Pump Module) REMOVAL
PROCEDURE
DISCHARGE FUEL SYSTEM PRESSURE
PRECAUTION
Note:After turning the power switch off, waiting time may be required before disconnecting the cable from the auxiliary battery negative (-) terminal. Therefore, make sure to read the disconnecting the cable from the auxiliary battery negative (-) terminal notices before proceeding with work.
DISCONNECT CABLE FROM NEGATIVE AUXILIARY BATTERY TERMINAL
Note:When disconnecting the cable, some systems need to be initialized after the cable is reconnected.
REMOVE FRONT FLOOR COVER (w/ Cover)
-
Remove the bolt and nut.
Detach the 5 clips and remove the front floor cover.
-
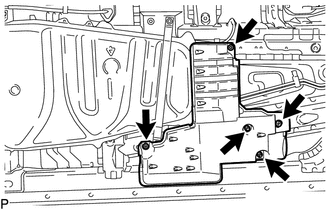
REMOVE NO. 1 FUEL TANK PROTECTOR (w/ Cover)
-
Detach the 2 clips and remove the nut.
-
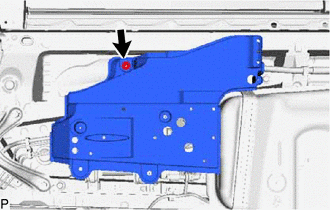
Loosen the clip and remove the No. 1 fuel tank protector.
-
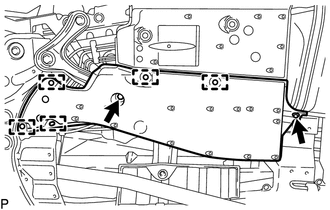
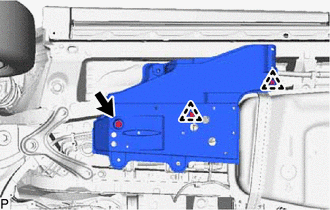
REMOVE NO. 1 FUEL TANK PROTECTOR (w/o Cover)
-
Remove the 2 clips and grommet.
Remove the 2 bolts and fuel tank protector.
-
REMOVE NO. 1 FLOOR UNDER COVER (w/ Cover)
-
Detach the clip and remove the 2 nuts and No. 1 floor under cover.
-
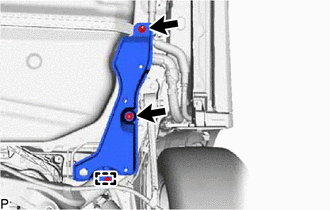
DISCONNECT NO. 2 PARKING BRAKE CABLE ASSEMBLY
-
Remove the 2 bolts and disconnect the No. 2 parking brake cable assembly from the body.
-
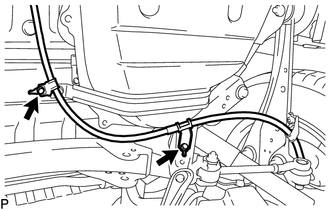
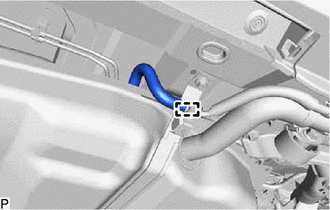
DISCONNECT NO. 1 FUEL EVAPORATION TUBE
-
Slide the hose clamp, and disconnect the No. 1 fuel evaporation tube from the fuel pipe.
-
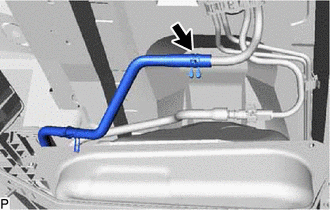
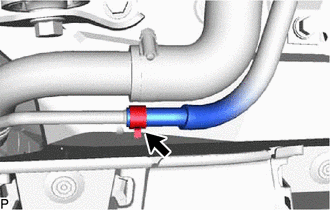
DISCONNECT FUEL TANK MAIN TUBE SUB-ASSEMBLY
-
Disconnect the fuel tank main tube sub-assembly from the fuel pipe.
-
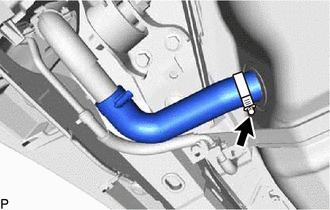
REMOVE FUEL HOSE PROTECTOR
-
Detach the claw and remove the fuel hose protector from the fuel tank assembly and fuel tank to filler pipe hose.
-
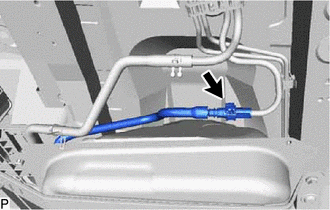
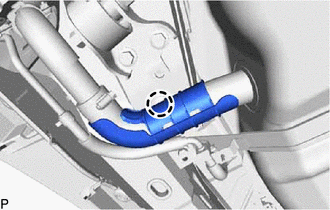
DISCONNECT FUEL TANK TO FILLER PIPE HOSE
-
Loosen the hose clamp, then disconnect the fuel tank to filler pipe hose from the fuel tank assembly.
-
DISCONNECT CHARCOAL CANISTER OUTLET TUBE SUB-ASSEMBLY
-
Disconnect the clamp from the No. 2 fuel tank band.
-
Slide the hose clamp, then disconnect the charcoal canister outlet tube sub-assembly from the fuel tank breather tube.
-
REMOVE FUEL TANK ASSEMBLY
-
Disconnect the 3 wire harness clamps from the 2 No. 4 fuel tube clamps and the bracket on the vehicle side.
Using an engine lifter and attachments, support the fuel tank assembly.
-
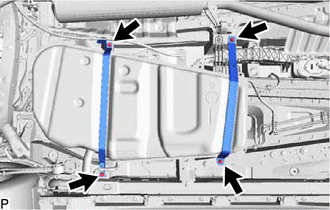
Remove the 2 bolts and No. 1 fuel tank band.
Remove the 2 bolts and No. 2 fuel tank band.
Slightly lower the engine lifter.
Note:Be careful not to cut the wiring.
-
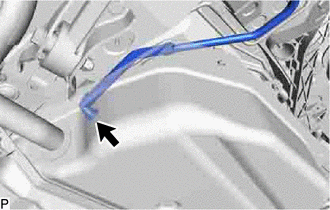
Disconnect the No. 3 fuel tank breather tube sub-assembly from the fuel tank assembly.
-
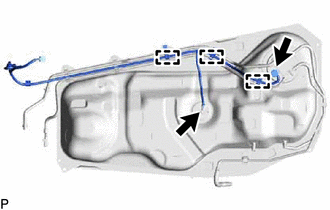
Disconnect the fuel pump connector and fuel sender gauge assembly connector.
Note:Before starting the operation, check that there is no mud or other dirt on the connector.
Do not use any tools.
Disconnect the 3 wire harness clamps from the 3 No. 4 fuel tube clamps.
-
DISCONNECT FUEL EMISSION HOSE
DISCONNECT FUEL TANK MAIN TUBE SUB-ASSEMBLY
REMOVE FUEL TANK VENT TUBE SET PLATE
REMOVE FUEL SUCTION TUBE ASSEMBLY
REMOVE FUEL SENDER GAUGE ASSEMBLY
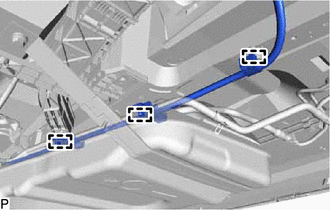
REMOVE FUEL TANK MAIN TUBE SUB-ASSEMBLY
-
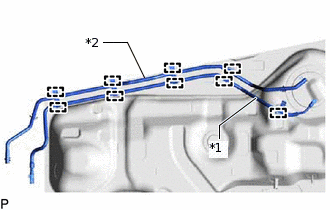
*1
Fuel Tank Main Tube Sub-assembly
*2
No. 1 Fuel Evaporation Tube Sub-assembly
Disconnect the 5 clamps and remove the fuel tank main tube sub-assembly from the 5 No. 4 fuel tube clamps.
-
REMOVE NO. 1 FUEL EVAPORATION TUBE SUB-ASSEMBLY
Disconnect the 4 clamps and remove the No. 1 fuel evaporation tube sub-assembly from the 4 No. 4 fuel tube clamps.
REMOVE CHARCOAL CANISTER OUTLET TUBE SUB-ASSEMBLY
-
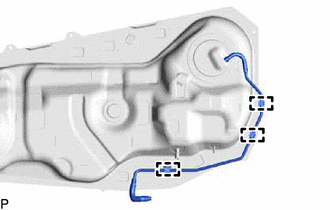
Disconnect the 3 clamps and remove the charcoal canister outlet tube sub-assembly from the 3 No. 4 fuel tube clamps.
-
REMOVE NO. 4 FUEL TUBE CLAMP
-
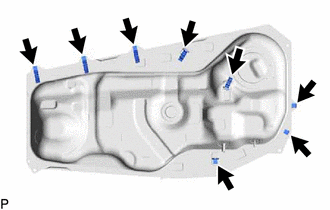
Remove the 8 No. 4 fuel tube clamps from the fuel tank assembly.
-
REMOVE FUEL EVAPORATION TUBE SUB-ASSEMBLY
-
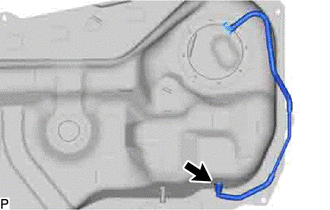
Remove the fuel evaporation tube sub-assembly from the fuel tank assembly.
-