INTERIOR
-
OUTLINE
-
Design Theme
-
Tough and Emotional
-
A tough sense of security as a workspace is provided. A satisfying refinement for a sense of private use is also expressed.
-
-
-
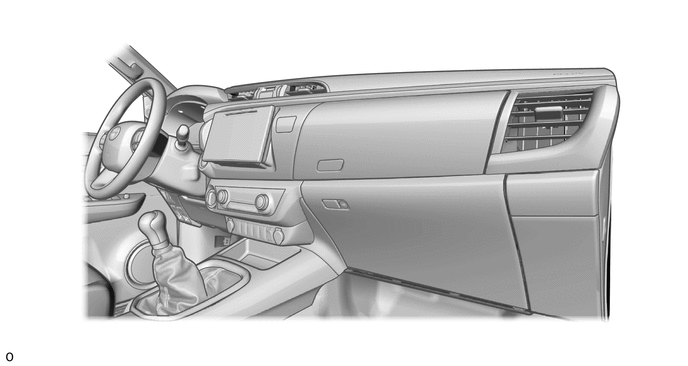
Instrument Panel
-
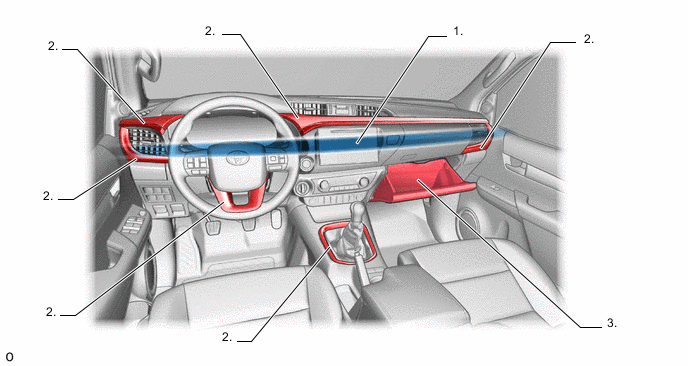
The instrument panel expresses the refined qualities of a passenger car with a private feel combined with a tough sense of security as a workspace.
-
Flowing metallic ornamentation is used above the solid, strong cross-section that expands horizontally from the meter to give a sense of expansiveness and emotionality in the midst of a tough sense of security.
-
The door trim, meter and steering all match the design of the instrument panel by using a solid, tough design and metallic ornamentation. A refined atmosphere, appropriate for the sense of security as a workspace and sense of private use, is produced throughout the entire interior.
-
A large storage compartment with a lid is provided for the front passenger seat side. The harmony of the design and quality of logically laid-out functional components that exist within the simple yet tough overall structure expresses functional beauty.
-
-
Soft skin is used for the dial knob of the instrument panel register assembly center.
Figure 1. Dial Knob (The illustration shows an example)
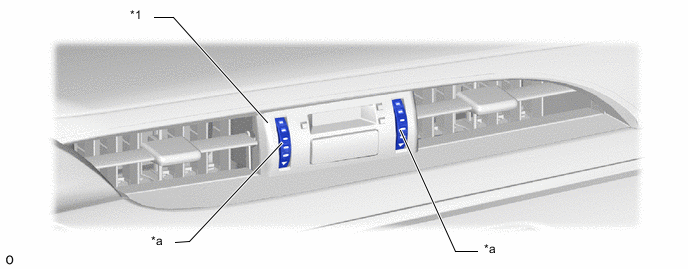
*1 Instrument Panel Register Assembly Center - - *a Dial Knob - -
-
-
Combination Meter Assembly
-
For models with a TFT multi-information display the multi information display is display is surrounded by a strong, solid frame-like shape where harmony is created with the instrument panel and a refined, unified feel is expressed within the toughness. (*a in illustration).
-
The ring ornamentation of the speedometer and tachometer emphasizes strength through the use of thick cross-section. Also, wider graduations are used to further emphasize strength and readability (*b in illustration).
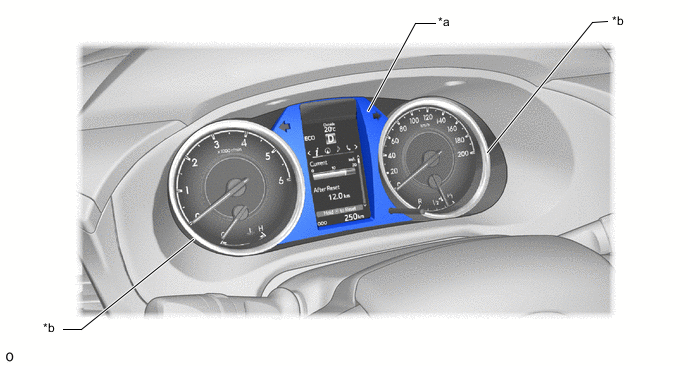
*a Strong Frame Shape *b Ring Ornamentation
-
-
Steering
-
The steering wheel was given a strong structure, consisting of thick metallic ornamentation (Standard, Middle and High Grades) which supports the wide horizontal spoke and solid pad, to express the harmony of the instrument panel.
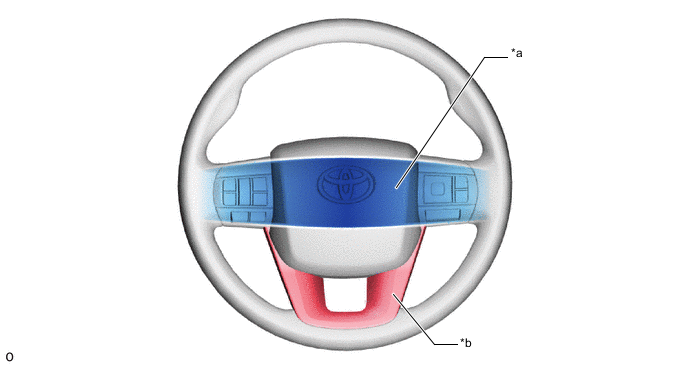
*a Wide Horizontal Spoke *b Metallic Ornamentation
-
-
Console
-
The following types of consoles are provided depending on the model.
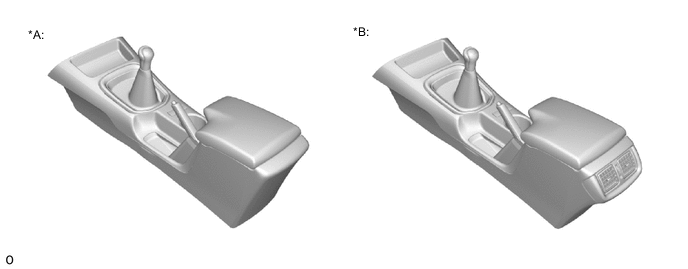
Figure 2. Small Console (Models with Bench Seat)
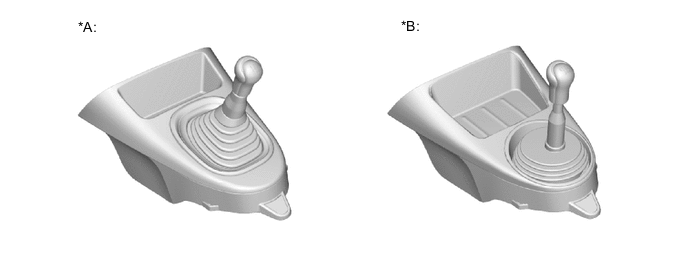
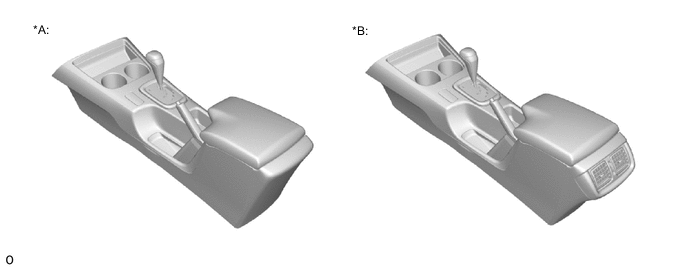
*A Models with 5-speed Manual Transmission *B Models with 6-speed Manual Transmission Figure 3. Small Console
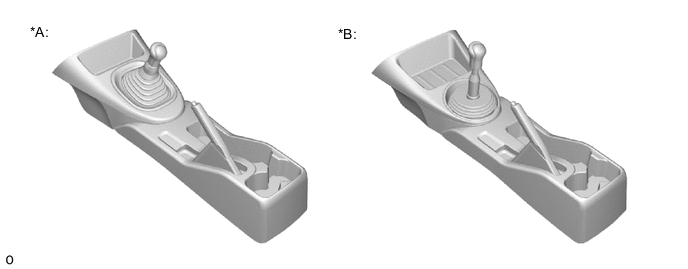
*A Models with 5-speed Manual Transmission *B Models with 6-speed Manual Transmission Figure 4. Large Console (Hard Lid)
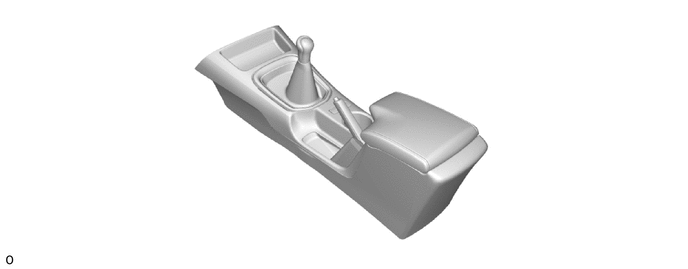
Figure 5. Large Console (Soft Lid / Models with Manual Transmission)
*A Models without Rear Register *B Models with Rear Register Figure 6. Large Console (Soft Lid / Models with Automatic Transmission)
*A Models without Rear Register *B Models with Rear Register -
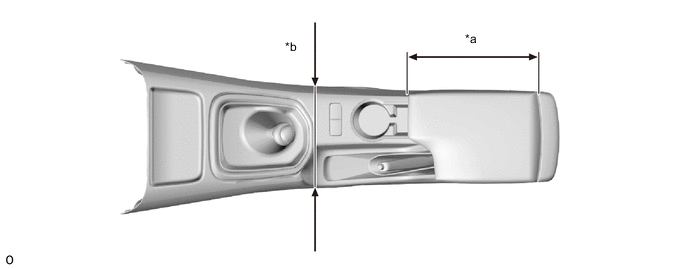
The upper surface of the lid has been made flat and long, enhancing its usability as an armrest (*a in illustration).
-
The console has been widened to produce a sense of thickness (*b in illustration).
Figure 7. Console Lid (The illustration shows an example)
-
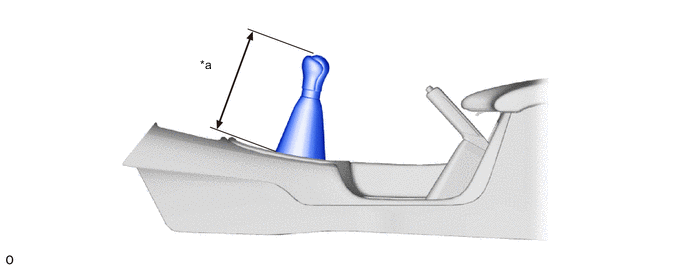
A low shift lever height has been provided to express a sense of private use similar to a passenger car (*a in illustration).
Figure 8. Shift Lever Height (The illustration shows an example)
-
Soft skin is used for the dial knob of the console box register assembly.
Figure 9. Dial Knob (The illustration shows an example)
*1 Console Box Register Assembly - - *a Dial Knob - - -
A soft lid (fabric) with double stitch and a soft lid (synthetic leather) with double stitch with soft touch feeling have been provided for the console compartment door sub-assembly depending on the model.
Figure 10. Console Compartment Door Sub-assembly (The illustration shows an example)
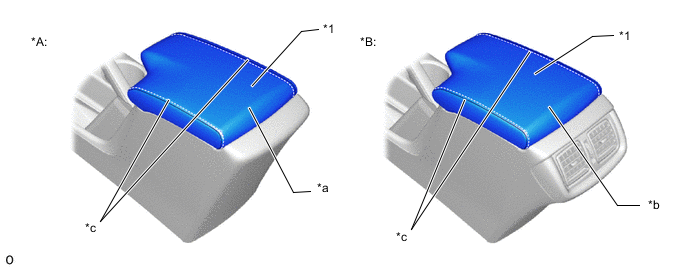
*A Models with Soft Lid (Fabric) *B Models with Soft Lid (Synthetic Leather) *1 Console Compartment Door Sub-assembly - - *a Fabric *b Synthetic Leather *c Real Stitch - -
-
-
Ornamentation/Surface Finish
-
Ornamentation such as that shown in the illustration is used for the instrument panel and console to expand the "truck" image and express the refined qualities of a passenger car which provides a sense of private use.
Figure 11. Instrument Panel (The illustration shows an example)
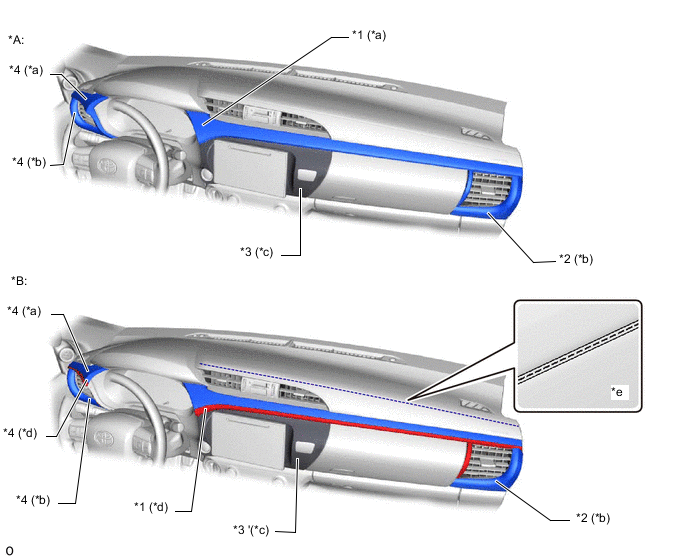
*A Standard Grade or Middle Grade *B High Grade *1 Instrument Cluster Finish Panel Garnish Assembly *2 Instrument Panel Register Assembly No. 2 *3 Instrument Cluster Finish Panel Assembly Center *4 Instrument Panel Register Assembly No. 1 *a Coated with Silver Paint Color *b Colored with Gun Metal Color *c Colored with High Gross Black Color *d Coated with Chromium *e Stitch Line (All Grade) - - Figure 12. Console (The illustration shows an example)

*A High Grade *B Middle Grade and High Grade *1 Manual Shift Knob Bezel (Shifting Hole Cover Assembly) *2 Manual Shift Bezel (Shifting Hole Cover Assembly) *3 Rear Register Bezel (Console Rear End Panel Sub-assembly) - - *a Coated with Chromium *b Coated with Silver Paint Color
-
-
Storage
-
Glove Compartment
-
The opener button (Glove Compartment Door Lock Assembly) has been designed to improve appearance and passenger usability. Moreover, the opener button is positioned near the center of the vehicle for easy access by the driver.
*1 Glove Compartment Door Assembly *2 Glove Compartment Door Lock Assembly
-
-
Upper Box
-
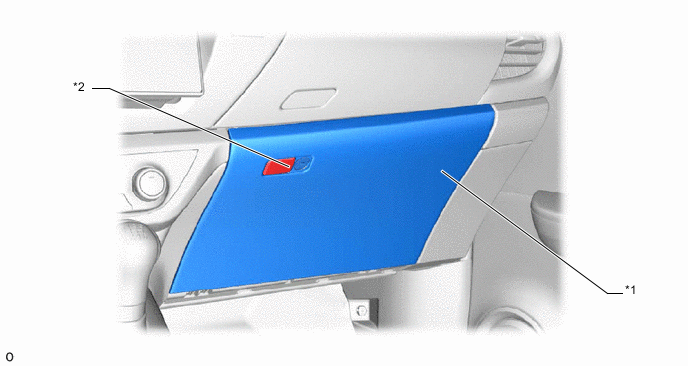
The opener button (instrument panel box door knob: *2 in illustration) has been designed to improve appearance and passenger usability. Moreover, the opener button is positioned near the center of the vehicle for easy access by the driver.
-
The door can be opened a large amount to increase visibility inside the storage compartment.
-
A ventilator function linked with the air conditioning is provided inside the upper box depending on the model. Opening and closing the instrument panel hole cover (*3 in illustration) makes it possible to maintain the temperature of drinks, etc. (however, this is not possible in extremely high or low temperatures).
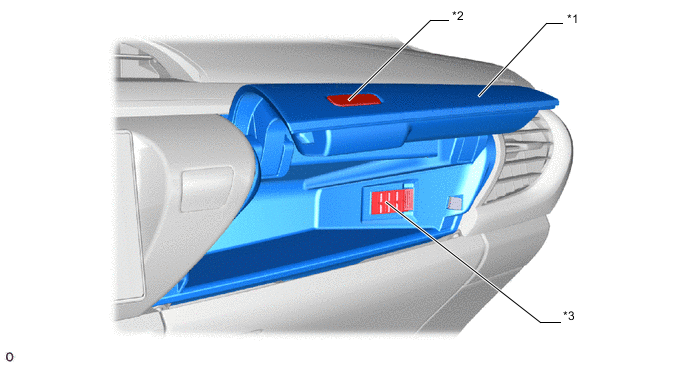
*1 Instrument Panel Box Door Sub-assembly No. 1 *2 Instrument Panel Box Door Knob *3 Instrument Panel Hole Cover - -
-
-
Cup Holder
-
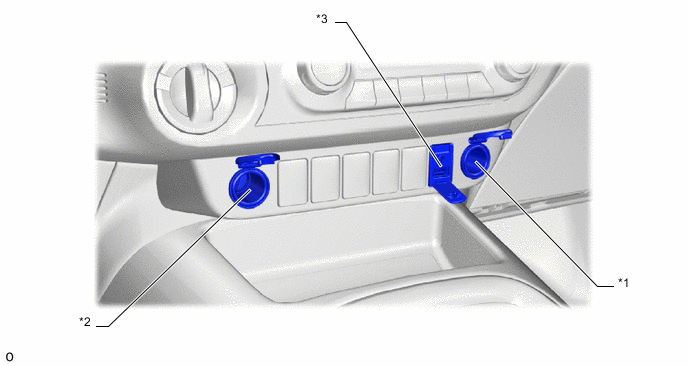
A push type cup holder has been designed to improve appearance and passenger usability.
-
It can be used as an accessory box to store items such as cell phones and key holders.
-
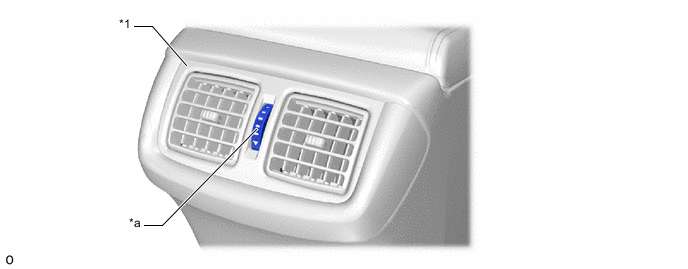
The cup holder has been designed to be in front of the side register to keep drinks cool or hot.
-
Open (*a in illustration): Push and slide the door out to open the cup holder (push manual open).
-
Accessory box (*b in illustration): Push the Instrument Panel Cup Holder Tray (*2 in illustration) to use the accessory box.
-
Close (*c in illustration): Push the door to close the cup holder (push manual close).
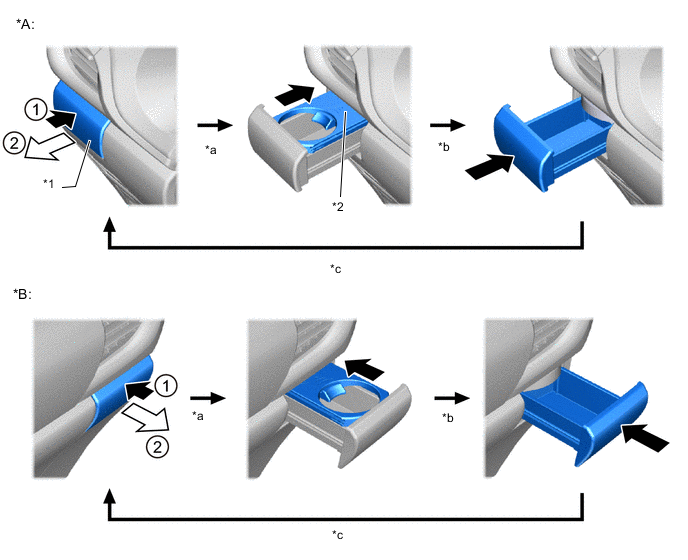
*A Driver Side *B Front Passenger Side *1 Instrument Panel Cup Holder Assembly *2 Instrument Panel Cup Holder Tray *a Open *b Accessory Box *c Close - - 
Push 
Pull
-
-
Console Area Storage
-
The design and positions of the tray, cup holder and accessory box have been optimized to maximize the storage space and utility of each part by considering the comfort and usability of each type of console.
Figure 13. Large Console
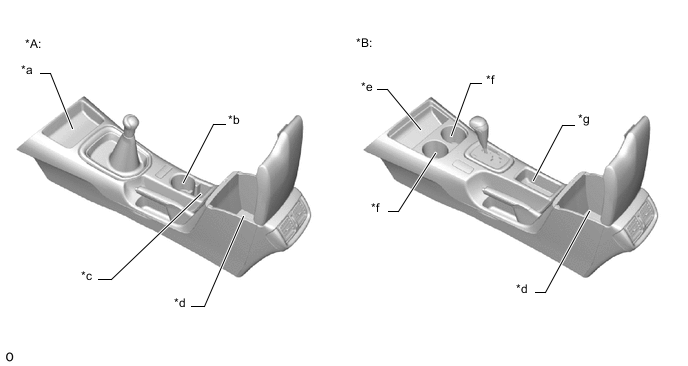
*A Models with Manual Transmission *B Models with Automatic Transmission *a Front Tray Box (Volume: 1.3 L) *b Cup Holder (Volume: 0.3 L) *c Accessory Box (Volume: 0.15 L) *d Console Box (Volume: 5.5 L) *e Front Tray Box (Volume: 0.85 L) *f Cup Holder (Volume: 0.8 L) *g Accessory Box (Volume: 0.45 L) - - Figure 14. Small Console (Models with Bench Seat)

*A Models with 5-speed Manual Transmission *B Models with 6-speed Manual Transmission *a Front Tray Box (Volume: 0.9 L) *b Front Tray Box (Volume: 1.5 L) Figure 15. Small Console
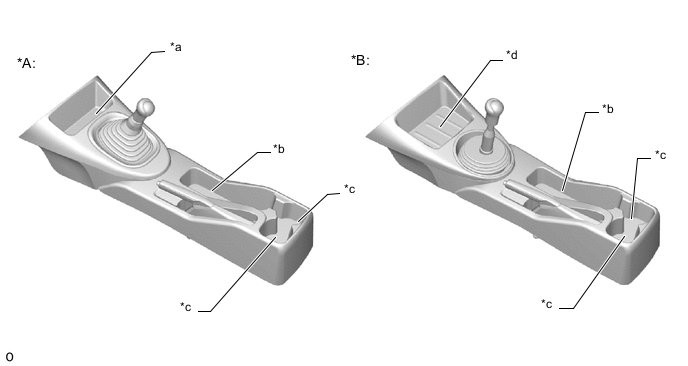
*A Models with 5-speed Manual Transmission *B Models with 6-speed Manual Transmission *a Front Tray Box (Volume: 0.9 L) *b Accessory Box (Volume: 1.75 L) *c Cup Holder (Volume: 0.6 L) *d Front Tray Box (Volume: 1.5 L)
-
-
-
Equipment
-
An audio mini-jack (AUX/USB) has been positioned in the instrument panel console close to the console tray, where small items can be placed. As a result, portable music devices can be comfortably used.
Figure 16. Audio Mini-jack (The illustration shows an example)
*1 DC 12 V Socket (Models with 2 Sockets) *2 DC 12 V Socket *3 AUX/USB Port - - -
Depending on the model, an accessory socket AC 220 V has been used inside the console box, where cell phones or cameras can be placed while charging.
Figure 17. Accessory Socket (The illustration shows an example)
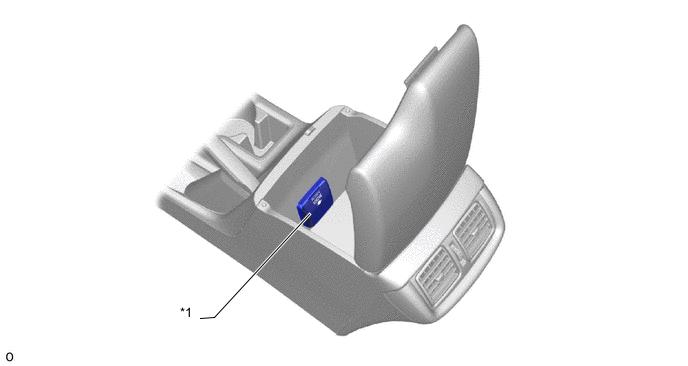
*1 Accessory Socket - -
-
-
Sound absorbing and vibration damping material
-
The placement of sound absorbing materials on the back surface of the instrument panel and the back of the panel parts and the use of urethane foam on the front end of the instrument panel suppress the penetration of engine noise from the cowl portion and enhance quietness.
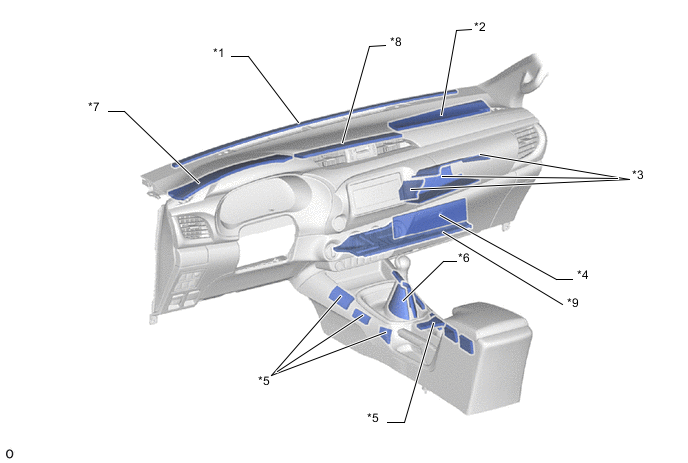
*1 Instrument Panel Cushion No. 5 *2 Instrument Panel Cushion No. 4 *3 Felt (Instrument Panel Box Door Sub-assembly No. 1) *4 Glove Compartment Door Silencer *5 Console Panel Sub-assembly Upper *6 Felt (Shifting Hole Cover Assembly) *7 Instrument Panel Cushion No. 2 *8 Instrument Panel Cushion No. 3 *9 Instrument Panel Under Cover Sub-assembly No. 2 - - -
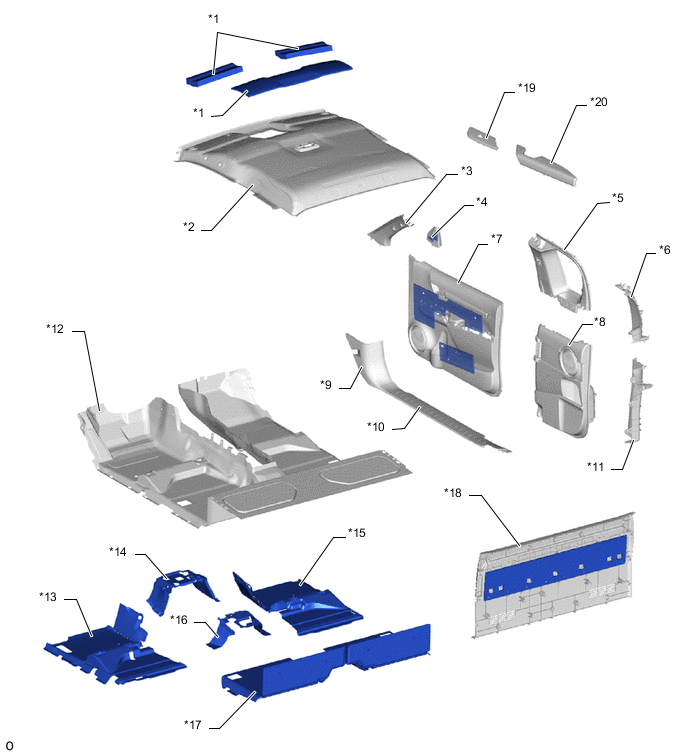
All the locations of acoustic insulating materials (sound insulation and absorption materials) in the cabin and luggage space have been optimized, thus creating a quiet drive.
Figure 18. Double Cab
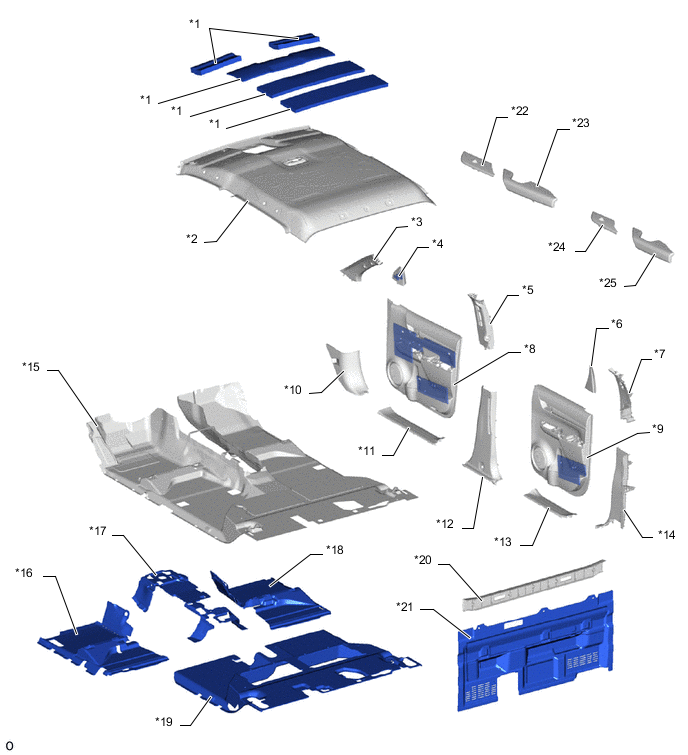
*1 Roof Silencer Pad No. 2 *2 Roof Headlining *3 Front Pillar Garnish *4 Front Door Lower Frame Bracket Garnish *5 Center Pillar Garnish *6 Rear Door Frame Garnish *7 Quarter Inside Trim Board *8 Front Door Trim Board *9 Rear Door Trim Board *10 Cowl Side Trim Board *11 Front Door Scuff Plate *12 Center Pillar Garnish Lower *13 Rear Door Scuff Plate *14 Quarter Trim Panel Lower *15 Floor Carpet Assembly Front *16 Front Floor Silencer No. 4 *17 Front Floor Silencer Sheet CTR FR *18 Front Floor Silencer No. 3 *19 Front Floor Silencer No. 5 *20 Back Panel Garnish Upper *21 Back Panel Trim *22 Front Armrest Base Panel Upper *23 Front Door Armrest *24 Rear Door Armrest Base Panel Upper *25 Rear Door Armrest - - Figure 19. Smart Cab
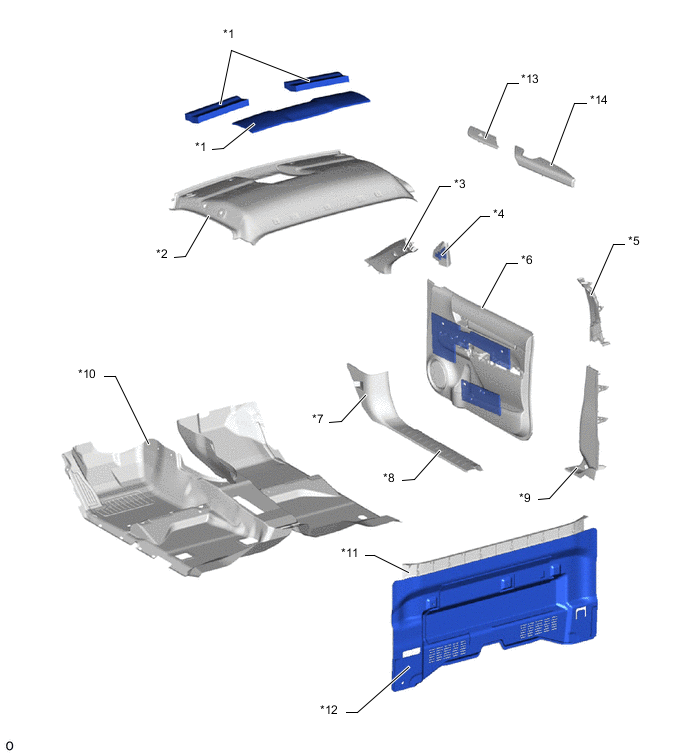
*1 Roof Silencer Pad No. 2 *2 Roof Headlining Assembly *3 Front Pillar Garnish *4 Front Door Lower Frame Bracket Garnish *5 Rear Door Frame Garnish *6 Quarter Inside Trim Board *7 Front Door Trim Board Sub-assembly *8 Rear Door Trim Board Sub-assembly *9 Cowl Side Trim Board *10 Front Door Scuff Plate *11 Quarter Trim Panel Lower *12 Floor Carpet Assembly Front *13 Front Floor Silencer No. 4 *14 Front Floor Silencer Sheet *15 Front Floor Silencer No. 3 *16 Front Floor Silencer Sheet Center *17 Front Floor Silencer No. 5 *18 Back Panel Trim *19 Front Armrest Base Panel Upper *20 Front Door Armrest Figure 20. Single Cab
*1 Roof Silencer Pad No. 2 *2 Roof Headlining Assembly *3 Front Pillar Garnish *4 Front Door Lower Frame Bracket Garnish *5 Quarter Inside Trim Board *6 Front Door Trim Board Sub-assembly *7 Cowl Side Trim Board *8 Front Door Scuff Plate *9 Quarter Trim Panel Lower *10 Floor Carpet Assembly *11 Back Panel Garnish Upper *12 Back Panel Trim *13 Front Armrest Base Panel Upper *14 Front Door Armrest
-
-