REAR COMBINATION LIGHT ASSEMBLY(except Sedan) REMOVAL
CAUTION / NOTICE / HINT
Use the same procedure for the RH side and LH side.
The following procedure is for the LH side.
PROCEDURE
REMOVE DECK BOARD ASSEMBLY (w/ Deck Board)
REMOVE REAR FLOOR MAT ASSEMBLY
REMOVE REAR DECK FLOOR BOX (w/ Deck Floor Box)
REMOVE DECK FLOOR BOX LH (w/ Deck Floor Box)
REMOVE DECK FLOOR BOX RH (w/ Deck Floor Box)
for RH Side:
REMOVE PACKAGE TRAY TRIM PANEL ASSEMBLY (w/ Package Tray Trim)
REMOVE REAR DECK TRIM COVER
REMOVE NO. 2 DECK SIDE TRIM HOOK
REMOVE LOWER DECK TRIM SIDE BOARD (w/ Deck Board)
SEPARATE DECK TRIM SIDE PANEL ASSEMBLY LH (for LH Side)
-
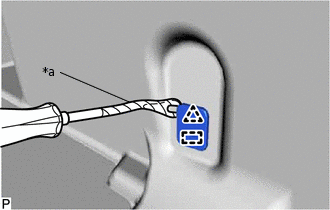
*a
Protective Tape
for Clip Type:
Using a clip remover, disengage the clip and guide to remove the deck trim service hole cover.
Tip:Tape the clip remover tip before use.
for Hook Type:
-
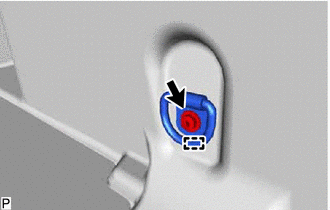
Remove the bolt.
Disengage the guide to remove the luggage hold belt striker assembly.
-
-
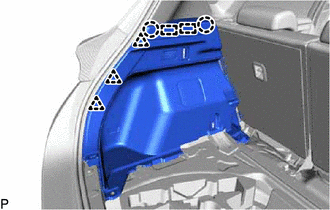
Disengage the 2 claws, 3 clips and 2 guides.
Disconnect the connector to separate the deck trim side panel assembly LH.
-
SEPARATE DECK TRIM SIDE PANEL ASSEMBLY RH (for RH Side)
Tip:Use the same procedure as for the LH side.
REMOVE REAR COMBINATION LIGHT ASSEMBLY
-
Disconnect the connector.
-
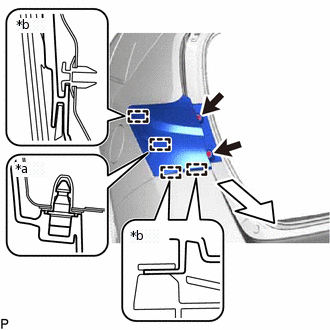
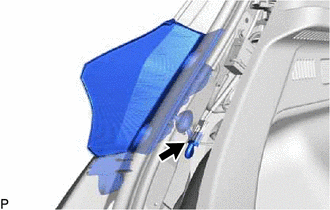
*a
Pin
*b
Guide
Remove the 2 screws.
Pull the rear combination light assembly toward the rear of the vehicle as shown in the illustration to disengage the pin and 3 guides and separate the rear combination light assembly.
Note:To prevent the rear combination light assembly from falling when disengaging the pin and guides, make sure to hold the rear combination light assembly.
-
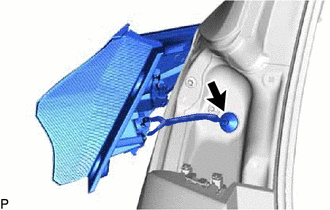
Disengage the grommet to remove the rear combination light assembly.
-