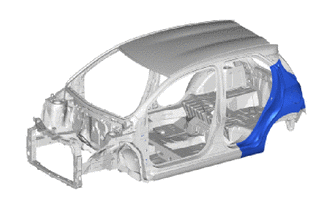
QUARTER PANEL(for 5 Door) CUT AND JOIN REPLACEMENT SECTIONS
Quarter Panel Replacement Using Adhesive
Cut the wheel arch portion.
Heat the quarter panel adhesive area and remove the quarter panel.
Tip:Using an industrial heater gun or gas burner, heat the quarter panel to 110 to 140°C. Make sure the quarter panel does not warp.
Clean off any adhesive that remains on the vehicle.
Tip:Using an industrial heater gun or gas burner, heat the adhesive to 110 to 140°C.
Using a scraper, scrape away the adhesive.
If adhesive remains, the strength of any subsequently applied adhesive will be weak.
Using a disc sander or belt sander, scuff and sand any adhesive that remains on the vehicle.
Tip:Scuff at a width of approximately 10 mm (0.39 in.) over the previous adhesive coating.
Apply adhesive to the exposed metal areas on the vehicle. Using a spatula, spread the adhesive evenly.
Apply adhesive to the vehicle again.
Using #60-120 grit sandpaper, scuff the adhesive application area on the new quarter panel.
Apply adhesive to the new quarter panel. Using a spatula, spread the adhesive evenly.
Using a vise grip or the palms of your hands, press the quarter panel so that the thickness of the adhesive is even.
Complete installation the new quarter panel.
Dry the adhesive areas of the new quarter panel.
Tip:With dryer or equivalent (60°C): 60 minutes (complete hardening: 90 minutes)
Ambient temperature (25°C): 12 hours (complete hardening: 24 hours)
REMOVAL
Symbol Meaning

Remove Weld Points

Cut and Join Location

Cut Location for Supply Parts
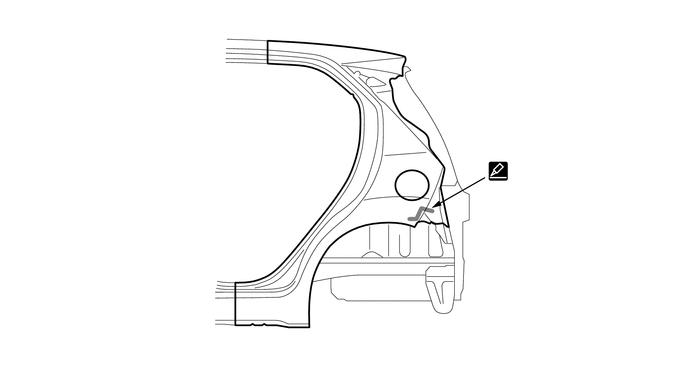
Roughly cut open the panel so that the adhesive can be reached. Cut through the adhesive with a cut chisel to remove the panel.
Tip:In cases where the adhesive cannot be removed with a cut chisel, heat the adhesive with an industrial heater gun or gas burner taking care not to cause panel deformation by overheating.
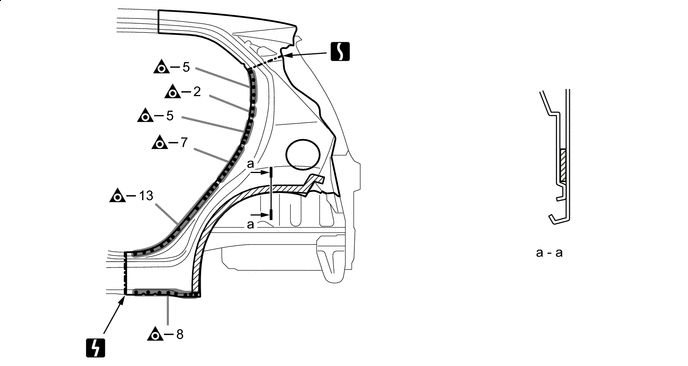

Adhesive
-
-
*a
30 mm (1.18 in.)
-
-
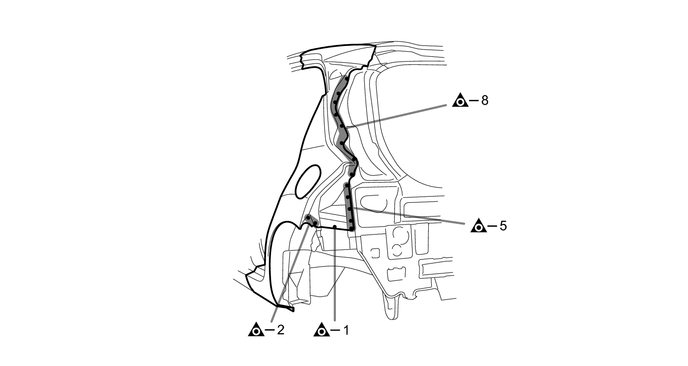
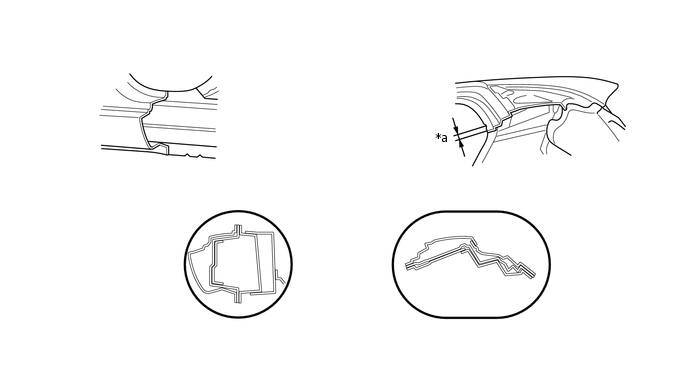
INSTALLATION
Symbol Meaning

Spot Weld

Plug Weld
Fillet Weld

Butt Weld

Body Sealer
Inspect the fitting of the related parts around the new parts before welding. This affects the appearance of the finish.
Temporarily install the new parts and measure each part of the new parts in accordance with the body dimension diagram. (See the body dimensions)
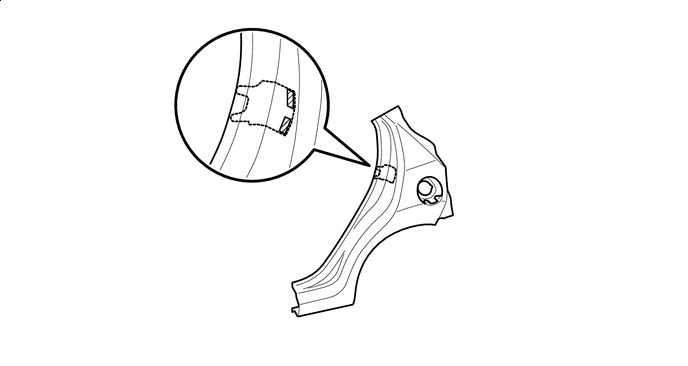
If the entire supply part is not needed, remove the part of the supply part that is needed.
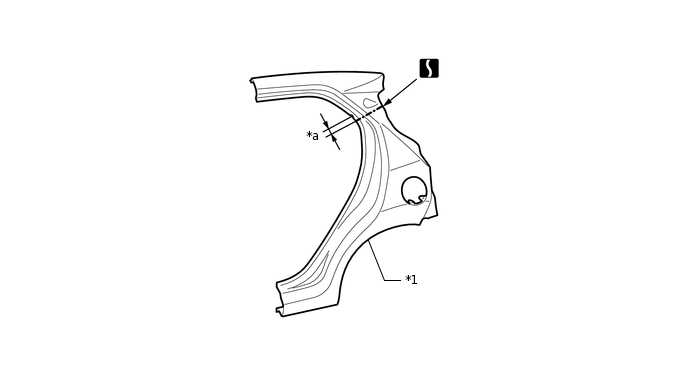
*1
QUARTER PANEL
-
-
*a
30 mm (1.18 in.)
-
-
Before installing a new part, apply body sealer.
Tip:Apply body sealer in an even, continuous bead.
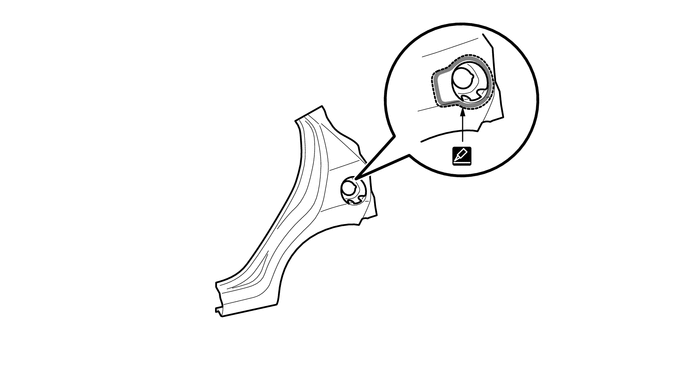
Apply adhesive (3MTM AutomixTM Panel Bonding Adhesive #8115).
Tip:Apply enough adhesive to the panels.
Adhesive
-
-
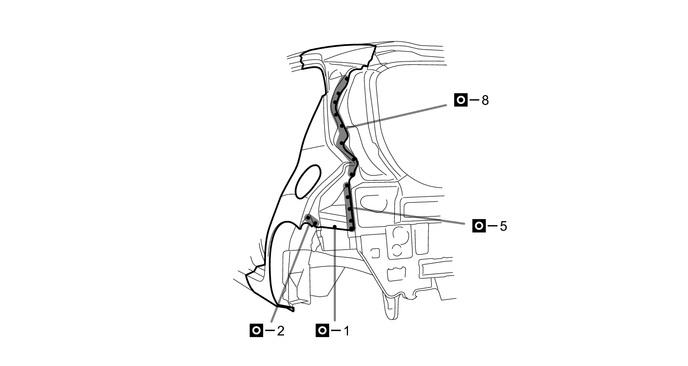
Before temporarily installing the new parts, weld the quarter panel, fuel inlet box sub-assembly and quarter lock pillar reinforcement sub-assembly with the standard number of welding points.
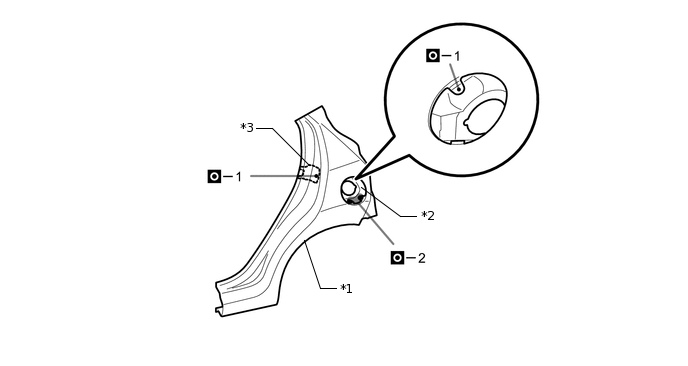
*1
QUARTER PANEL
*2
FUEL INLET BOX SUB-ASSEMBLY
*3
QUARTER LOCK PILLAR REINFORCEMENT SUB-ASSEMBLY
-
-
Before installing a new part, apply body sealer.
Tip:Apply body sealer in an even, continuous bead.
Apply adhesive (3MTM AutomixTM Panel Bonding Adhesive #8115).
Tip:Apply enough adhesive to the panels.
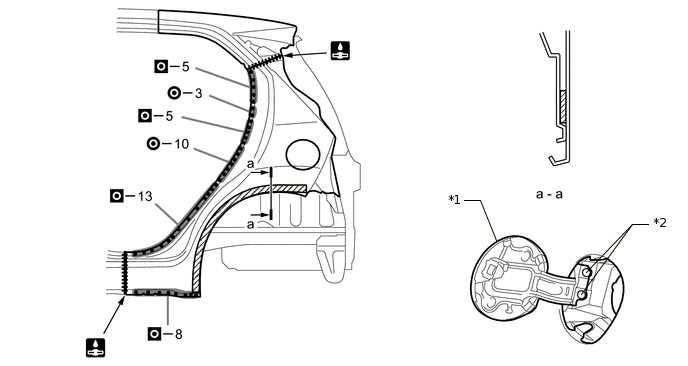
*1
FUEL FILLER OPENING LID ASSEMBLY
*2
RIVETS
Adhesive
-
-
After welding, apply the foamed sealing material to the corresponding parts. (See the painting/coating)
After welding, apply body sealer to the corresponding parts. (See the painting/coating)
After applying the top coat, apply anti-rust agent to the internal panel portion of the closed section structural weld points.