CANVAS TOP ROOF HOUSING DISASSEMBLY
PROCEDURE
REMOVE TARPAULIN RAIL CABLE LH
-
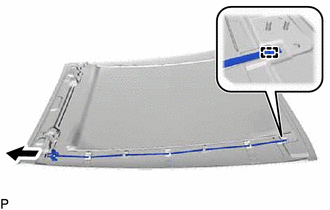
Disengage the hook.
Through the tarpaulin rail cable LH of the front sliding roof shoe LH to remove it as shown in the illustration.
-
REMOVE TARPAULIN RAIL CABLE RH
Tip:Use the same procedure as for the LH side.
REMOVE FRONT SLIDING ROOF SHOE LH
Disengage the 5 claws and disconnect the 2 sledge bows and 3 fixation lift up springs from the 5 No. 4 tarpaulin bow sets as shown in the illustration.
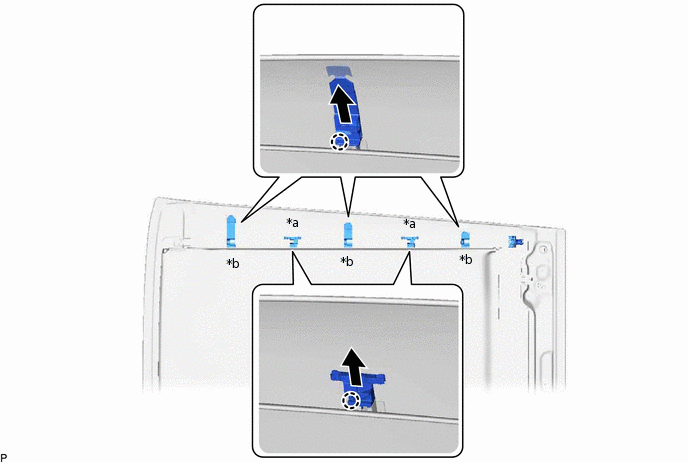
*a
Sledge Bow
*b
Fixation Lift Up Spring
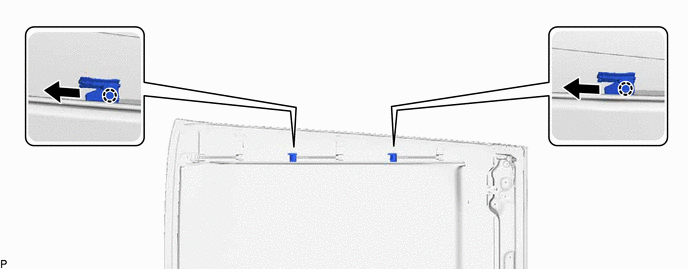
Disengage the 2 claws and disconnect the 2 sledge bows as shown in the illustration.
Disengage the 3 claws and disconnect the 3 fixation lift up springs as shown in the illustration.
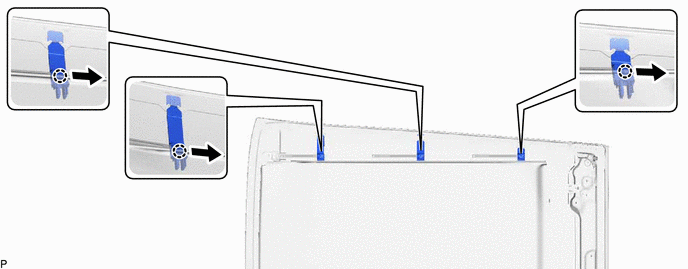
Disengage the 6 hooks and disconnect the 3 fixation lift up springs as shown in the illustration.
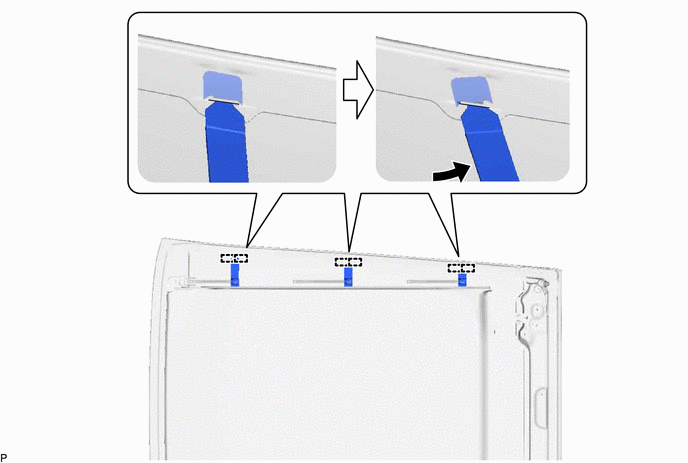
Remove the front sliding roof shoe LH.
REMOVE FRONT SLIDING ROOF SHOE RH
Tip:Use the same procedure as for the LH side.
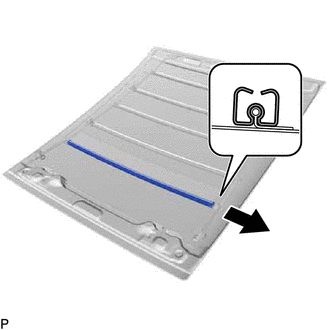
REMOVE SLIDING ROOF HEADLINING SUB-ASSEMBLY
-
Remove the sliding roof headlining sub-assembly as shown in the illustration.
-
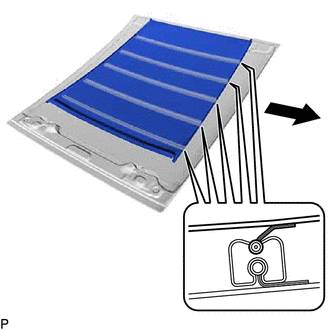
REMOVE NO. 4 TARPAULIN BOW SET
-
Remove the No. 4 tarpaulin bow set from the tarpaulin assembly as shown in the illustration.
Tip:Use the same procedure for other 4 No. 4 tarpaulin bow sets.
-
REMOVE NO. 2 SUN ROOF OPENING TRIM MOULDING
-
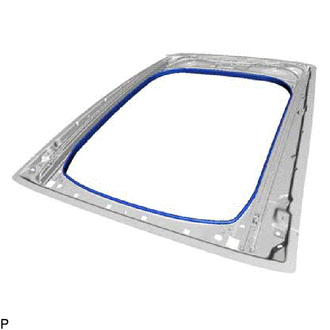
Remove the No. 2 sun roof opening trim moulding from the sliding roof housing sub-assembly.
-