HEADLIGHT CLEANER ACTUATOR INSTALLATION
PROCEDURE
-
INSTALL HEADLIGHT WASHER ACTUATOR SUB-ASSEMBLY LH
-
Attach the 2 claws to install the headlight washer actuator sub-assembly.
-
Install the 2 screws.
- Torque:
- 5.0 N*m { 51 kgf*cm, 44 in.*lbf }
-
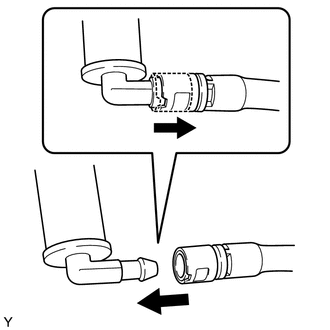
Connect the headlight washer hose and lock the headlight washer hose as shown in the illustration.
Note
Check that the headlight washer hose is securely connected by pulling it.
-
-
INSTALL HEADLIGHT WASHER ACTUATOR SUB-ASSEMBLY RH
Tech Tips
Use the same procedure described for the LH side.
-
INSTALL HEADLIGHT CLEANER WASHER NOZZLE COVER (for LH Side)
-
INSTALL HEADLIGHT CLEANER WASHER NOZZLE COVER (for RH Side)
Tech Tips
Use the same procedure described for the LH side.
-
FILL UP WASHER JAR WITH WASHER FLUID
-
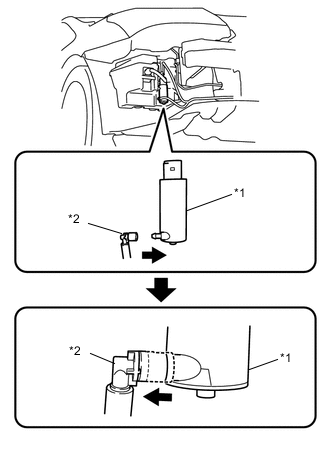
Text in Illustration *1 Headlight Cleaner Motor and Pump Assembly *2 Headlight Cleaner Hose Connect the headlight cleaner hose to the headlight cleaner motor and pump assembly and lock the headlight cleaner hose as shown in the illustration.
Note
Check that the headlight washer hose is securely connected by pulling it.
-
Fill the washer jar with washer fluid.
-
-
INSTALL FRONT BUMPER COVER
-
INSTALL RADIATOR SUPPORT OPENING COVER
-
PREPARATION FOR FOG LIGHT AIMING (w/ Fog Light)
-
INSPECT FOG LIGHT AIMING (w/ Fog Light)
-
ADJUST FOG LIGHT AIMING (w/ Fog Light)