HEATER ASSEMBLY REMOVAL
PROCEDURE
REMOVE WINDSHIELD WIPER MOTOR AND LINK ASSEMBLY
REMOVE WATER GUARD PLATE LH
for Sedan:Click hereClick hereClick hereClick here
for Hatchback, Wagon:Click hereClick hereClick hereClick here
REMOVE NO. 2 HEATER AIR DUCT SPLASH SHIELD SEAL
for Sedan:Click hereClick hereClick hereClick here
for Hatchback, Wagon:Click hereClick hereClick hereClick here
REMOVE OUTER COWL TOP PANEL
for Sedan:Click hereClick hereClick hereClick here
for Hatchback, Wagon:Click hereClick hereClick hereClick here
REMOVE FRONT FLOOR COVER RH
-
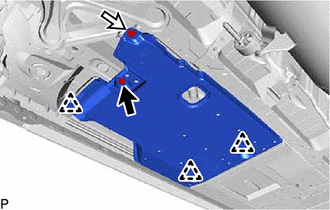

Bolt

Clip
Remove the bolt and clip.
Disengage the 3 clips to remove the front floor cover RH.
-
REMOVE AIR DUCT
-
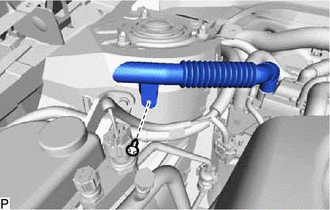
Remove the clip and air duct.
-
REMOVE NO. 1 EXHAUST PIPE SUB-ASSEMBLY
-
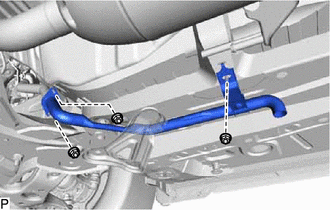
Remove the 3 nuts and No. 1 exhaust pipe sub-assembly.
-
REMOVE NO. 2 HEAT EXCHANGER UNIT GASKET
Remove the No. 2 heat exchanger unit gasket.
REMOVE HEATER AND ACCESSORY ASSEMBLY
-
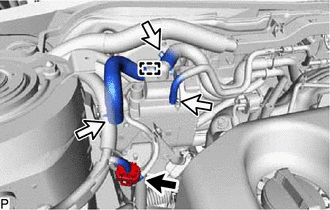
Disconnect the connector.
Using pliers, grip the claws of the clips and slide the 3 clips to disconnect each hose.
Disengage the clamp.
-
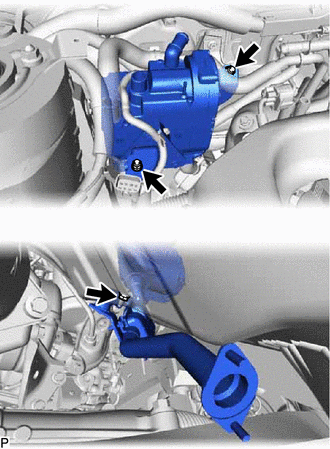
Remove the 3 nuts and heater and accessory assembly.
-