HEADLIGHT ASSEMBLY DISASSEMBLY
PROCEDURE
REMOVE NO. 1 HEADLIGHT BULB (for Halogen Headlight)
-
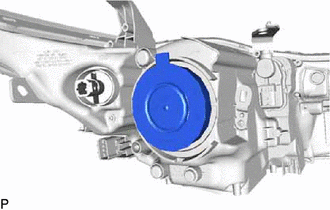
Remove the cover.
-
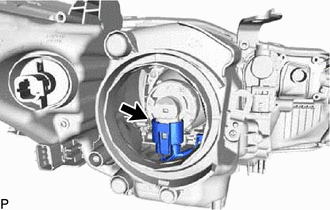
Disconnect the connector.
-
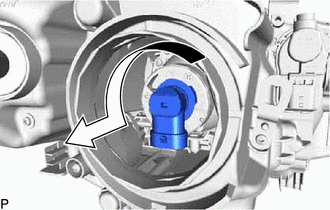
Turn the No. 1 headlight bulb in the direction indicated by the arrow in the illustration to remove it.
Note:Do not touch the bulb glass.
-
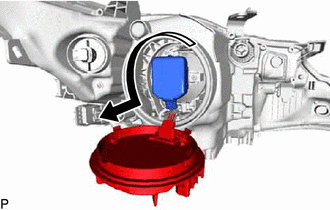
REMOVE HEADLIGHT LIGHT CONTROL ECU SUB-ASSEMBLY (for HID Headlight)
-
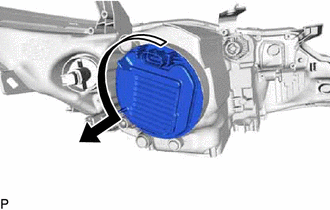
Turn the headlight light control ECU sub-assembly in the direction indicated by the arrow in the illustration to separate it.
Note:Do not apply excessive force using a tool.
Do not damage the O-ring or allow it to become contaminated with foreign matter. If the O-ring is damaged or contaminated, water may get into the headlight assembly, resulting in a malfunction of the headlight light control ECU sub-assembly.
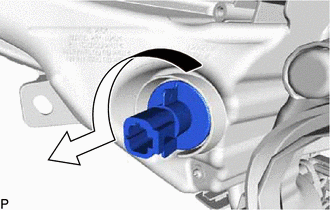
-
Turn the socket of the headlight light control ECU sub-assembly in the direction indicated by the arrow in the illustration to remove it.
Note:Do not pull the headlight light control ECU sub-assembly with the socket connected.
-
REMOVE DISCHARGE HEADLIGHT BULB (for HID Headlight)
-
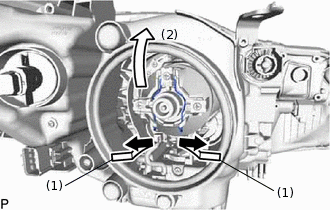
Release the set spring as shown in the illustration and remove the discharge headlight bulb.
Note:Do not touch the bulb glass.
-
REMOVE FRONT TURN SIGNAL LIGHT BULB
-
Turn the front turn signal light socket with the front turn signal light bulb in the direction indicated by the arrow in the illustration, and remove them as a unit.
Remove the front turn signal light bulb from the front turn signal light socket.
-