REAR SEAT ASSEMBLY(for RH Side) REMOVAL
CAUTION / NOTICE / HINT
Wear protective gloves. Sharp areas on the seatback frame, seat cushion frame and reclining adjuster may injure your hands.
PROCEDURE
REMOVE REAR SEAT FRONT BRACKET COVER RH
-
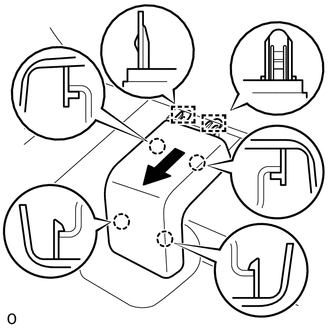
Using a screwdriver, detach the 4 claws.
Tip:Tape the screwdriver tip before use.
Detach the 2 guides and remove the rear seat front bracket cover RH in the direction shown by the arrow in the illustration.
-
REMOVE REAR SEAT NO. 2 LEG SIDE COVER
-
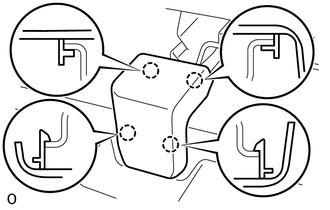
Using a screwdriver, detach the 4 claws to remove the rear seat No. 2 leg side cover.
Tip:Tape the screwdriver tip before use.
-
REMOVE REAR SEAT ASSEMBLY RH
-
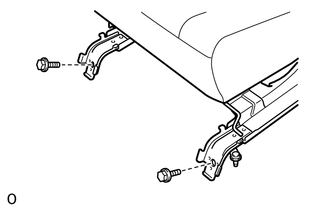
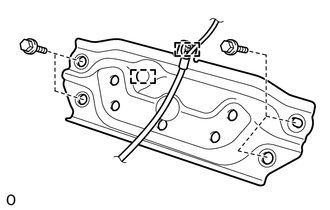
Remove the 2 bolts on the front side of the seat.
-
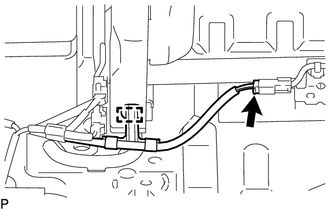
w/ Seat Heater System:
Disconnect the connector.
Detach the wire harness clamp.
-

*1
Rubber Band
w/ Seat Belt Warning System:
Disconnect the 2 connectors.
Pass the rear seat center lap type belt assembly RH through the rubber band of the separate type rear seat cushion cover.
Remove the 3 bolts on the rear side of the seat.
Fully tilt the seatback forward. Then remove the seat.
Note:Be careful not to damage the vehicle body.
-
REMOVE SEAT LEG BRACKET
Detach the clamp and remove the 4 bolts.
Detach the guide to remove the seat leg bracket.