FRONT DOOR BELT MOULDING REMOVAL
CAUTION / NOTICE / HINT
Use the same procedure for the RH and LH sides.
The procedure described below is for the LH side.
PROCEDURE
REMOVE OUTER REAR VIEW MIRROR ASSEMBLY WITH COVER
REMOVE FRONT DOOR SERVICE HOLE COVER
REMOVE FRONT DOOR GLASS SUB-ASSEMBLY
REMOVE FRONT DOOR BELT MOULDING ASSEMBLY
Resin Type:
-
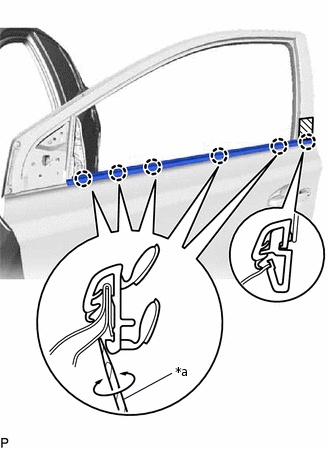
*a
Protective Tape

Protective Tape
Put protective tape around the front door belt moulding assembly.
Using a screwdriver with its tip wrapped with protective tape, disengage the 6 claws and remove the front door belt moulding assembly as shown in the illustration.
Tip:Tape the screwdriver tip before use.
-
Plating Type:
-
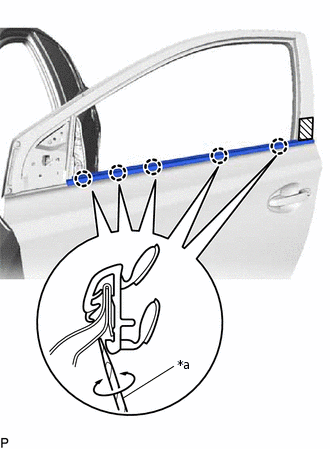
*a
Protective Tape
Protective Tape
Put protective tape around the front door belt moulding assembly.
Using a screwdriver with its tip wrapped with protective tape, disengage the 5 claws and remove the front door belt moulding assembly as shown in the illustration.
Tip:Tape the screwdriver tip before use.
-