REAR CRANKSHAFT OIL SEAL REMOVAL

CAUTION / NOTICE / HINT
The necessary procedures (adjustment, calibration, initialization, or registration) that must be performed after parts are removed, installed, or replaced during the rear engine oil seal removal/installation are shown below.
| Replacement Part or Procedure | Necessary Procedures | Effects/Inoperative when not Performed | Link |
|---|---|---|---|
| Gas leaks from exhaust system | Inspection after repair | Poor idle, engine start, etc. |
PROCEDURE
-
REMOVE MANUAL TRANSMISSION UNIT ASSEMBLY
-
REMOVE CLUTCH COVER ASSEMBLY
-
REMOVE CLUTCH DISC ASSEMBLY
-
REMOVE FLYWHEEL SUB-ASSEMBLY
-
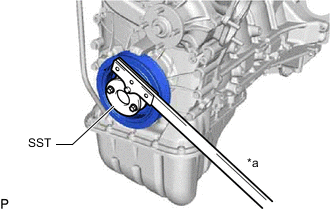
*a Hold Using SST, hold the crankshaft.
- SST
- 09213-54015 ( 91651-60855 )
- 09330-00021
-
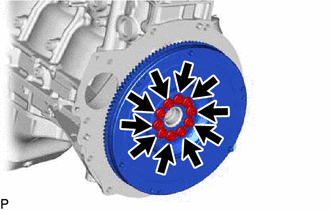
Remove the 10 bolts and flywheel sub-assembly.
-
-
REMOVE REAR ENGINE OIL SEAL
-
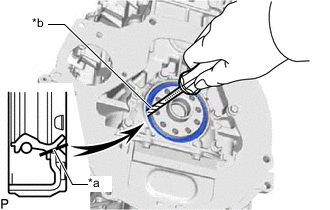
*a Cut Position *b Protective Tape Using a knife, cut off the lip of the rear engine oil seal.
-
Using a screwdriver, pry out the rear engine oil seal.
Note
-
Do not damage the surface of the rear engine oil seal press fit hole or the crankshaft.
-
After removing the rear engine oil seal, check the crankshaft for damage. If damaged, smooth the surface with 400-grit sandpaper.
Tech Tips
Tape the screwdriver tip before use.
-
-