HEATER ASSEMBLY INSTALLATION
PROCEDURE
-
INSTALL HEATER WITH EXHAUST PIPE ASSEMBLY
-
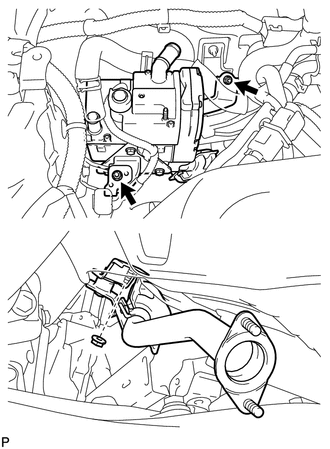
Install the heater with exhaust pipe assembly with the 3 nuts.
- Torque:
- 7.5 N*m { 77 kgf*cm, 66 in.*lbf }
-
Attach the clamp.
-
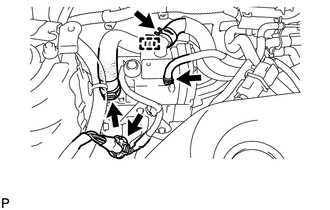
Install the 3 clips.
-
Connect the connector.
-
-
INSTALL NO. 1 EXHAUST PIPE SUB-ASSEMBLY
-
Install a new gasket to the No. 2 exhaust pipe sub-assembly.
-
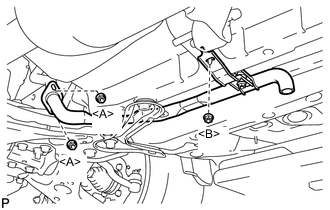
Install the No. 1 exhaust pipe sub-assembly with the 2 nuts labeled <A>.
- Torque:
- 7.5 N*m { 77 kgf*cm, 66 in.*lbf }
-
Install the nut labeled <B>.
- Torque:
- 7.5 N*m { 77 kgf*cm, 66 in.*lbf }
-
-
INSTALL AIR DUCT
-
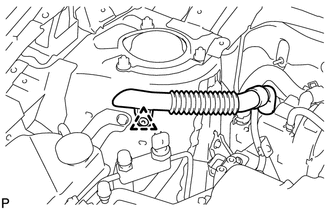
Install the air duct with the clip.
-
-
INSTALL OUTER COWL TOP PANEL SUB-ASSEMBLY
-
INSTALL DIFFERENTIAL PRESSURE SENSOR ASSEMBLY (for DPF)
-
INSTALL WINDSHIELD WIPER MOTOR AND LINK ASSEMBLY
-
Install the windshield wiper motor and link assembly Click here.
-
-
INSTALL NO. 1 ENGINE COVER