FUEL INJECTOR INSTALLATION
PROCEDURE
INSTALL FUEL INJECTOR ASSEMBLY
-
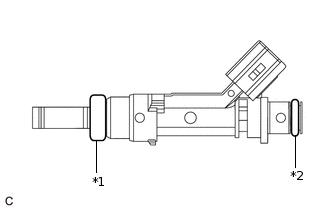
*1
Injector Vibration Insulator
*2
O-ring
Apply a light coat of gasoline or spindle oil to new injector vibration insulators and O-rings, and then install one onto each fuel injector assembly.
Apply a light coat of gasoline or spindle oil to the contact surfaces of the O-ring of the fuel injector assembly.
-
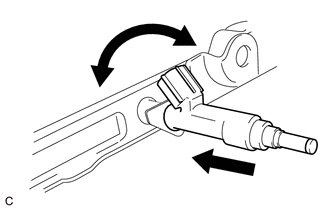
While turning the fuel injector assembly left and right, install it onto the fuel delivery pipe.
Note:Do not damage the fuel injector assembly or O-ring.
Do not twist the O-ring.
After installing each fuel injector assembly, check that it turns smoothly. If not, replace the O-ring with a new one.
-
INSTALL FUEL DELIVERY SPACER
-

*a
Fuel Delivery Pipe Side
*b
Cylinder Head Side
Install the 2 fuel delivery spacers onto the cylinder head.
Note:Install the fuel delivery spacers in the correct direction.
-
INSTALL FUEL DELIVERY PIPE
Install the fuel delivery pipe with the 4 fuel injector assemblies and install the 2 bolts.
28 N*m
286 kgf*cm
21 ft.*lbf
Note:Do not drop the fuel injector assemblies when installing the fuel delivery pipe.
After installing the fuel delivery pipe, check that the fuel injector assemblies turn smoothly.
CONNECT FUEL TUBE SUB-ASSEMBLY
Connect the fuel tube sub-assembly connector to the fuel delivery pipe until a "click" sound is heard.
Note:Check that there are no scratches or foreign matter on the contact surfaces of the fuel tube connector and fuel delivery pipe before performing this work.
After connecting the fuel lines, check that the fuel tube connector and fuel delivery pipe are securely connected by pulling on them.
Install the No. 2 fuel pump clamp.
INSTALL AIR CLEANER CAP SUB-ASSEMBLY
CONNECT CABLE TO NEGATIVE BATTERY TERMINAL
Note:When disconnecting the cable, some systems need to be initialized after the cable is reconnected.
Click hereClick hereClick hereClick hereClick hereClick here
INSPECT FOR FUEL LEAK
INSTALL NO. 1 ENGINE COVER