FRONT CONSOLE BOX INSTALLATION
CAUTION / NOTICE / HINT
Use the same procedure for RHD and LHD vehicles..
The procedure listed below is for LHD vehicles.
A bolt without a torque specification is shown in the standard bolt chart.
PROCEDURE
INSTALL REAR CONSOLE BOX SUB-ASSEMBLY
Install the rear console box sub-assembly with the 4 bolts and 2 screws.
INSTALL LOWER CENTER INSTRUMENT PANEL FINISH PANEL
-
Attach the 5 clips to install the lower center instrument panel finish panel.
-
INSTALL CONSOLE BOX CARPET
Install the console box carpet.
INSTALL UPPER REAR CONSOLE PANEL SUB-ASSEMBLY
Attach the 4 claws to install the upper rear console panel sub-assembly.
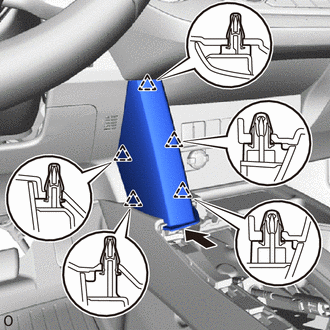
INSTALL INNER NO. 1 INSTRUMENT PANEL BRACKET COVER LH
Attach the guide and 2 clips to install the inner No. 1 instrument panel bracket cover LH.
INSTALL INNER NO. 1 INSTRUMENT PANEL BRACKET COVER RH
Attach the guide and 2 clips to install the inner No. 1 instrument panel bracket cover RH.
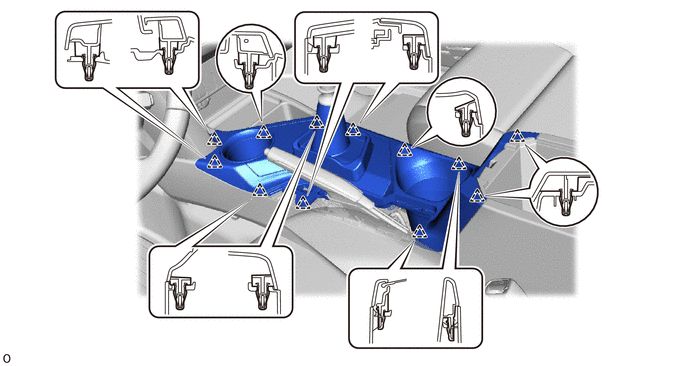
INSTALL UPPER CONSOLE PANEL SUB-ASSEMBLY (for Manual Transaxle)
Attach the 12 clips to install the upper console panel sub-assembly.
-
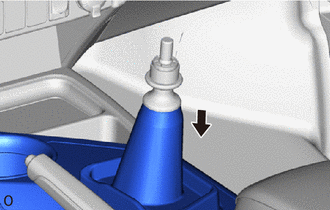
Lower the shift lever boot to connect it to the shift lever assembly.
INSTALL UPPER CONSOLE PANEL SUB-ASSEMBLY (except Manual Transaxle)
Connect the connector.
Attach the 12 clips to install the upper console panel sub-assembly.

INSTALL PARKING BRAKE HOLE COVER SUB-ASSEMBLY
-

Attach the 9 clips and claw to install the parking brake hole cover sub-assembly.
-
INSTALL SHIFT LEVER KNOB SUB-ASSEMBLY (for Manual Transaxle)
-
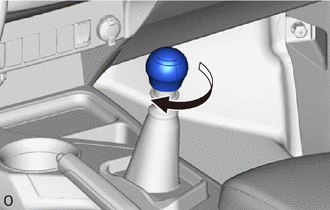
Twist the shift lever knob sub-assembly in the direction indicated by the arrow to install it.
-
INSTALL SHIFT LEVER KNOB SUB-ASSEMBLY (except Manual Transaxle)
-
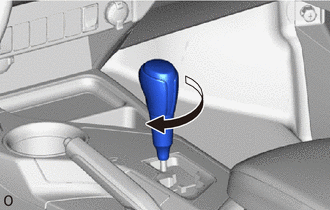
Twist the shift lever knob sub-assembly in the direction indicated by the arrow to install it.
-