EMISSION CONTROL SYSTEM ON-VEHICLE INSPECTION
PROCEDURE
-
CHECK PURGE VALVE
-
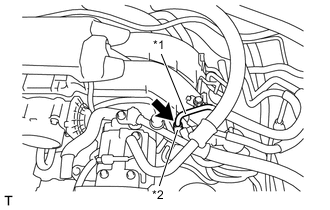
Text in Illustration *1 Fuel delivery pipe sub-assembly *2 No.2 fuel vapor feed hose Disconnect the No. 2 fuel vapor feed hose (on the canister side) of the fuel pipe.
-
Connect the GTS to the DLC3.
-
Start the engine.
-
Turn the GTS on.
-
Enter the following menus: Engine / Active Test / Activate the VSV for Evap Control.
-
When the purge valve is operated using the tester, check whether the port of the purge valve applies suction to your finger.
OK Tester Operation Specified Condition Check valve: OFF Purge valve has no suction Check valve: ON Purge valve has suction If the result is not as specified, check the valve Click here, wire harness and ECM.
-
Connect the No. 2 fuel vapor feed hose (on the canister side) of the purge valve.
-
-
INSPECT FUEL CUT-OFF RPM
-
Start and warm up the engine.
-
Use a sound scope to check for injector operation noise.
-
Increase the engine speed to at least 3000 rpm.
-
Check that when the accelerator pedal is released, the injector operation noise stops momentarily and then resumes.
Standard Item Specified Condition Fuel cut off rpm 2500 rpm or more Fuel injection restart rpm 1400 rpm If the result is not as specified, check the injector Click here, wire harness and ECM.
-
-
VISUALLY INSPECT HOSES, CONNECTIONS AND GASKETS EMISSION HOSE
-
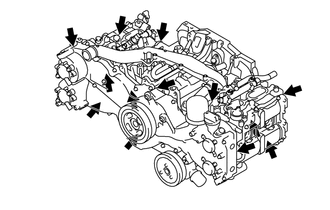
Check that there are no cracks, leaks or damage.
Note
-
Detachment or other problems with the engine oil dipstick, filler cap, ventilation hose and other components may cause the engine to run improperly.
-
Air suction caused by disconnections, looseness or cracks in the parts of the air induction system between the throttle body and cylinder head will cause engine failure or engine malfunctions.
If the result is not as specified, replace parts as necessary.
-
-
-
CHECK HOSES AND CONNECTORS
-
Visually check for loose connections, sharp bends or damage.
-