REAR SIDE WINDOW GLASS REMOVAL
-
REMOVE BACK DOOR SCUFF PLATE
-
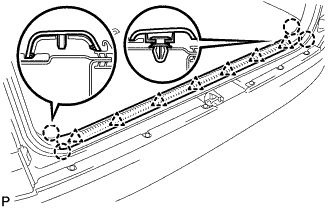
Detach the 7 clips and 4 claws and remove the back door scuff plate.
-
-
REMOVE BACK DOOR WEATHERSTRIP
-
DISCONNECT FRONT SEAT OUTER BELT ASSEMBLY LH
-
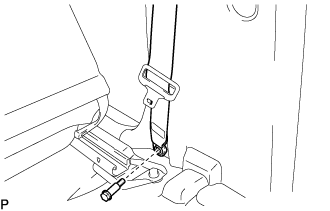
Remove the bolt and disconnect front seat outer belt assembly RH.
-
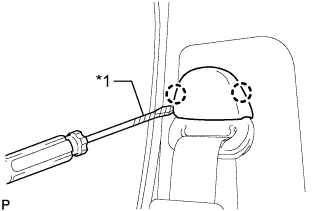
Text in Illustration *1 Protective Tape Using a screwdriver, detach the 2 claws and open the cover.
Tech Tips
Tape the screwdriver tip before use.
-

Remove the bolt and disconnect front seat outer belt assembly RH.
-
-
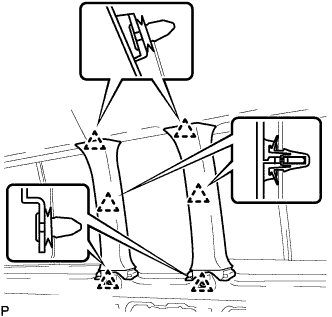
REMOVE QUARTER TRIM PANEL ASSEMBLY REAR LH
-
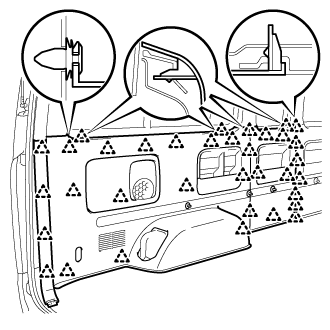
Detach the 35 clips and remove the quarter trim panel assembly rear LH.
-
-
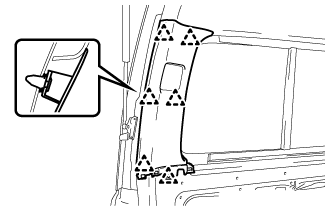
REMOVE QUARTER PILLAR GARNISH LH
-
Detach the 6 clips and remove the quarter pillar garnish LH.
-
-
REMOVE ROOF SIDE GARNISH INNER UPPER LH
-
Using a screwdriver, detach the 6 clips and remove the roof side garnish inner upper LH.
Tech Tips
Tape the screwdriver tip before use.
-
-
REMOVE REAR SIDE WINDOW GLASS
-

Apply protective tape to the outer surface of the vehicle body to prevent scratches.
-
From the interior, insert piano wires between the vehicle body and back door glass as shown in the illustration.
-
Tie objects that can serve as handles (for example, wooden blocks) to all wire ends.
Note
When separating the back door glass from the vehicle, be careful not to damage the vehicles paint or interior/exterior ornaments.
-
Cut through the adhesive by pulling the piano wire around the back door glass.
-
Using a suction cup, remove the back door glass.
Note
Leave as much adhesive on the vehicle body as possible when removing the back door glass.
-