HEADLIGHT ASSEMBLY INSTALLATION

CAUTION / NOTICE / HINT
Tech Tips
-
Use the same procedure for the RH and LH sides.
-
The procedure described below is for the LH side.
PROCEDURE
-
INSTALL HEADLIGHT ASSEMBLY LH
-
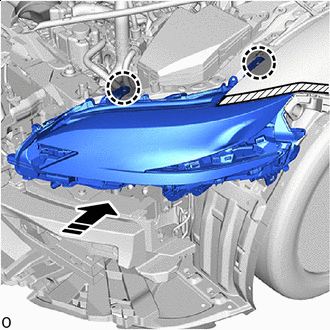

Set to the Vehicle 
Place Hands Here Set the headlight assembly LH to the vehicle.
-
Place your hand on 2 brackets of the headlight assembly LH to set them on the screw seats.
Note
Be careful not to break the bracket.
-
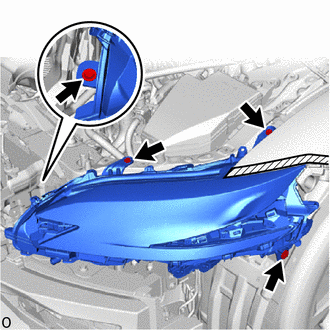
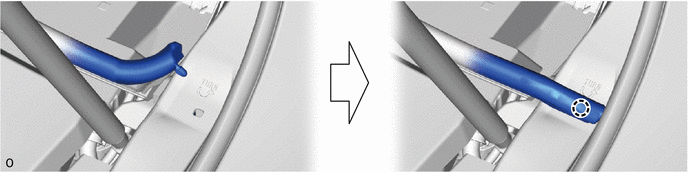
Install the 3 screws and 2 bolts.
- Torque:
- for Bolt
- 7.5 N*m { 76 kgf*cm, 66 in.*lbf }
-
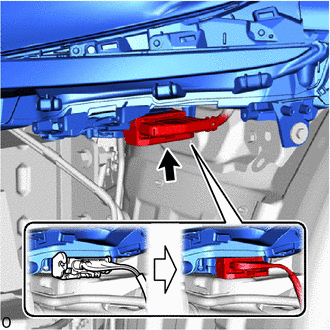
Connect the connector and lock the connector lock lever.
-
-
INSTALL FRONT FENDER REINFORCEMENT SUB-ASSEMBLY TOP LH
-

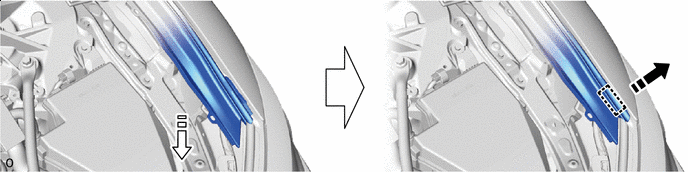
*a Headlight Assembly LH Clip Installation Area Set the front fender reinforcement sub-assembly top LH and attach the clip.
Note
When attaching the headlight assembly LH to the clips, do not damage the clip installation area.
-
Lower the rear end of the front fender reinforcement sub-assembly top LH and attach the hook toward the outside of the vehicle.
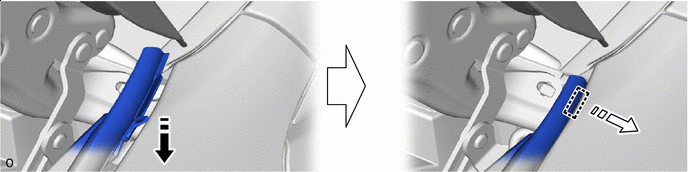
Lower 
Attach the hook -
Attach the claw of the hood to cowl top seal.
-
Lower the end of the front fender reinforcement sub-assembly top LH and attach the hook toward the outside of the vehicle.
Lower Attach the hook
-
-
INSTALL FRONT BUMPER ASSEMBLY
except Sports Package:
for Sports Package:
-
PERFORM REGISTRATION (When Replacing The Headlight Assembly LH or Headlight ECU Sub-assembly LH)
Note
-
If any of the work in the table below has been performed, vehicle information registration of the headlight ECU sub-assembly LH is necessary.
Performed Work or System Condition Necessary Procedures Replacement of the headlight ECU sub-assembly LH Vehicle information registration for the headlight ECU sub-assembly LH Replacement of the headlight assembly LH -
If the steering sensor zero point calibration is not performed, the cornering lights may not operate correctly.
-
A new headlight ECU sub-assembly LH cannot operate until the vehicle information is synchronized.
-
After replacing the headlight ECU sub-assembly LH, it is necessary to synchronize the vehicle information and performing initialization.
-
Even if the headlight ECU sub-assembly RH is replaced with a new one, synchronizing the vehicle information and performing initialization are not necessary.
-
Adjust the headlight aim after initializing the headlight ECU sub-assembly LH.
-
When a malfunction is detected in the automatic headlight beam level control system, rear height control sensor sub-assembly LH signal initialization is impossible. Perform troubleshooting before initialization.
-
-
PERFORM SYSTEM CALIBRATION
-
ADJUST HEADLIGHT AIMING