РАДИАТОР СНЯТИЕ

-
DISCHARGE REFRIGERANT FROM REFRIGERATION SYSTEM
-
Запустите двигатель.
-
Установите выключатель системы кондиционирования в положение ON (ВКЛ).
-
С помощью компрессора прокачайте хладагент по системе кондиционирования при частоте вращения коленчатого вала двигателя приблизительно 1000 об/мин в течение 5-6 минут и соберите в компрессор системы кондиционирования, по возможности, все компрессорное масло, оставшееся в компонентах.
-
Выключите двигатель.
-
С помощью SST выпустите газообразный хладагент.
- SST
- 07110-58060 ( 07117-58080, 07117-58090, 07117-78050, 07117-88060, 07117-88070, 07117-88080 )
-
-
DRAIN ENGINE COOLANT
CAUTION:
Не снимайте пробку радиатора, пока двигатель и радиатор не остынут. Выброс горячей охлаждающей жидкости и пара под давлением может стать причиной серьезных ожогов.
-
Подсоедините шланг с внутренним диаметром 9 мм (0,354 дюйма) к сливному крану радиатора.
-
Ослабьте пробку сливного крана радиатора.
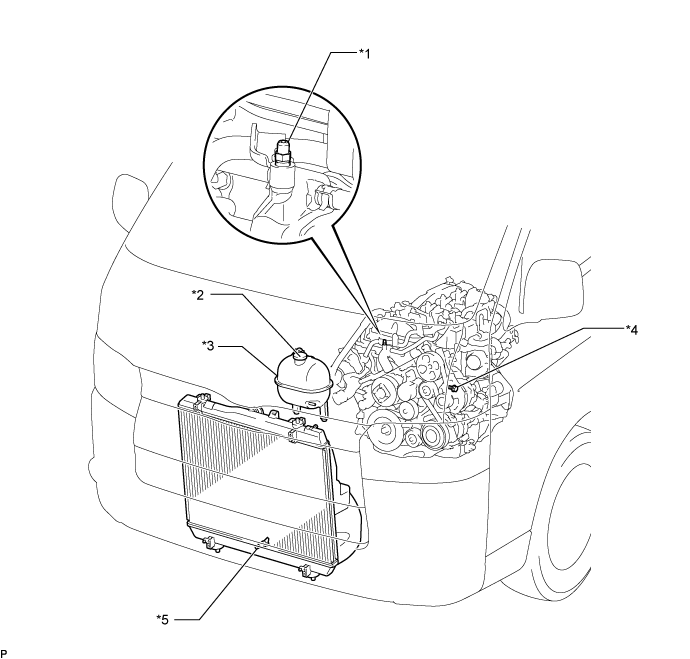
Обозначения на рисунке *1 Прокачной штуцер *2 Пробка радиатора *3 Расширительный бачок системы охлаждения в сборе *4 Пробка сливного крана блока цилиндров *5 Пробка сливного крана радиатора - - -
Снимите пробку радиатора.
-
Ослабьте пробку сливного крана блока цилиндров и слейте охлаждающую жидкость двигателя.
-
Затяните пробку сливного крана радиатора.
-
Затяните пробку сливного крана блока цилиндров.
- Torque:
- 13 Н*м { 130 кгс*см, 9 фунт-сила-футов }
-
Отсоедините шланг от сливного крана радиатора.
-
-
REMOVE FRONT BUMPER REINFORCEMENT
-
REMOVE HOOD LOCK SUPPORT BRACE SUB-ASSEMBLY
-
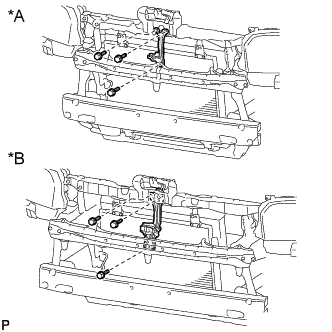
Обозначения на рисунке *A Для моделей со стандартным кузовом *B Для моделей с широким кузовом Выверните 3 болта и снимите кронштейн замка капота в сборе.
-
-
REMOVE W/RECEIVER CONDENSER ASSEMBLY
-
REMOVE NO. 1 AIR INLET DUCT
-
Detach the 5 clips and remove the 2 bolts, No. 1 air inlet duct and No. 2 air inlet duct.
-
-
REMOVE RADIATOR RESERVE TANK ASSEMBLY
-

Slide the clamp and disconnect the water by-pass hose from the radiator reserve tank assembly.
-
Slide the clamp and disconnect the No. 2 water by-pass hose from the radiator reserve tank assembly.
-
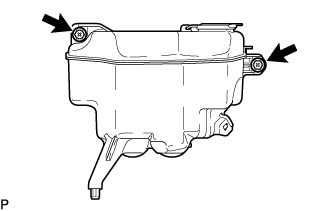
Remove the bolt and radiator reserve tank assembly.
-
-
REMOVE WINDSHIELD WASHER MOTOR AND PUMP ASSEMBLY
-
Remove the 2 bolts and windshield washer motor and pump assembly.
-
Detach the hose clamp.
-
Disconnect the 2 connectors and 2 washer hoses.
-
-
DISCONNECT UREA TANK FILLER PIPE ASSEMBLY
-
Disconnect the 2 bolts and urea tank filler pipe assembly from the upper radiator support sub-assembly.
-
-
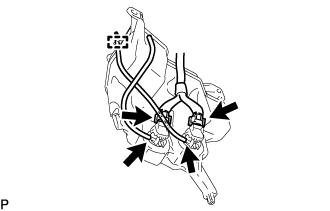
REMOVE HOOD LOCK ASSEMBLY
-
Remove the 3 bolts and disconnect the hood lock assembly.
-
Remove the hood lock assembly from the hood lock control cable assembly.
-
-
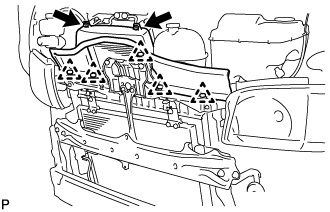
REMOVE UPPER RADIATOR SUPPORT SUB-ASSEMBLY
-
Slide the hose clamp and disconnect the water by-pass hose from the radiator assembly.
-
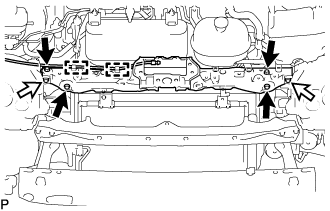
Detach the 2 clamps to disconnect the hood lock control cable assembly from the upper radiator support sub-assembly.
-
Remove the 4 bolts, 2 screws and upper radiator support sub-assembly.
Text in Illustration 
Bolt 
Screw
-
-
REMOVE INTERCOOLER ASSEMBLY
-
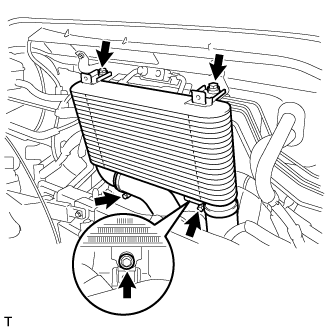
Ослабьте шланговый хомут и отсоедините воздушный шланг № 2.
-
Ослабьте шланговый хомут и отсоедините воздушный шланг № 3.
-
Выверните 3 болта и снимите промежуточный охладитель воздуха.
-
-
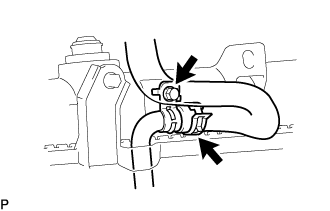
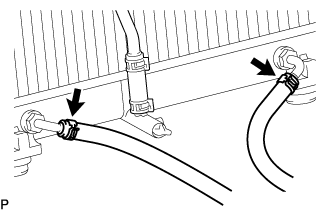
DISCONNECT OIL COOLER HOSE
-

Detach the 2 clamps and disconnect the oil cooler hose from the fan shroud.
-
Slide the 2 clamps and disconnect the 2 oil cooler hoses from the 2 oil cooler tubes.
-
-
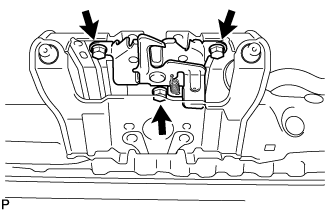
REMOVE FAN BRACKET SUB-ASSEMBLY
-
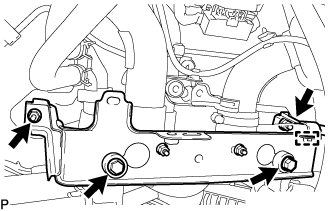
Detach the clamp and remove the 2 bolts, 2 nuts and fan bracket sub-assembly.
-
-
REMOVE FAN SHROUD
-
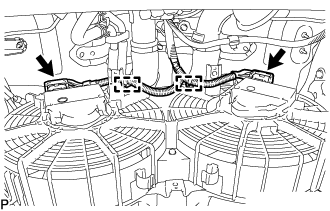
Detach the 2 clamps and disconnect the 2 connectors.
-
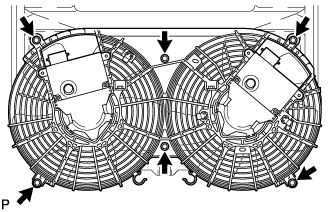
Remove the 6 bolts and fan shroud from the underside of the vehicle.
-
-
REMOVE NO. 2 FAN SHROUD
-
Slide the hose clamp and disconnect the No. 2 water by-pass hose from the water by-pass pipe sub-assembly.
-
Remove the bolt to disconnect the water by-pass pipe sub-assembly from the radiator assembly.
-
Remove the 2 bolts from the upper side of the vehicle, and then remove the No. 2 fan shroud from the underside of the vehicle.
Note
Do not damage the radiator assembly when removing the No. 2 fan shroud.
-
-
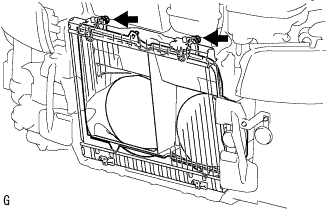
REMOVE RADIATOR ASSEMBLY
-
Slide the 2 clamps and disconnect the No. 2 radiator hose and No. 3 radiator hose from the radiator assembly.
-
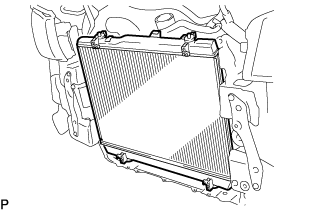
Remove the radiator assembly from the vehicle.
-
Remove the 4 grommets from the radiator assembly.
-
-
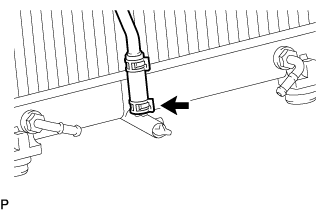
REMOVE OIL COOLER HOSE
-
Slide the 2 clamps and disconnect the 2 oil cooler hoses from the radiator assembly.
-
-
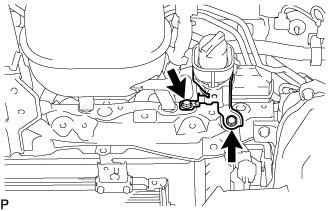
REMOVE WATER BY-PASS PIPE SUB-ASSEMBLY
-
Slide the clamp and remove the water by-pass pipe sub-assembly from the radiator assembly.
-