REAR COMBINATION LIGHT ASSEMBLY DISASSEMBLY

PROCEDURE
-
PRECAUTION
Note
-
Be sure to read Precaution thoroughly before servicing.
-
Handle components indoors as much as possible to prevent foreign matter from entering and adhering to rear combination light assembly components.
-
Do not reuse parts which have reduced fastening ability due to thread damage.
-
Do not touch the inner surface of the lens and metallic surfaces as much as possible, or they may become dirty
-
Do not allow metallic surfaces to become dirty, as such surfaces become damaged even if they are only lightly wiped with a soft cloth.
-
When installing components, make sure that the wire harness is not pinched or pulled.
-
Do not use solvent to clean components. Only clean them with a dry cloth.
Tech Tips
-
Use the same procedure for the RH and LH sides.
-
The procedure listed below is for the LH side.
-
-
REMOVE REAR COMBINATION LIGHT RETAINER LH
-
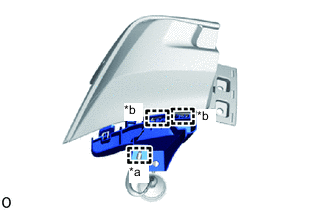
*a Wire Harness Clamp *b Guide Detach the wire harness clamp.
-
Detach the 2 guides and remove the rear combination light retainer LH.
-
-
REMOVE REAR COMBINATION LIGHT SOCKET AND WIRE SUB-ASSEMBLY LH
Note
-
Prevention of static electricity is required during this procedure.
-
Use static electricity countermeasures SST (desktop antistatic mat set) and observe all precautions to prevent damage to the system by electrostatic discharge (ESD).
-
Perform work using clean rubber gloves.
-
Do not touch the rear combination light socket and wire sub-assembly LH connector with bare hands.
- SST
- 09890-47010 ( 09891-04010, 09891-04020, 09891-04030, 09891-04040 )
-
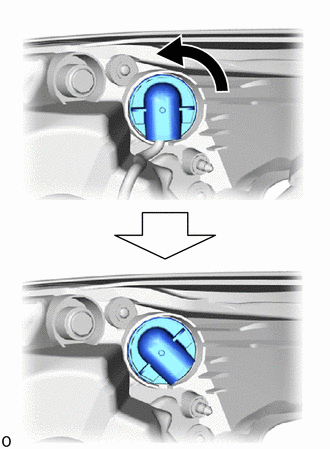
Turn the connector cap counterclockwise until it stops to disconnect the connector cap.
-
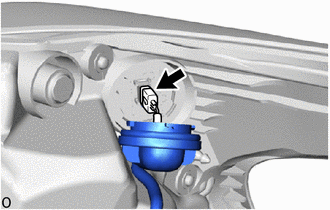
Disconnect the connector.
-
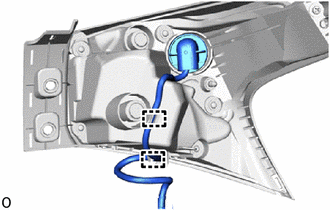
Detach the 2 wire harness clamps and remove the rear combination light socket and wire sub-assembly LH.
-