YAW RATE AND DECELERATION SENSOR (w/ VSC) INSTALLATION
-
INSTALL YAW RATE SENSOR ASSEMBLY
-
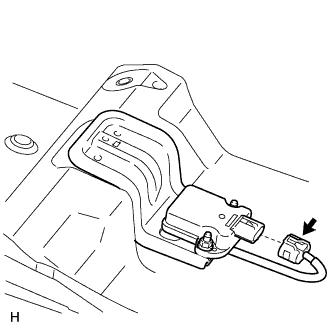
Connect the connector.
Note
Securely connect the connector.
-
Set the yaw rate sensor to the crossmember.
Note
-
Do not use any parts which have been dropped or struck.
-
Make sure that there is no foreign matter or carpet between the bracket of the sensor and crossmember.
-
Do not do anything to deform the bracket of the sensor, such as kicking or stepping on it.
-
-
-
INSTALL SENSOR BRACKET
-
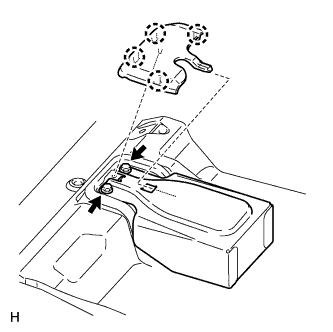
Install the sensor bracket with the 2 bolts.
- Torque:
- 14 N*m { 138 kgf*cm, 10 ft.*lbf }
-
-
INSTALL FLOOR CARPET COVER
-
Insert the floor carpet cover into the sensor bracket.
-
Insert the positioning boss of the floor carpet cover into the hole in the bracket of the sensor.
-
Attach the 4 claws to install the floor carpet cover.
-
-
INSTALL FRONT SEAT ASSEMBLY RH
-
for Separate Seat:
Install the front seat assembly RH Click here.
-
w/ Front Seat Side Airbag:
Install the front seat assembly RH Click here.
-
for Bench Seat:
Install the front seat assembly RH Click here.
-
for Power Seat:
Install the front seat assembly RH Click here.
-
-
CONNECT CABLE TO NEGATIVE BATTERY TERMINAL
Note
When disconnecting the cable, some systems need to be initialized after the cable is reconnected Click here.
-
PERFORM YAW RATE SENSOR ZERO POINT CALIBRATION
-
Perform the yaw rate sensor zero point calibration Click here.
-
-
CHECK YAW RATE SENSOR SIGNAL
-
Check the yaw rate sensor signal Click here.
-