STEERING PAD INSTALLATION
Tech Tips
-
Use the same procedure for RHD and LHD vehicles.
-
The procedure listed below is for LHD vehicles.
-
INSTALL STEERING PAD ASSEMBLY
-
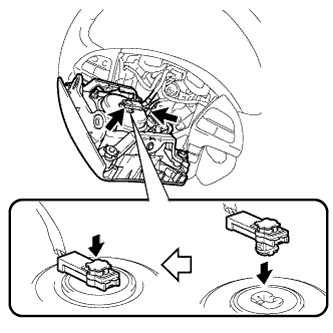
Support the steering pad with one hand.
-
Connect the connector to the steering pad.
Note
When handling the airbag connector, take care not to damage the airbag wire harness.
-
Connect the horn connector.
-
Confirm that the groove along the circumference of the "TORX" screw is attached to the screw case and place the steering pad onto the steering wheel.
-
Using a T30 "TORX" socket wrench, tighten the 2 screws.
- Torque:
- 8.8 N*m { 90 kgf*cm, 78 in.*lbf }
-
-
INSTALL LOWER NO. 3 STEERING WHEEL COVER
-
Attach the 2 claws to install the lower No. 3 steering wheel cover.
-
-
INSTALL LOWER NO. 2 STEERING WHEEL COVER
-
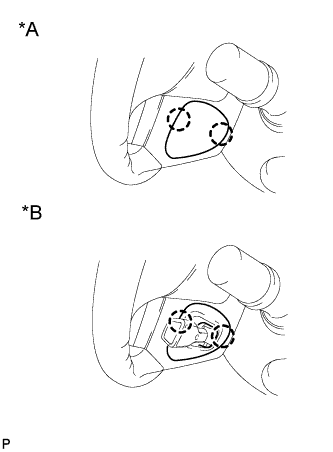
Text in Illustration *A w/o Cruise Control System *B w/ Cruise Control System Attach the 2 claws to install the lower No. 2 steering wheel cover.
-
-
CONNECT CABLE TO NEGATIVE BATTERY TERMINAL
Note
When disconnecting the cable, some systems need to be initialized after the cable is reconnected Click here.
-
INSPECT STEERING PAD ASSEMBLY
-
With the steering pad installed on the vehicle, perform a visual check. If there are any defects as mentioned below, replace the steering pad with a new one:
Cuts, minute cracks or marked discoloration on the steering pad top surface or in the grooved portion.
-
Make sure that the horn sounds.
If the horn does not sound, inspect the horn system.
-
-
INSPECT SRS WARNING LIGHT
-
Check the SRS warning light Click here.
-